
VPS 転送 — どこからでもプロキシを使用
VPS Forwarding lets you expose your XProxy proxies to the internet through a cloud server's public IP — even if your home router doesn't support port forwarding or your upload speed is limited.
Ways to expose XProxy remotely
- Router Port Forwarding — simplest, but requires a router that supports it and a fast upload connection.
- Tailscale VPN — easy mesh VPN, good for personal use.
- VPS Forwarding — most reliable and professional. This guide covers this method.
Why use VPS Forwarding?
A VPS acts as an intermediary: Customer → VPS public IP → XProxy server → mobile network.
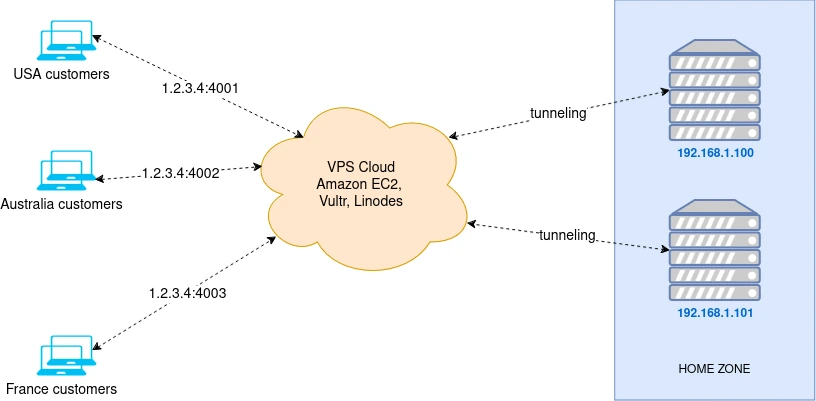
- Your router doesn't support port forwarding.
- Your home upload speed is below 50 Mbps.
- You want to hide your home IP address.
- You need a static public IP without DDNS.
- You need full UDP support for SOCKS5 proxies (gaming, QUIC, HTTP/3).
事前準備
- A VPS running Ubuntu (Amazon EC2, Vultr, Linode, or OVH).
- Recommended: OVH VPS — unlimited bandwidth, 500 Mbps / 1 Gbps.
- Choose a VPS close to your physical location for lower latency.
Security settings before you start
In the XProxy dashboard, enable all of these before proceeding to protect your proxy endpoints and dashboard from unauthorized access:
Dashboard User Authentication
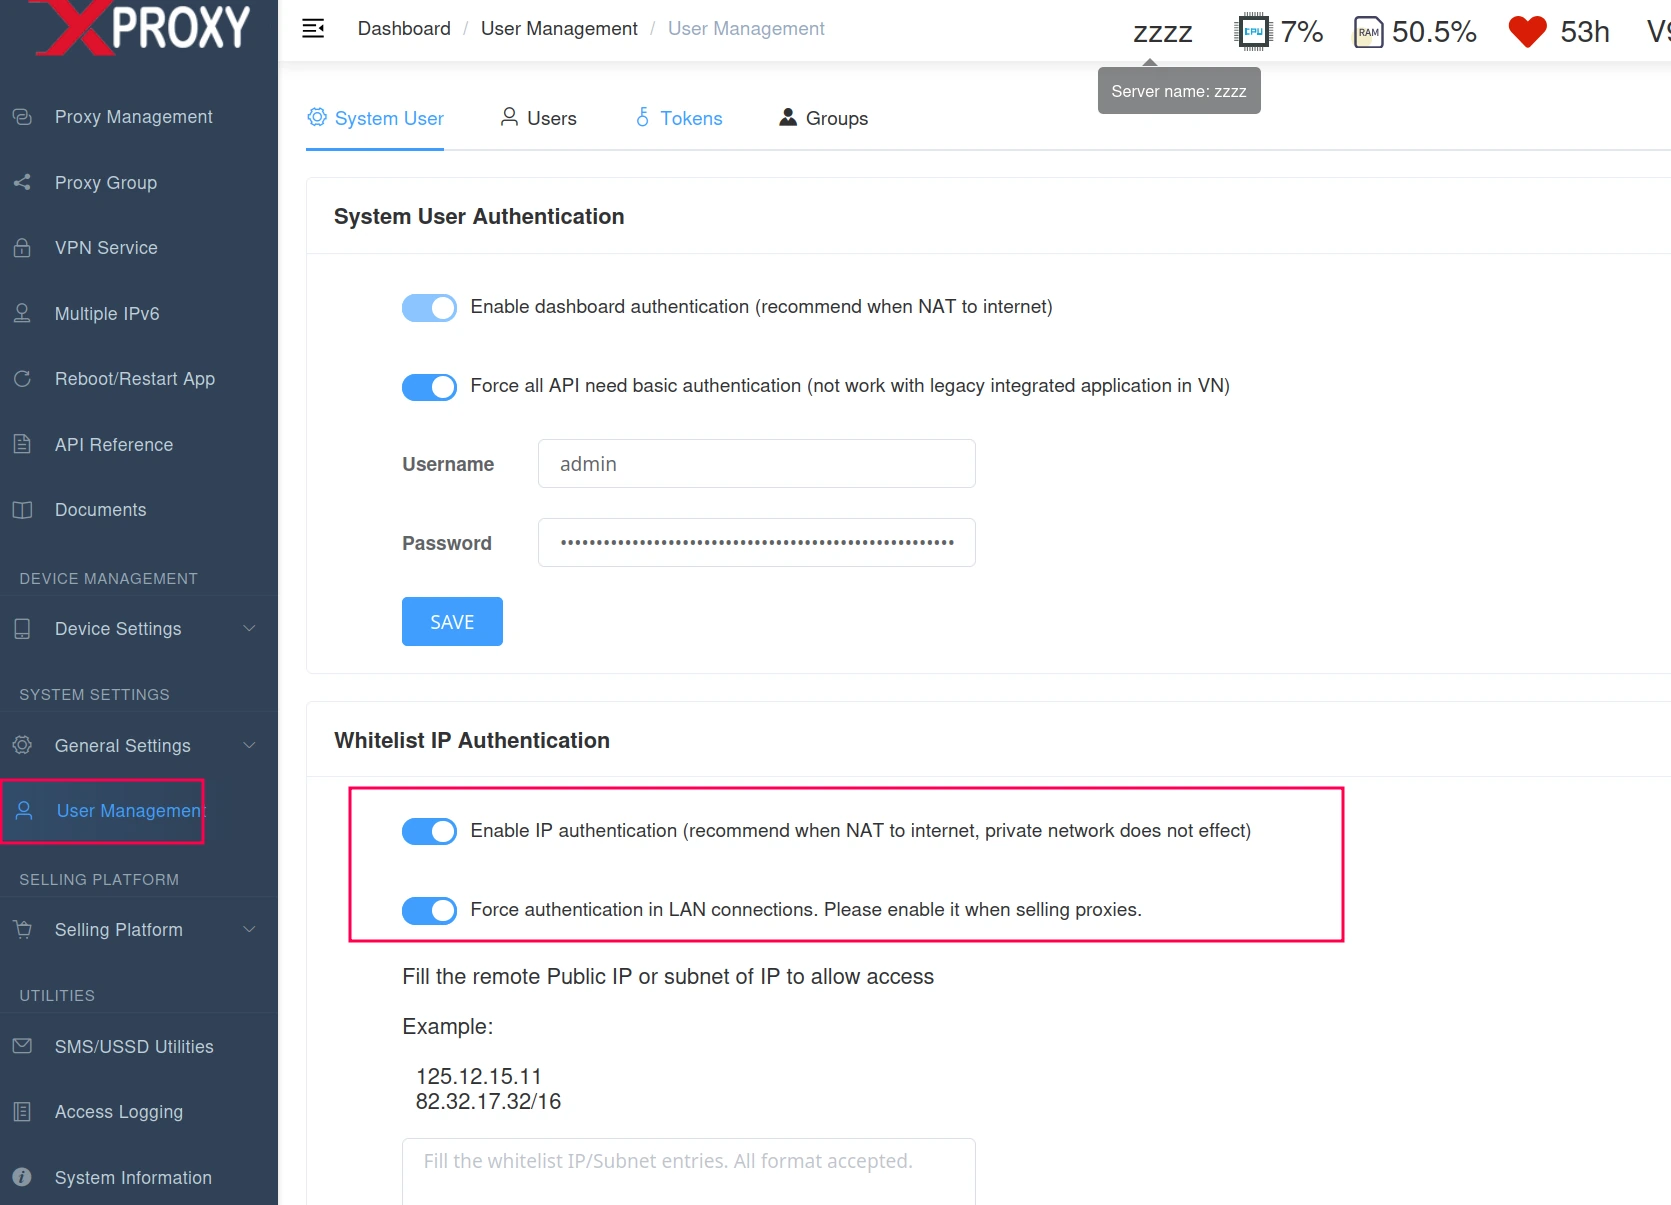
Enable User Authentication under General Settings in your dashboard - Enable dashboard authentication: Activates login protection for the management dashboard.
- Force authentication in LAN connections: Requires authentication even for devices on the same local network, preventing unauthorized internal access.
Proxy Authentication Settings
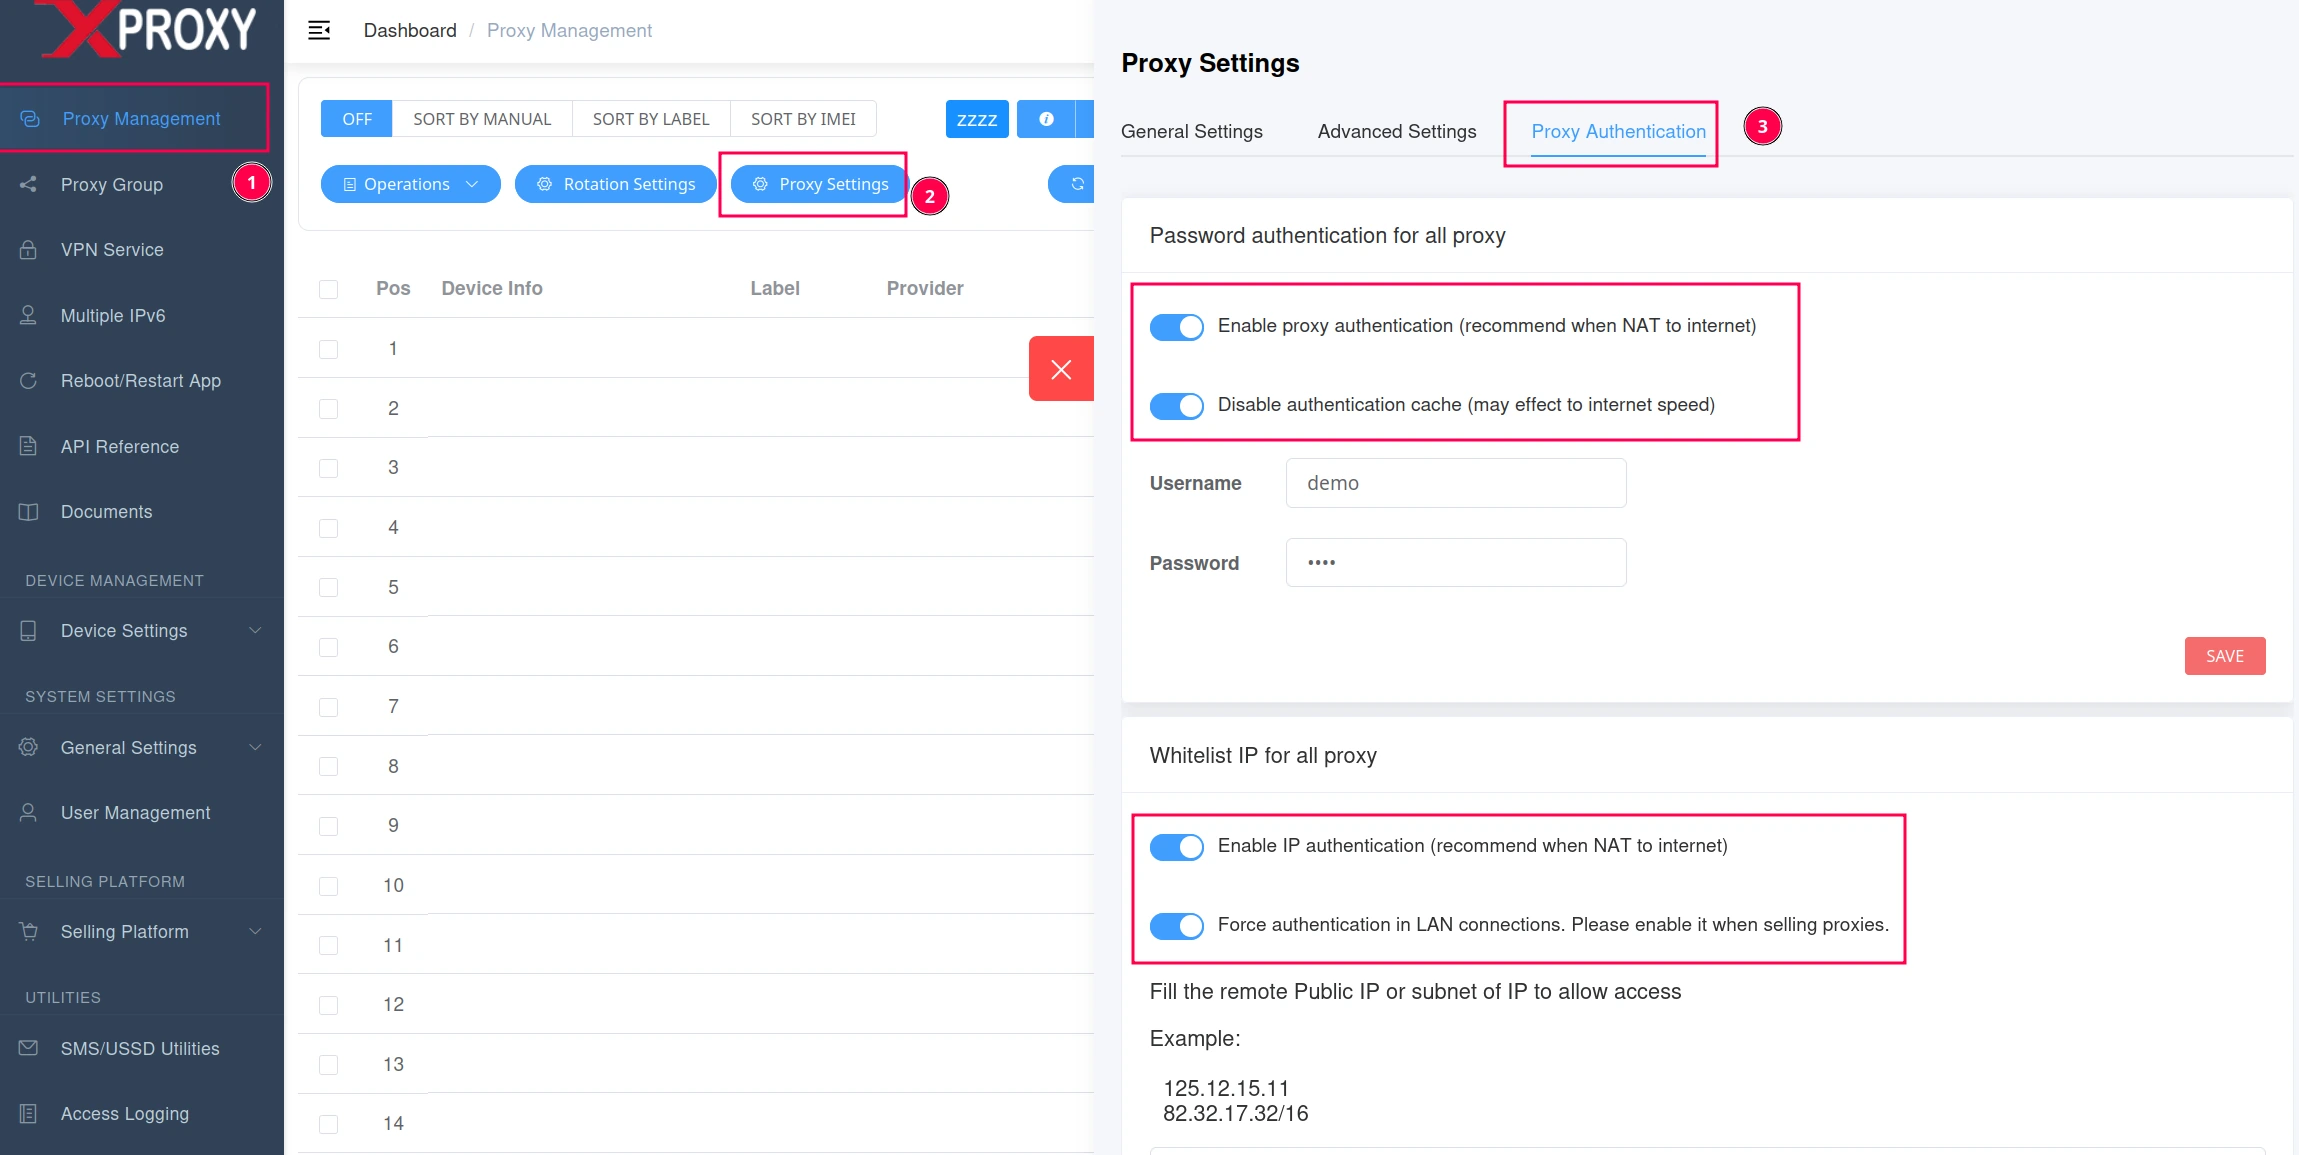
Enable proxy authentication, password auth, and LAN authentication - Enable proxy authentication: Requires username/password for all proxy connections.
- Force authentication in LAN connections: Ensures LAN users must authenticate, preventing unauthorized internal usage.
ステップ 1
SSH into your VPS as root and update the system:
sudo apt update && sudo apt upgrade -yステップ 2
Ensure ports 80 to 65550 are open. To disable the firewall temporarily:
systemctl disable ufw && systemctl stop ufwステップ 3
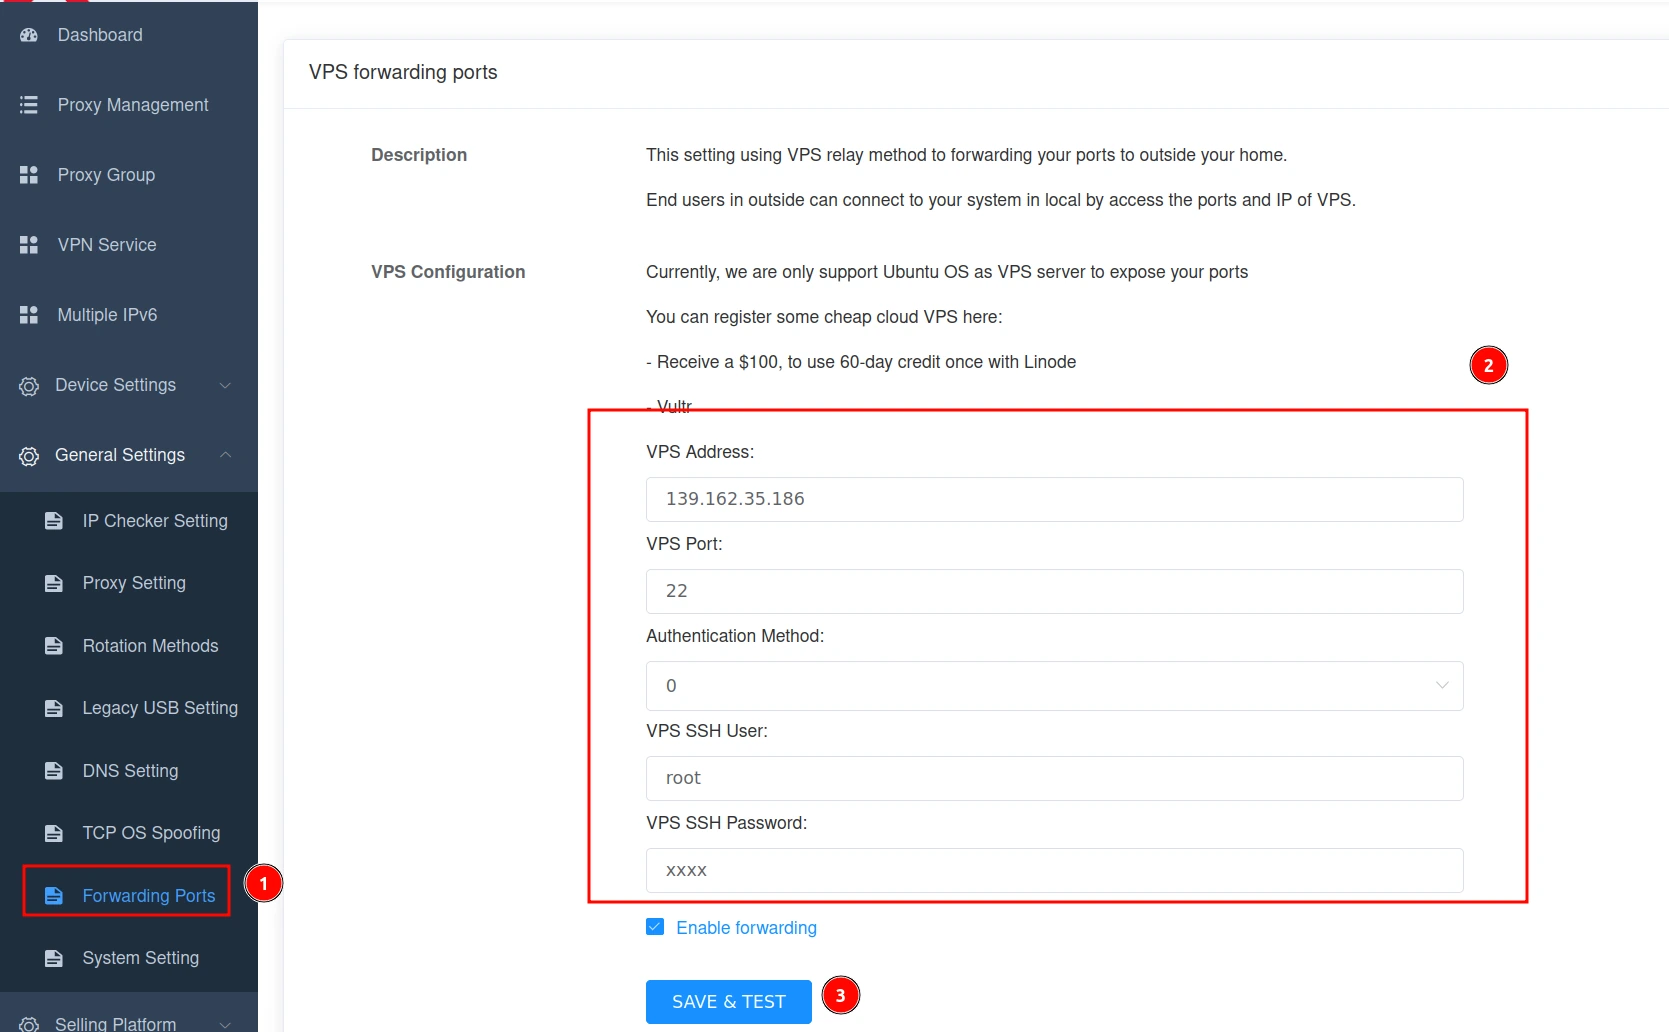
XProxy ダッシュボードを開きます → General Settings → Forwarding Ports. Enter your VPS IP, SSH port (22), username (root), and password. Click Save & Test.
ステップ 4
- Network Isolation (SIM Upload) — routes each SIM's traffic through its own mobile network. Enable when SIM upload speed is faster than your WAN.
- Enable UDP for SOCKS5 — required for gaming, VoIP, QUIC, HTTP/3. Each UDP SOCKS5 connection uses ~40 MB of RAM on the VPS.
- Starting Relay Port — base port for forwarding (default: auto). For multiple services on the same VPS, set a unique starting port (e.g. 65011) and increment by 10 per service.
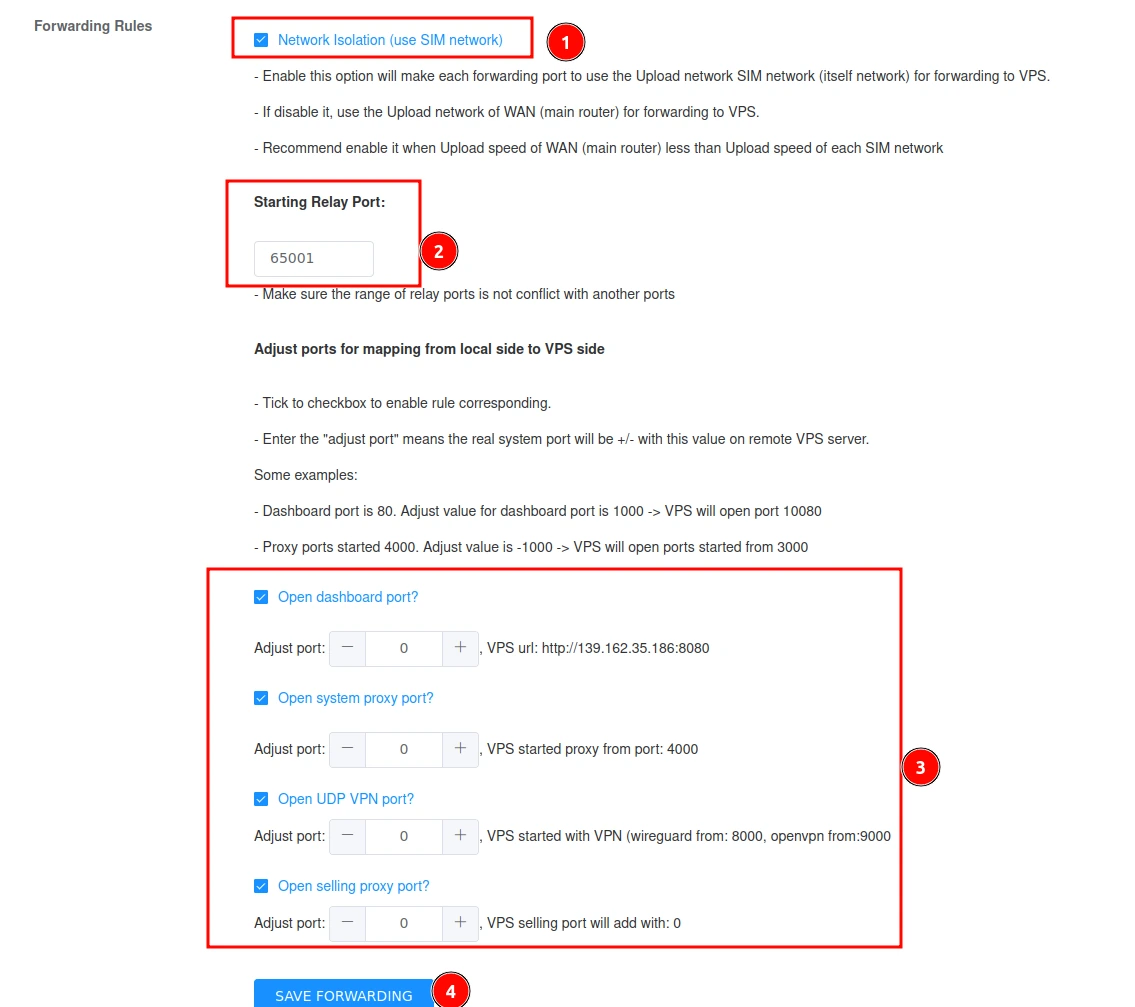
Configure and manage ports for multiple forwarding services
ポートの調整と管理
適切なポート管理はスムーズな運用に不可欠です。XProxy では、ネットワークの効率を最適化するためにポートを調整・管理できます:
- Starting Relay Port — 転送の開始ポート番号を設定します。単一の VPS で複数のサービスを実行する場合、競合を防ぐために開始ポートを増分します。例: 開始ポートが 65011 の場合、次のサービスは自動的に 65021 を使用します。
- Port Range — 異なるサービスに特定の範囲を割り当て、重複がないことを確認します。同じ VPS で複数のプロキシや VPN サービスを実行する場合に便利です。
- Forwarding Services — 各サービス(プロキシまたは VPN)は、チェックボックスで個別に転送の有効/無効を切り替えられます。
- Port Conflicts — 2 つのサービスが同じポートを使用すると競合が発生します。常にサービスごとに一意のポートを割り当て、10(または別の固定ステップ)ずつ増分して重複を避けてください。
例: 開始ポート 65011 → 次のサービス 65021 → 次 65031。このシステムにより、干渉なく複数のサービスにポートを効率的に割り当てられます。
Monitoring & troubleshooting
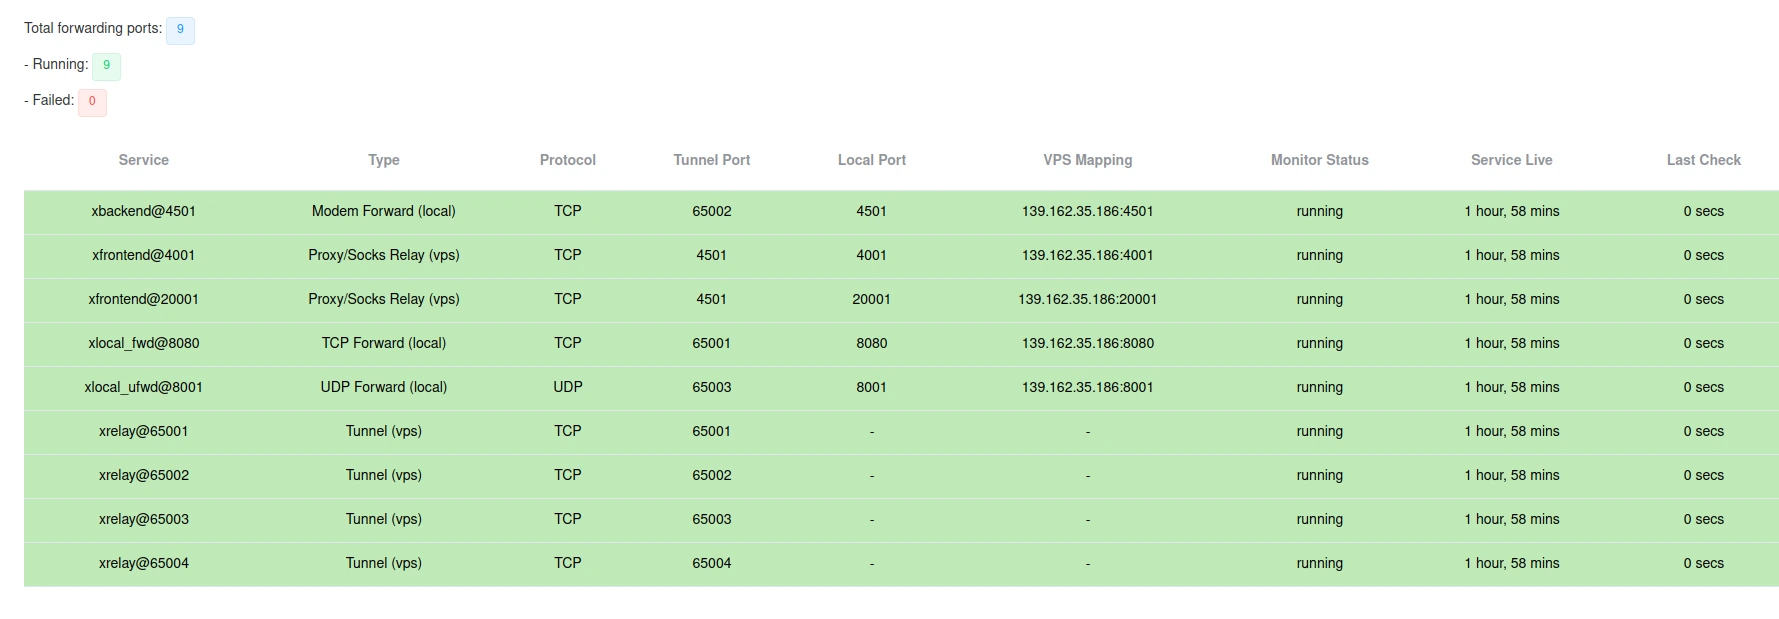
All active forwarding ports will appear in green. If there's an issue, the port will be marked red, making it easy to identify and troubleshoot problems.
- If UDP traffic is heavy, upgrade your VPS RAM.
- Always choose a VPS close to your physical location for best performance.
最終的なヒント
- 最良の結果を得るため、常に物理的な場所に近い高性能 VPS を選択してください。
- ポートが適切に開放され、ファイアウォール設定が調整されていることを確認してください。
- UDP トラフィックが多い場合は、VPS の RAM アップグレードを検討してください。
- 潜在的な問題に備えて、ポートの状態を定期的に監視してください。
