Dynamic DNS (DDNS)
Dynamic DNS (DDNS) lets you use a stable domain name (like myproxy.example.com) to access your XProxy dashboard and proxies — even when your public IP changes.
Why use DDNS with XProxy?
- One stable domain for your dashboard and all proxy endpoints.
- No need to remember or update IPs when your ISP changes them.
- XProxy automatically keeps the domain pointing to your current public IP.
Quick start
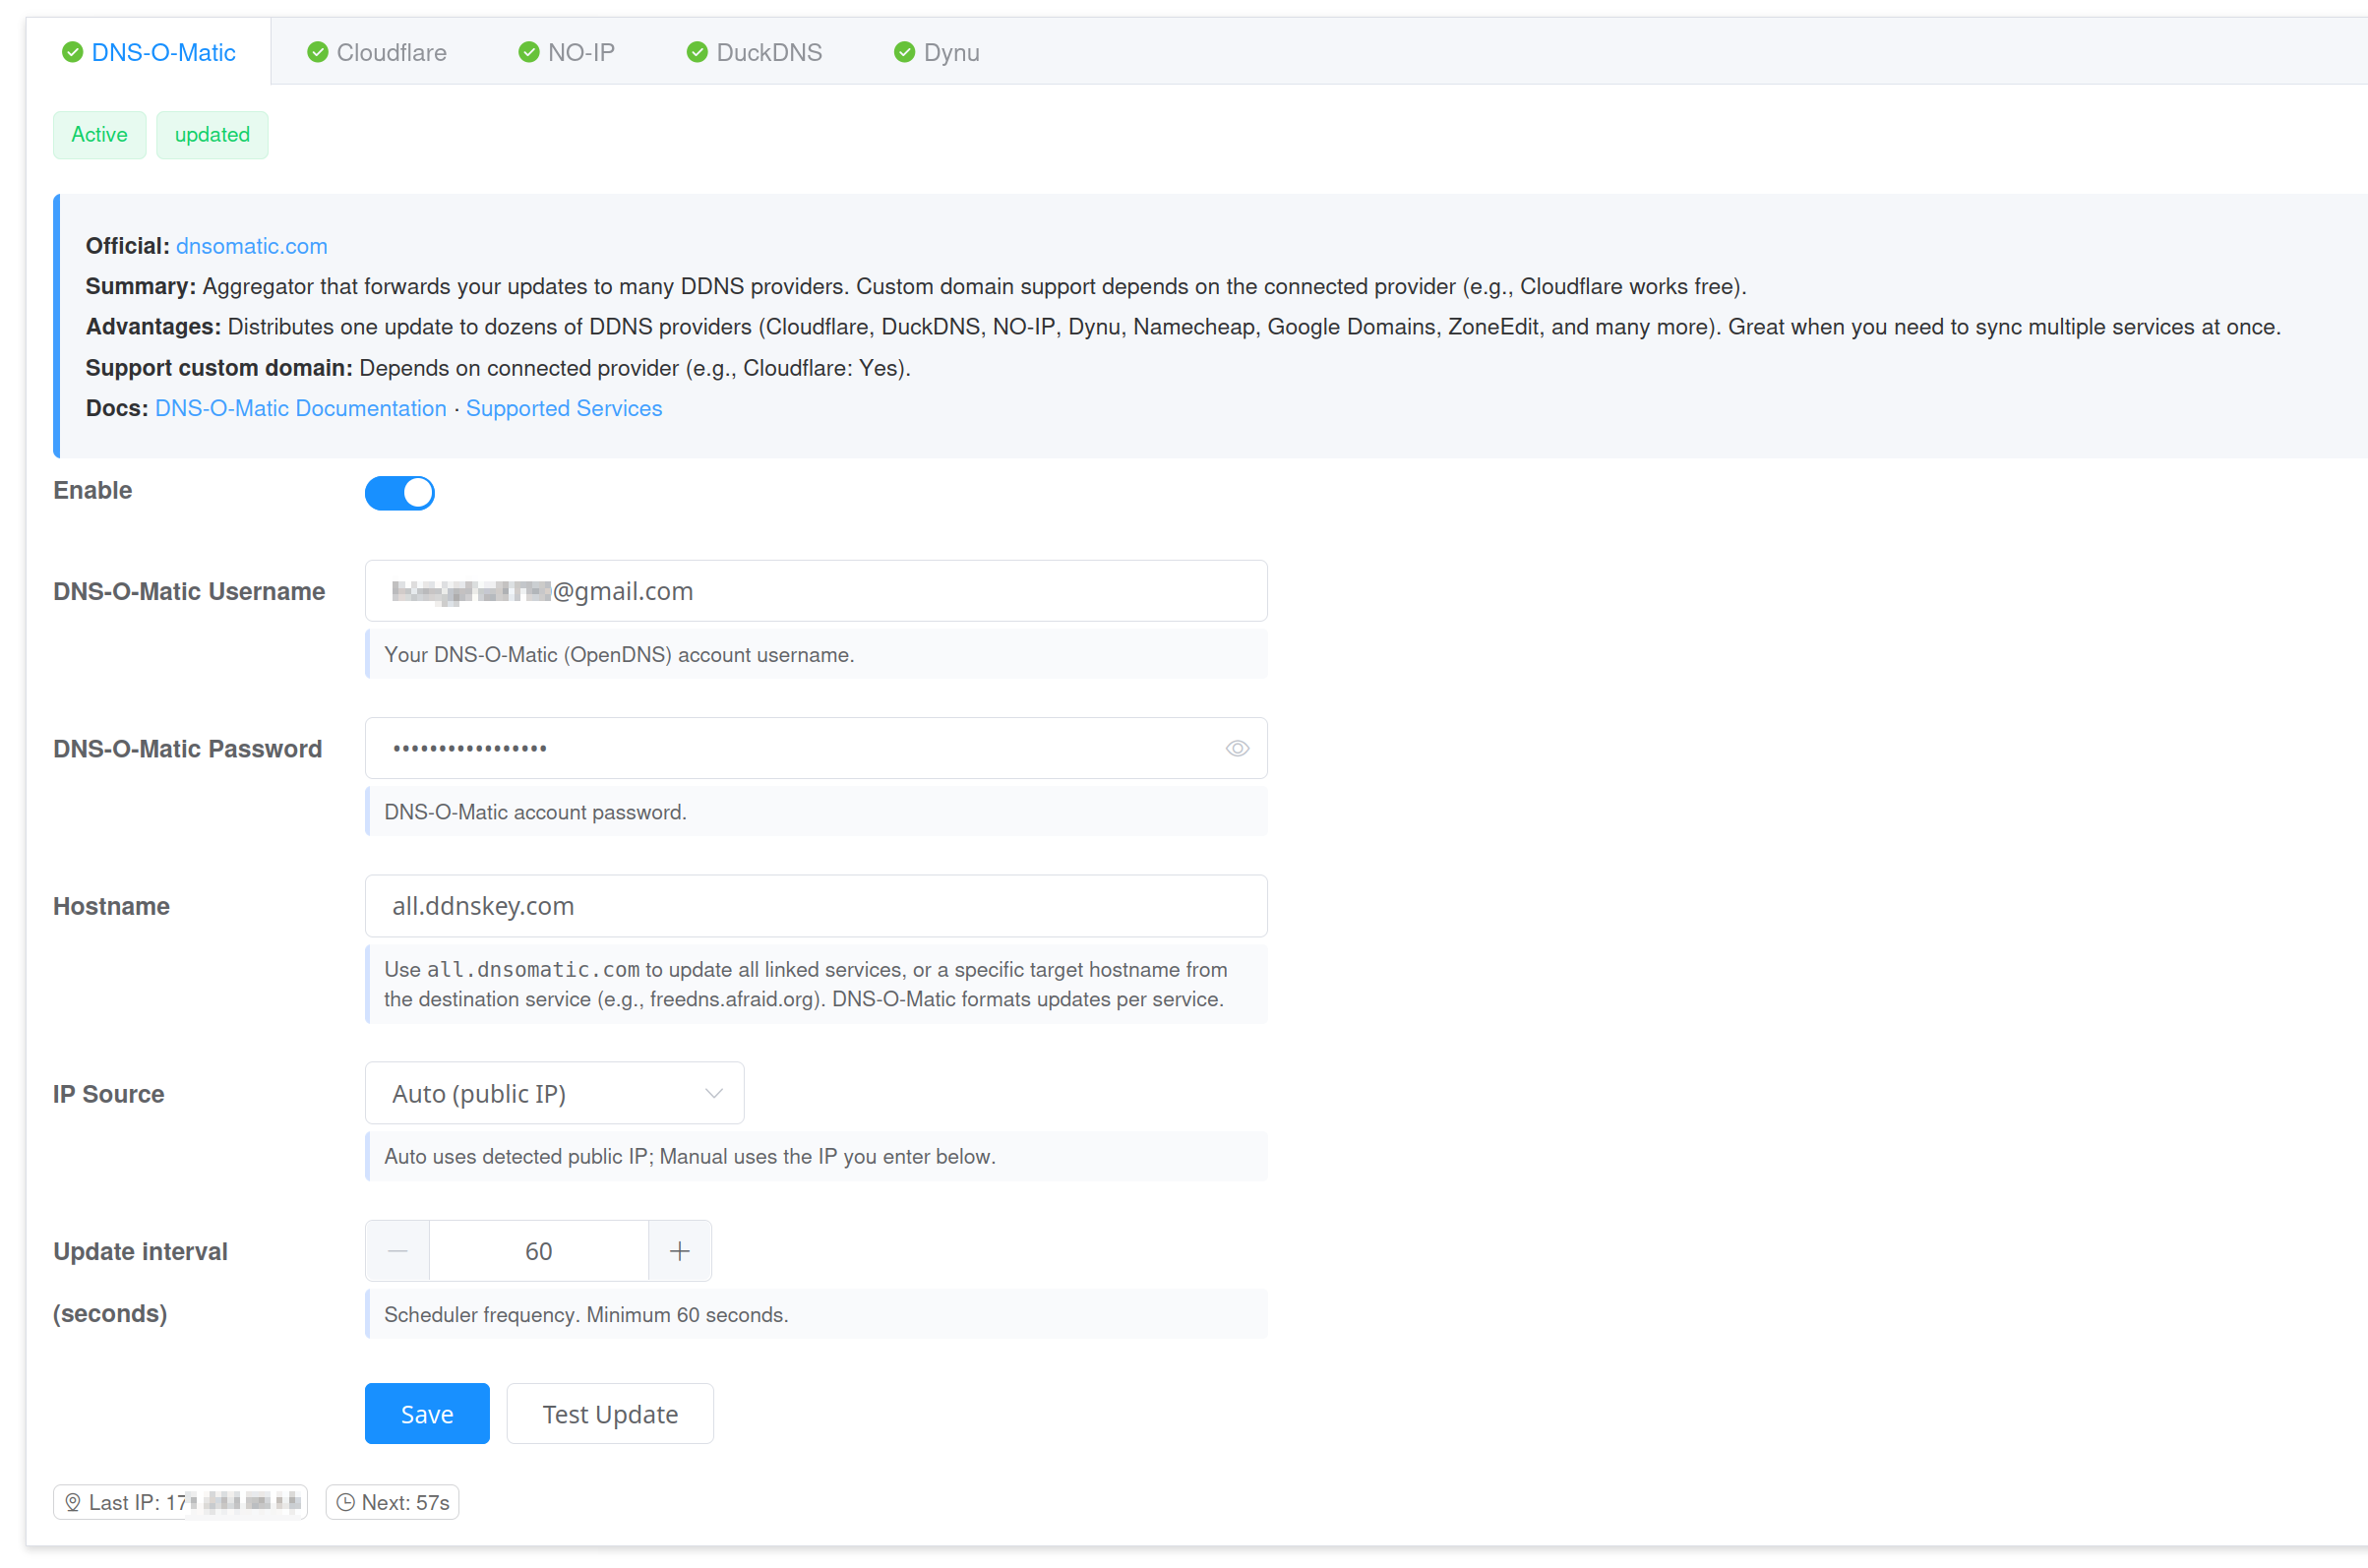
- Open XProxy → General Settings → Dynamic DNS.
- Select a provider tab.
- Toggle Enabled ON.
- Fill in the required fields (see provider details below).
- Set Update interval to 60 seconds.
- Click Save. XProxy syncs immediately.
- Click Test to confirm the provider returns "Synchronized".
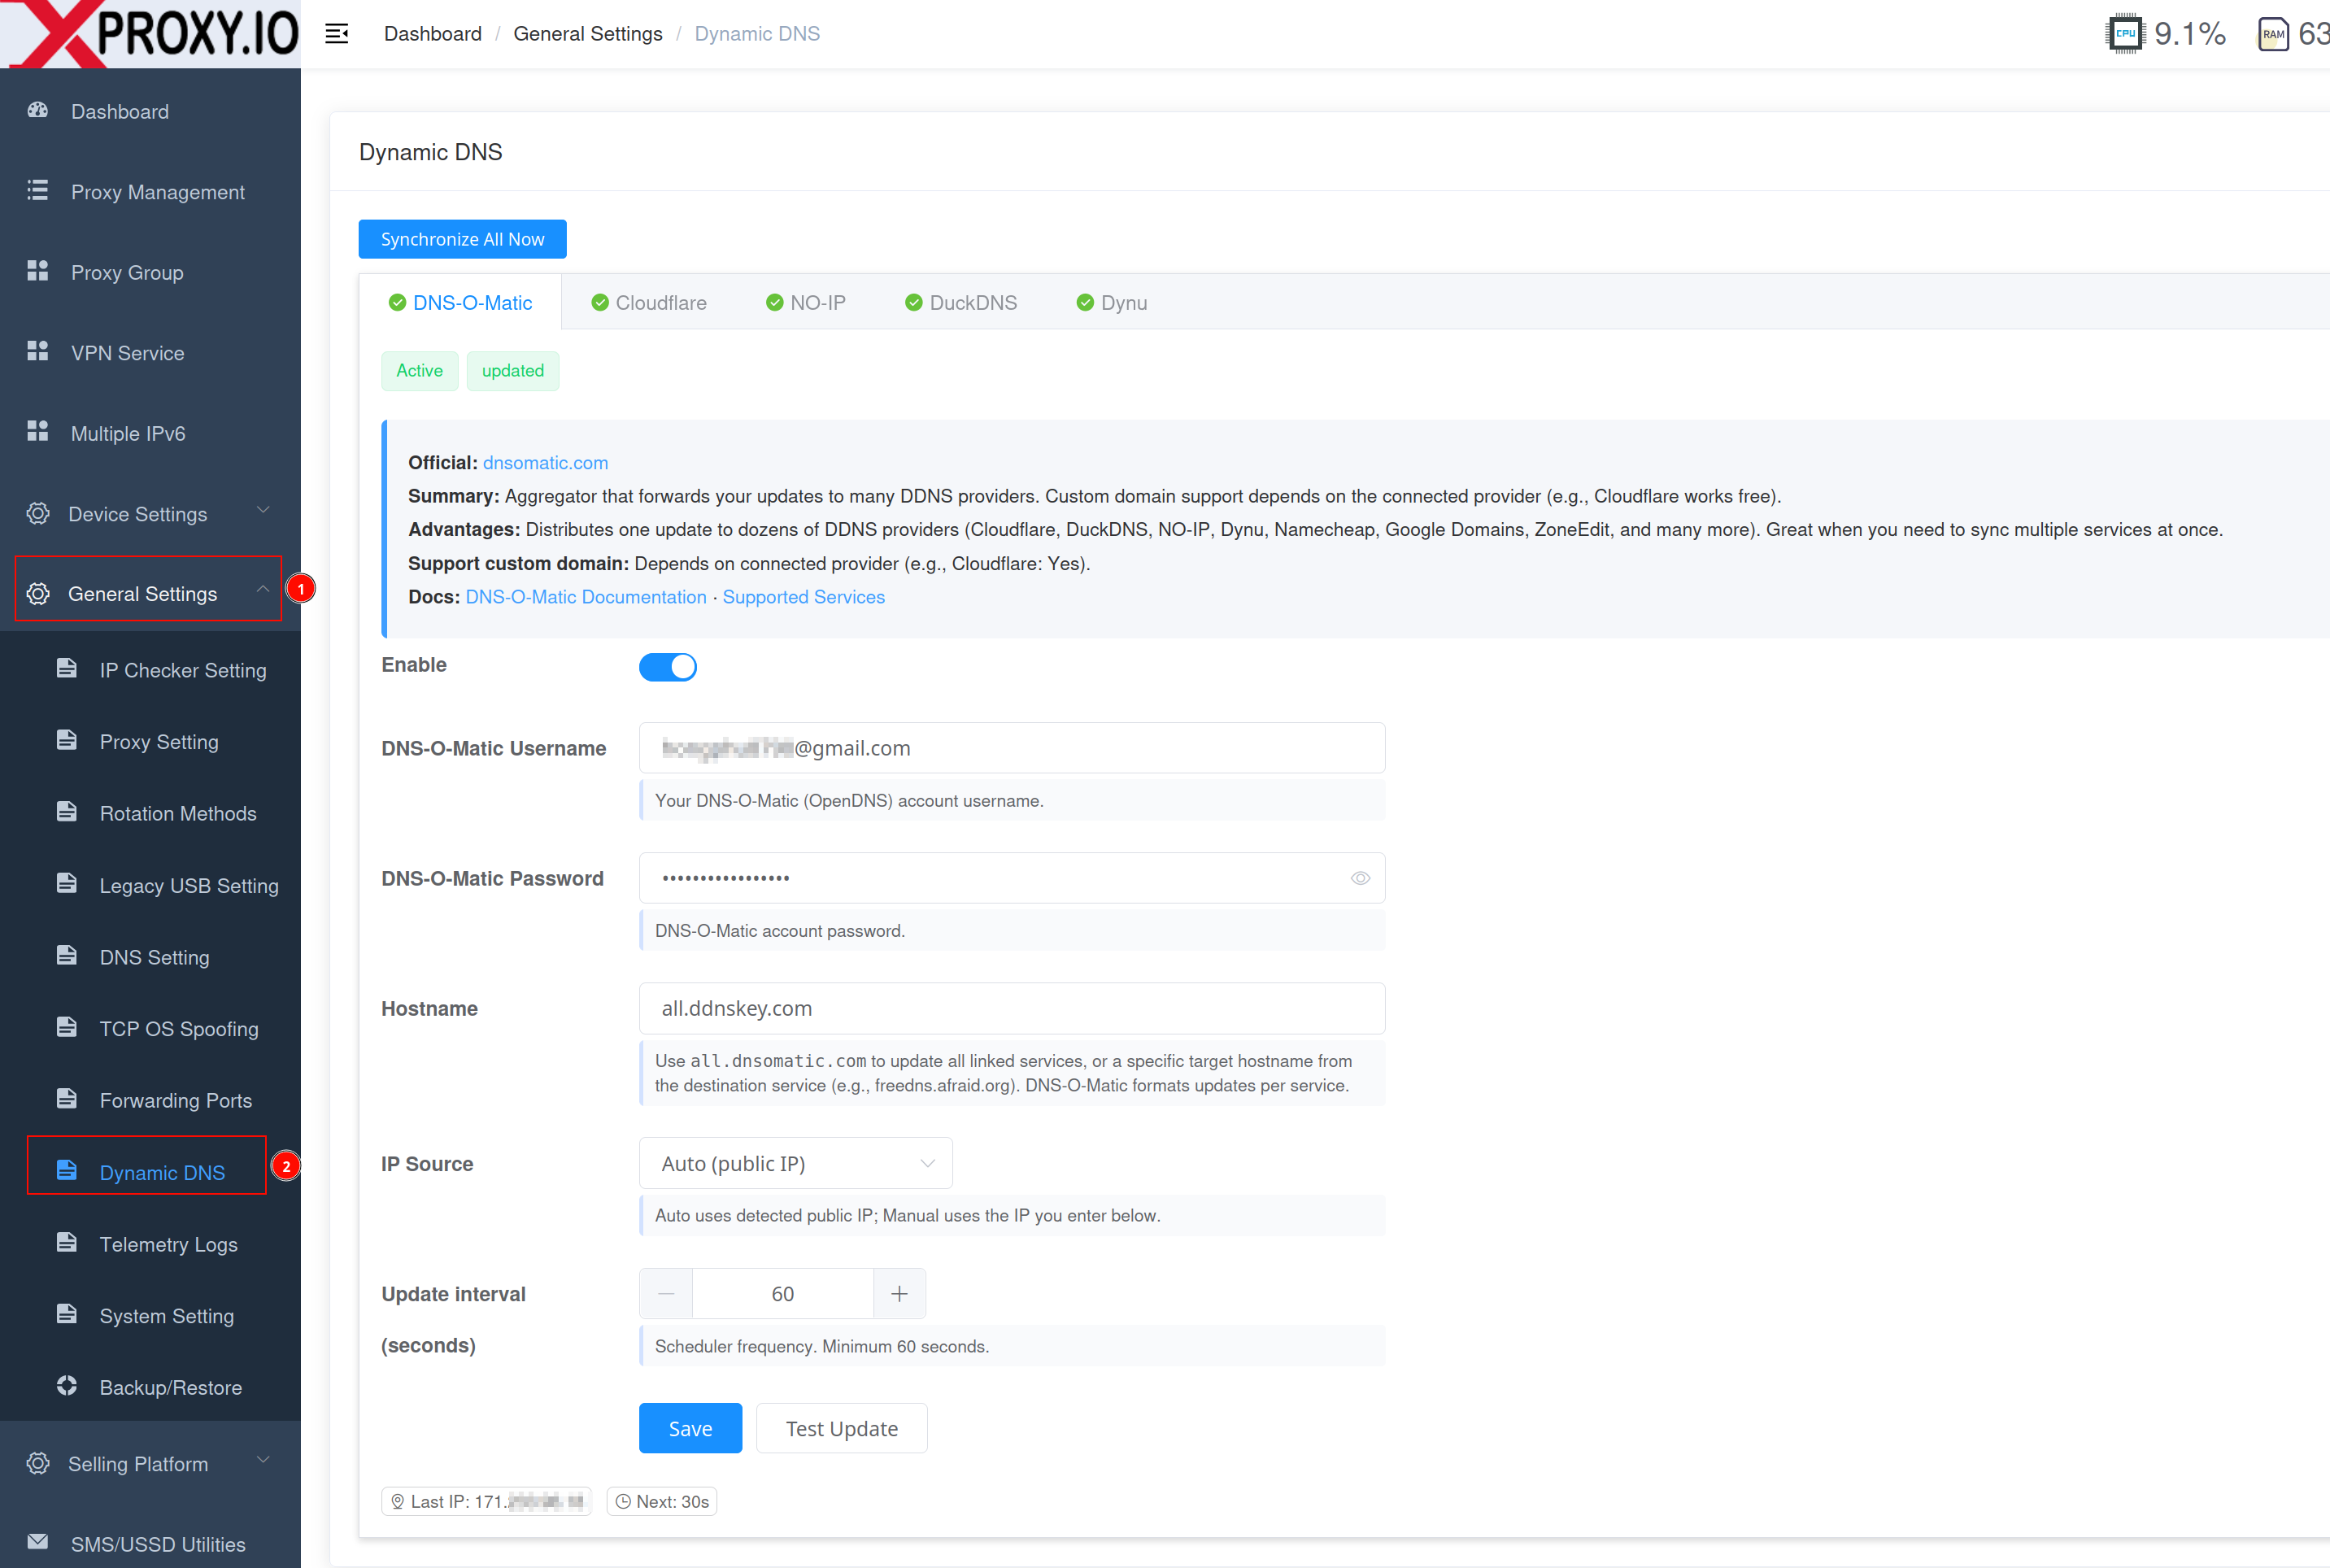
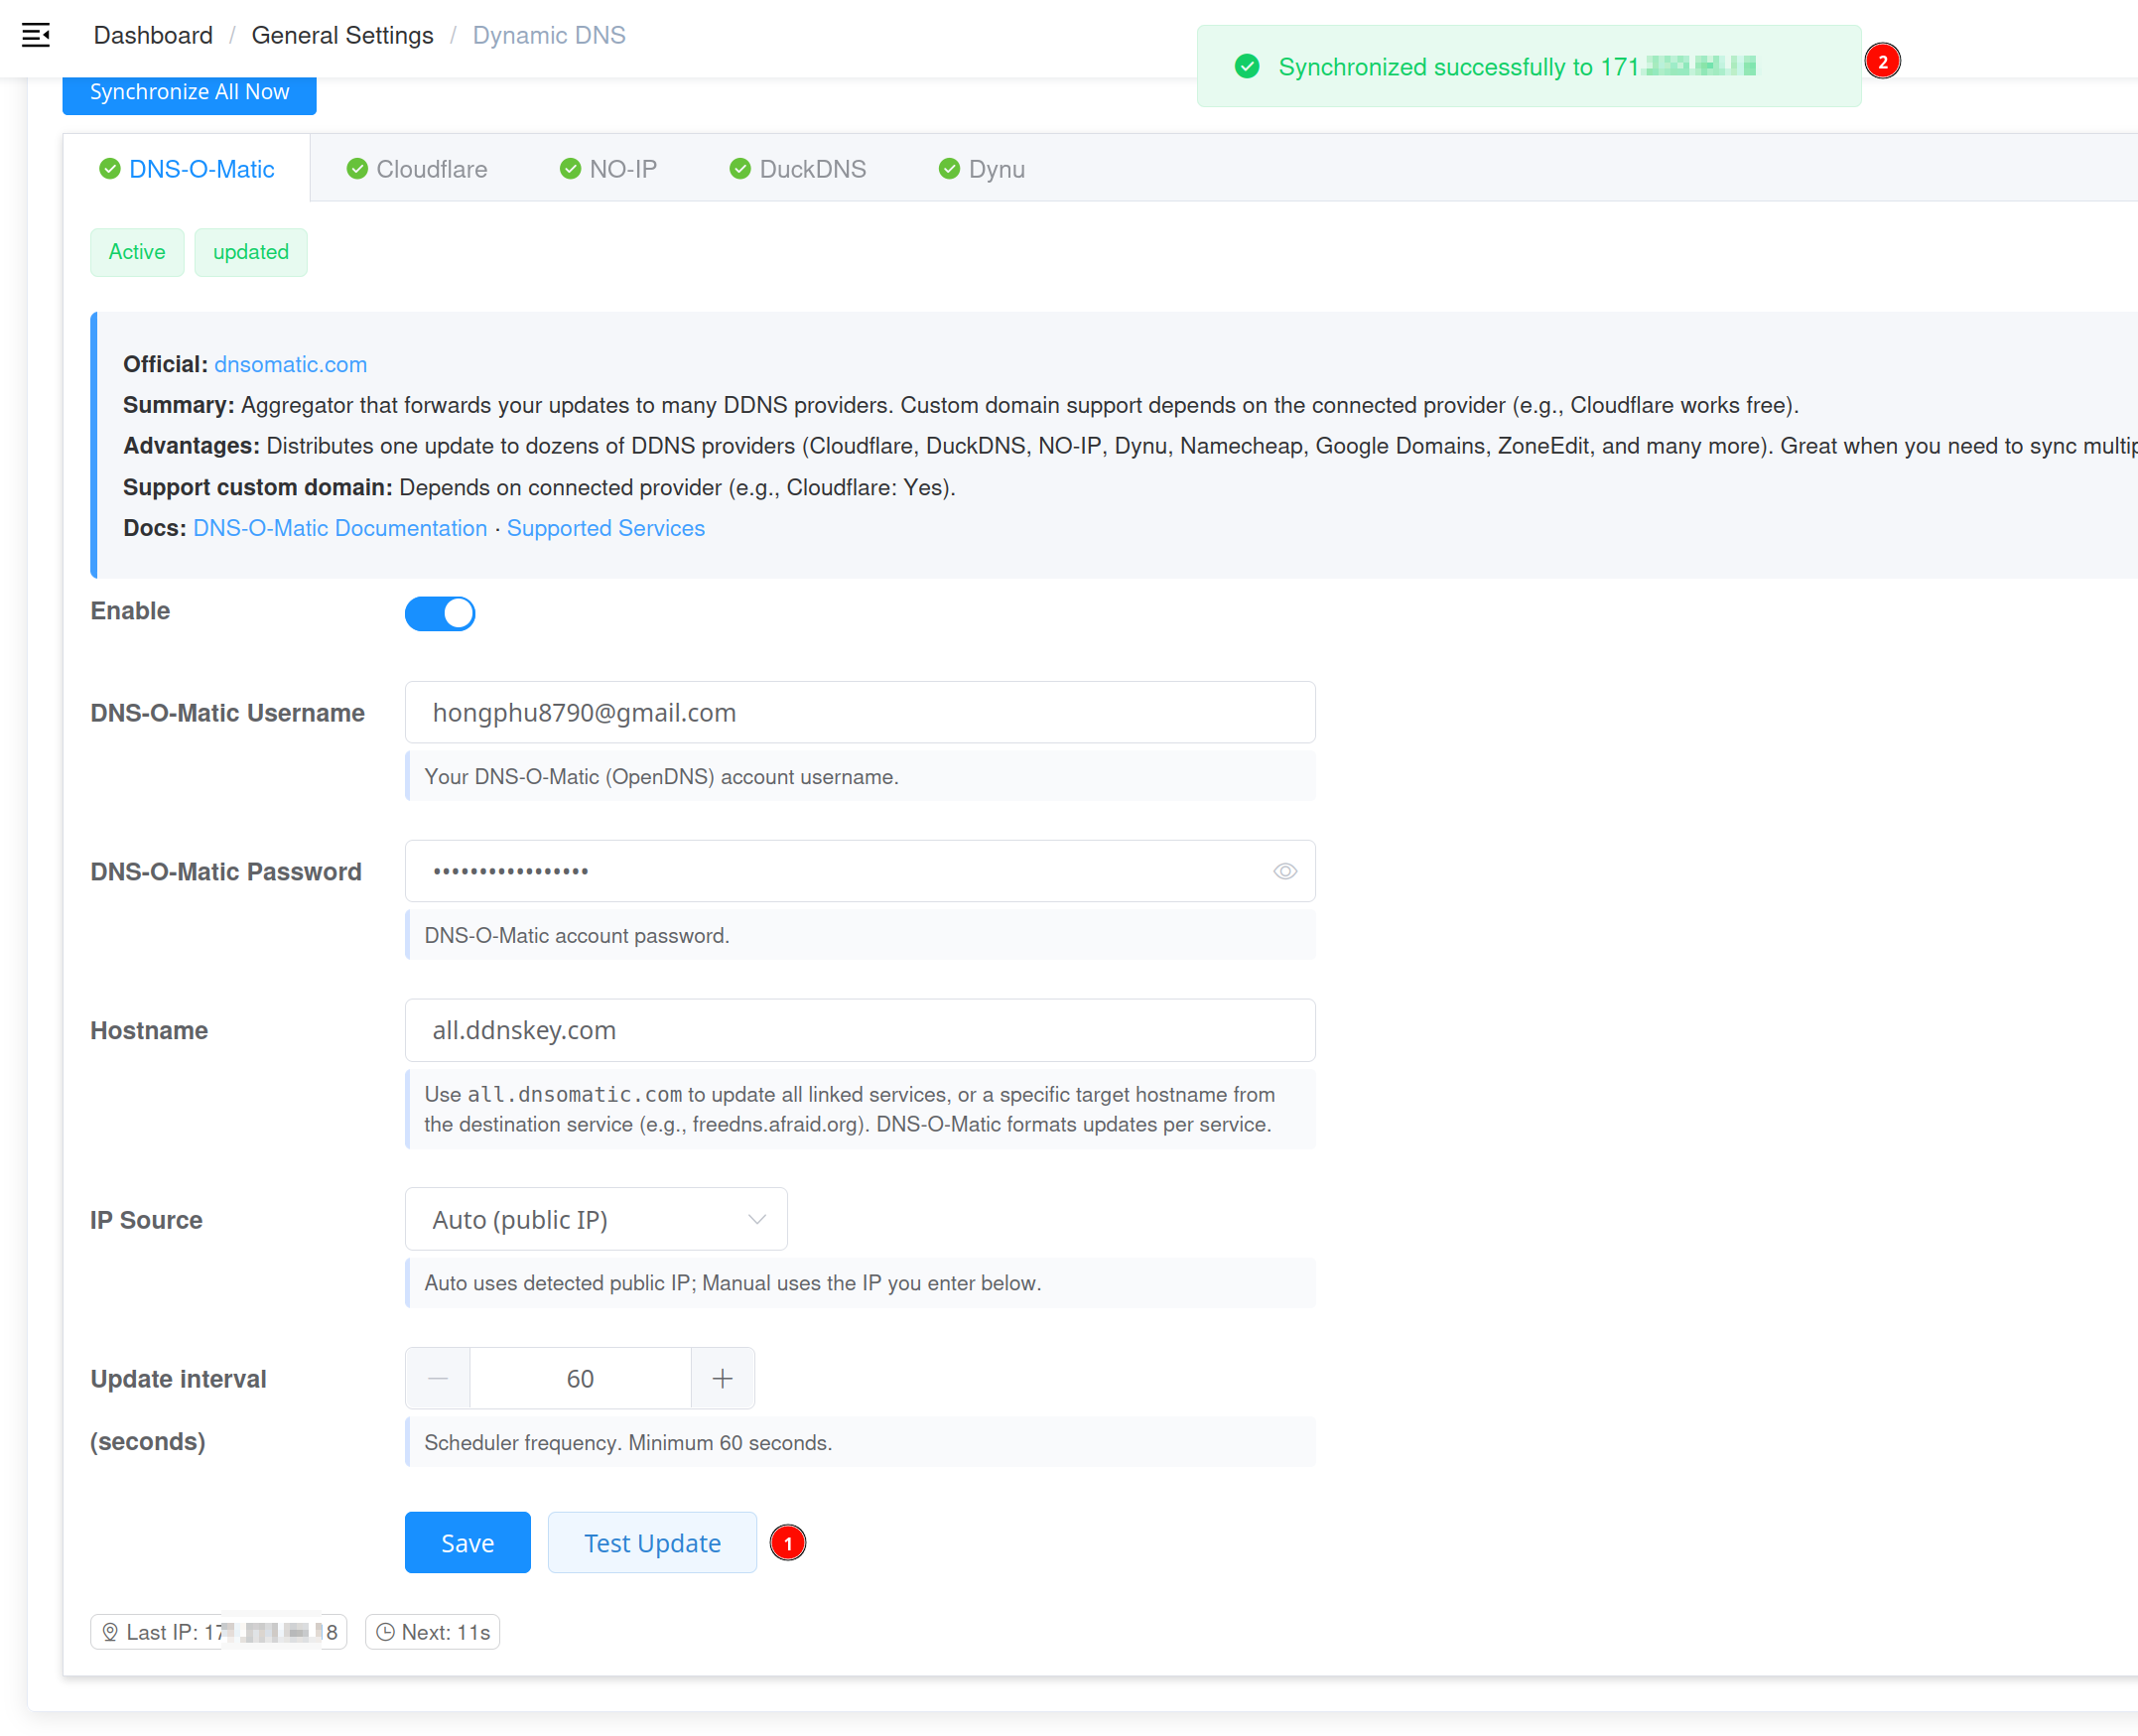
Provider 1 — DNS-O-Matic
- Username — your DNS-O-Matic account email/username.
- Password — your DNS-O-Matic password.
- Hostname — leave empty to update
all.dnsomatic.com, or set a specific host.
Provider 2 — Cloudflare
- API Token — token with DNS Read + DNS Edit for the target zone.
- Zone ID — the zone where your domain lives.
- Record Name — the DNS A record to update (e.g.
proxy.example.com). - Proxied — keep OFF for proxy endpoints; ON for public websites/dashboard only.
- TTL — use 60–120 seconds for faster global updates.

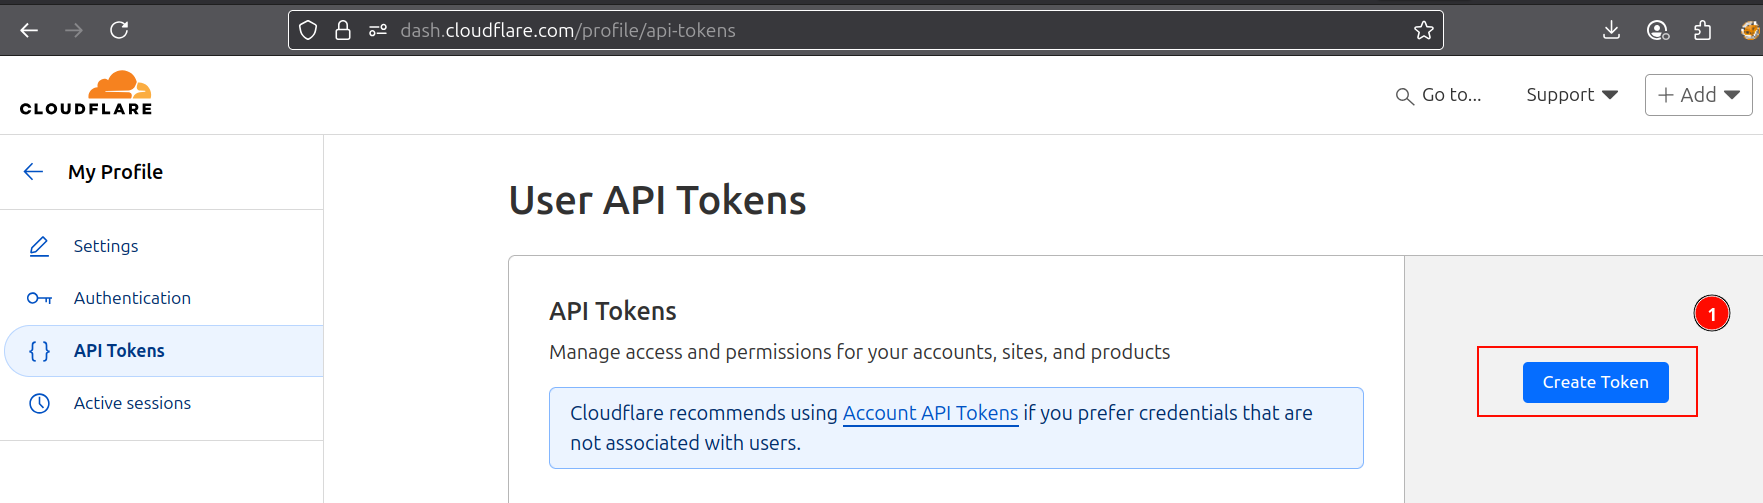
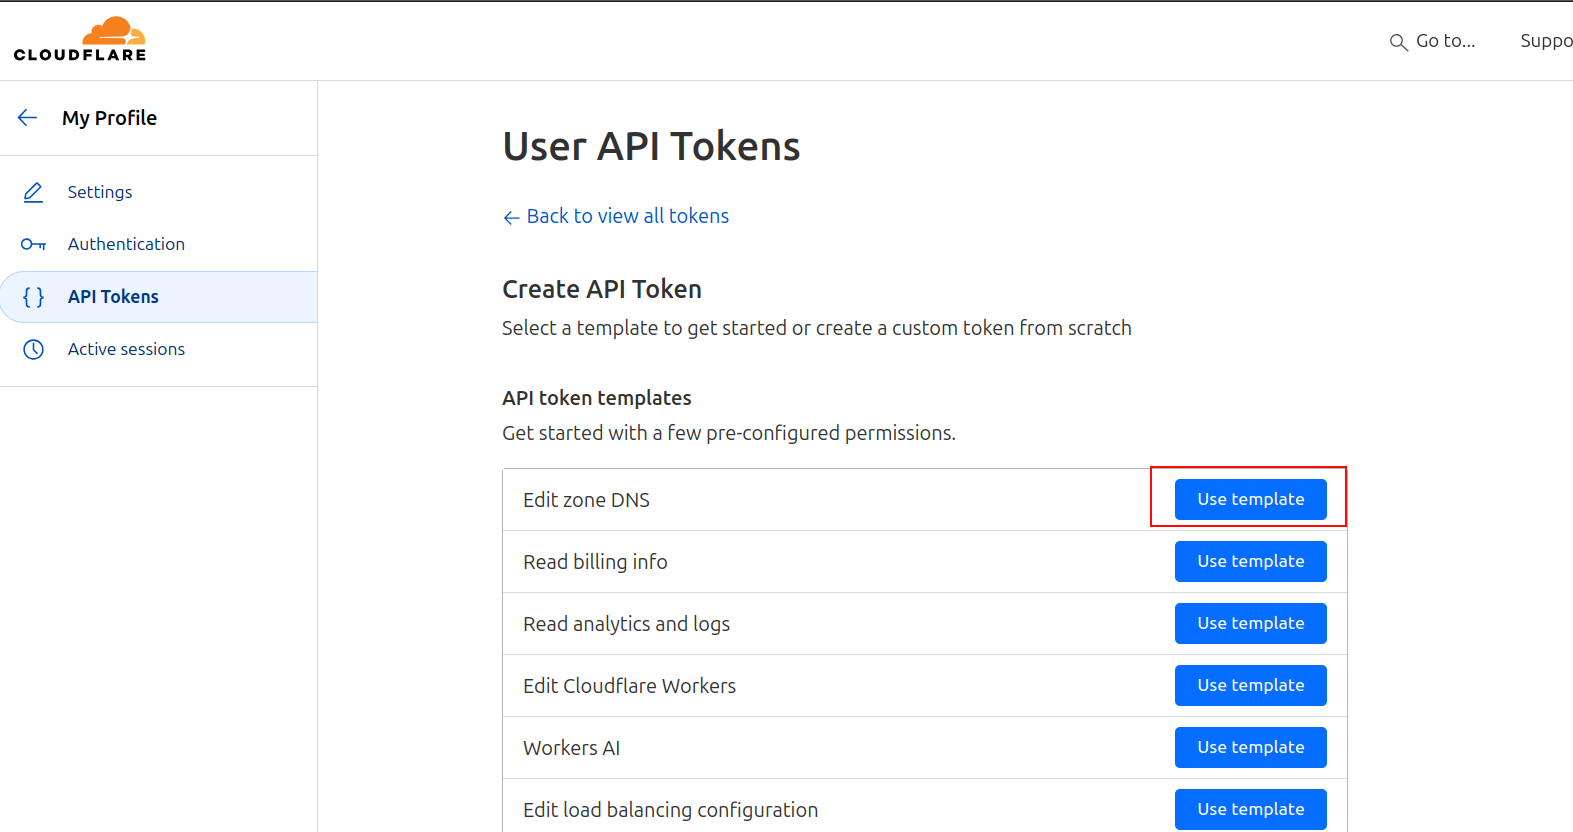
Step 1 — Create API Token
Open Cloudflare → My Profile → API Tokens → Create Token. Use the "Edit DNS" template. Scope must include Zone.DNS Read and Zone.DNS Edit. Limit to your target zone. Copy the token.
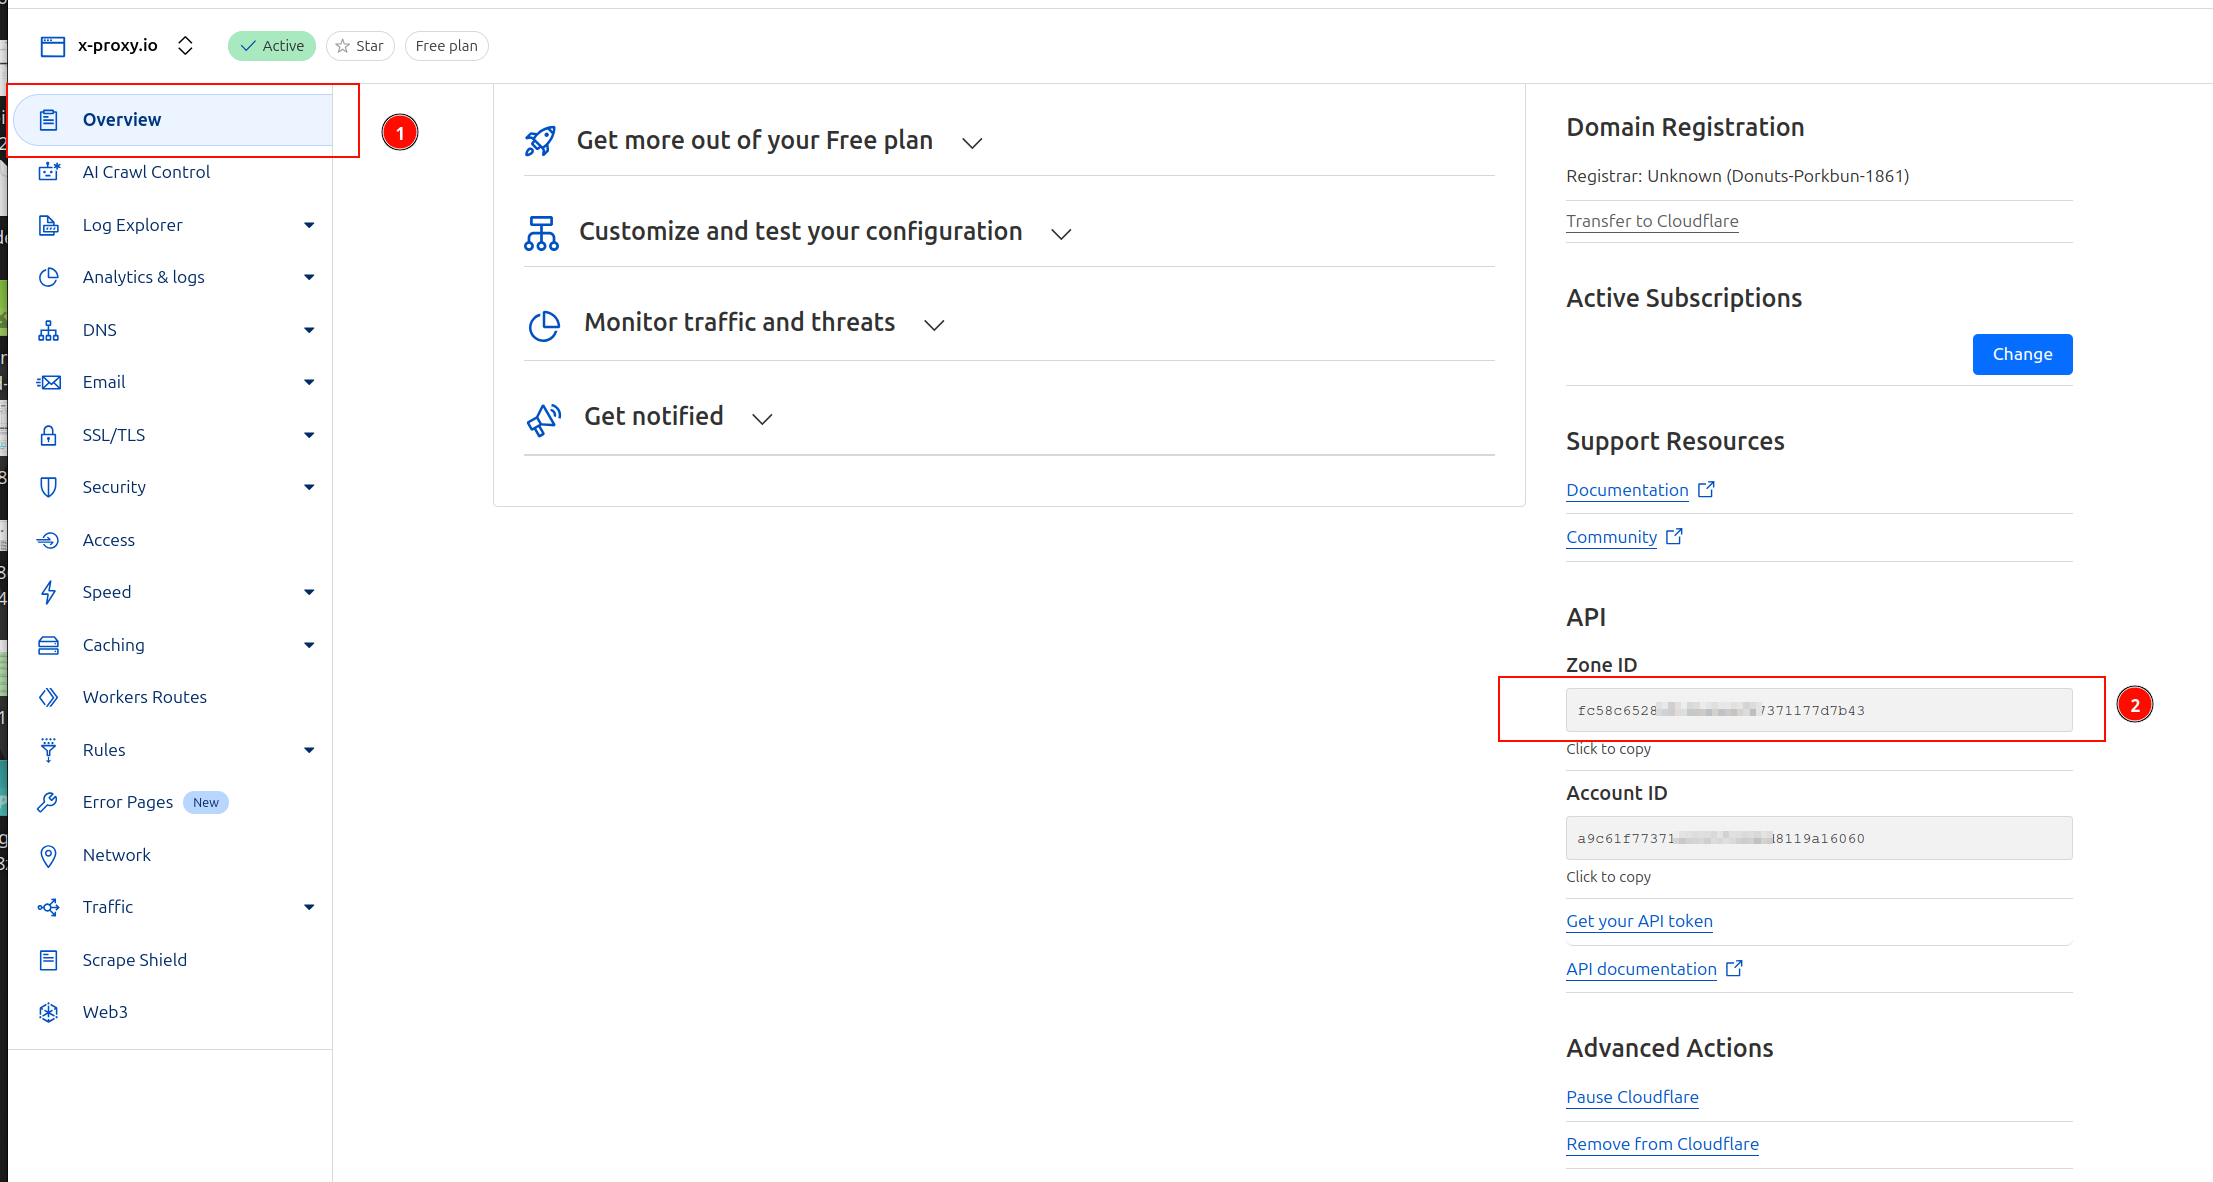
Step 2 — Get your Zone ID
Open your domain in Cloudflare → Overview → copy the Zone ID.
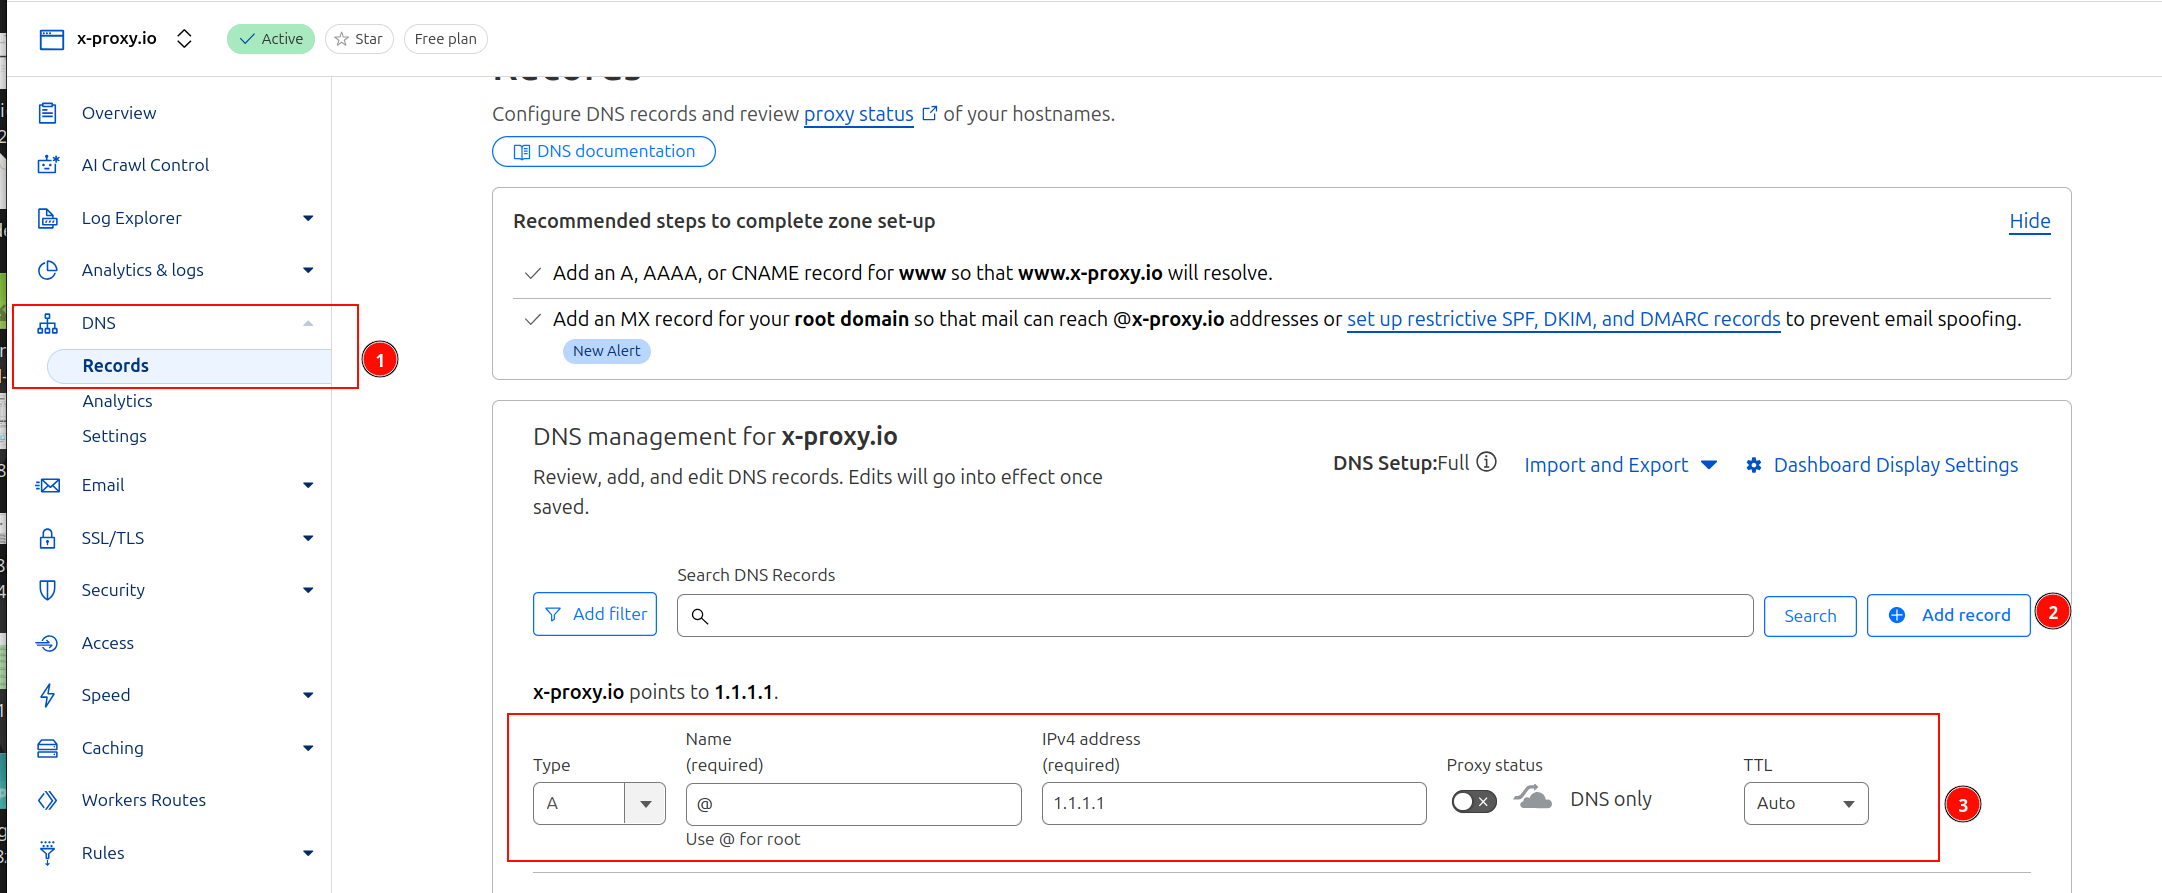
Step 3 — Create the A record
Open the DNS tab in Cloudflare and create an A record for your host (e.g. proxy.example.com). Use any IP now — XProxy will keep it updated.
Step 4 — Test and verify
After saving in XProxy, click Test. Then verify from a terminal:
nslookup proxy.example.com
# or
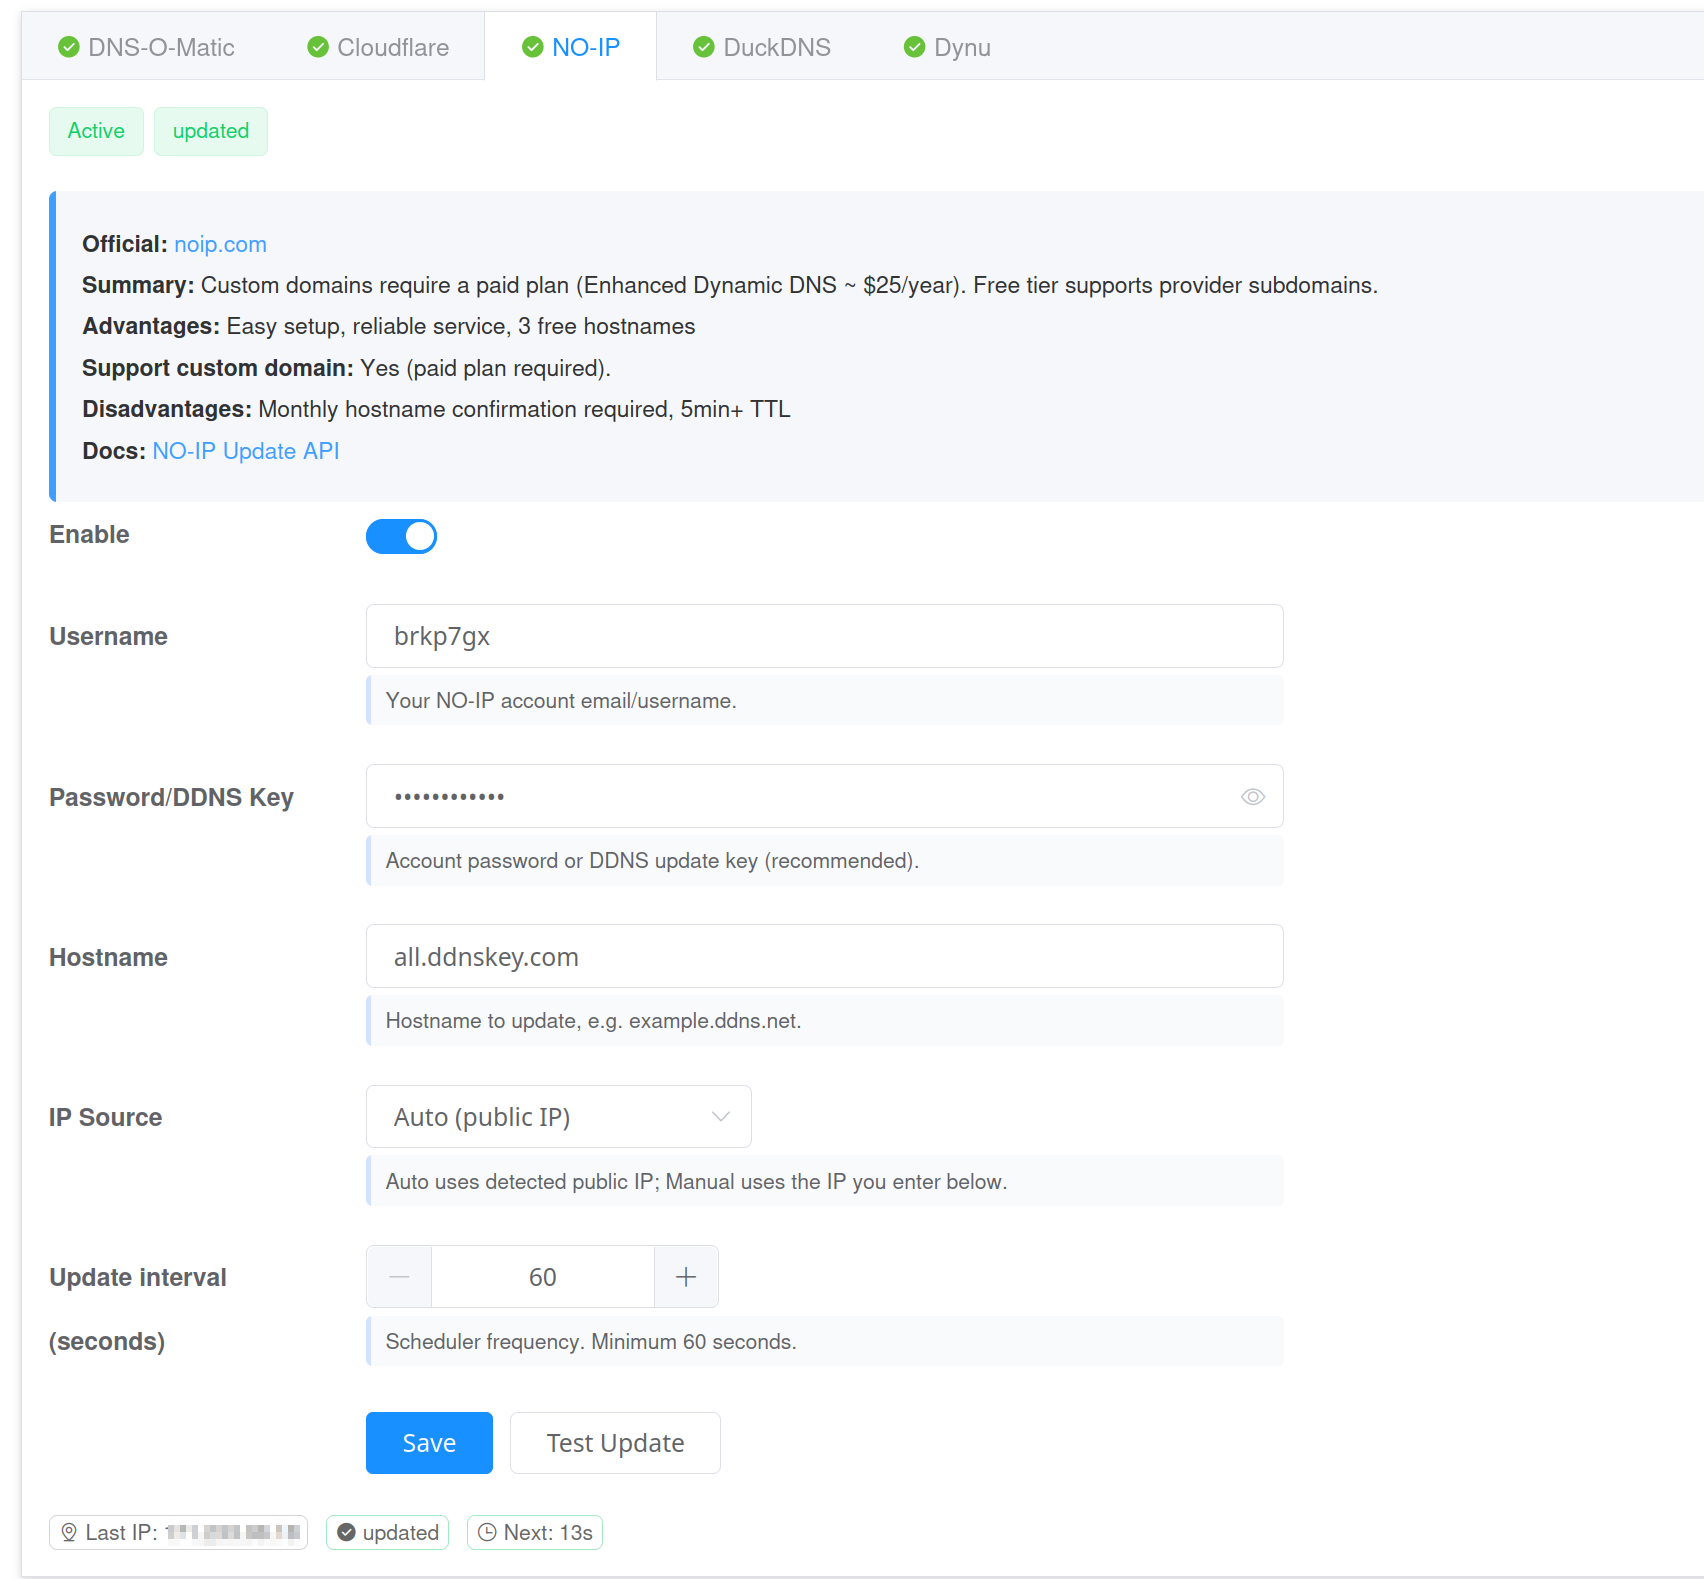
dig +short proxy.example.comProvider 3 — NO-IP
- Username and Password/Key — your NO-IP credentials.
- Hostname — your NO-IP host (e.g.
yourname.ddns.net).
Provider 4 — Dynu
- Hostname — your Dynu host (e.g.
yourname.ddnsfree.com). - Password — your Dynu account password (hashed automatically).
- Supports custom domains (point your domain NS to Dynu).

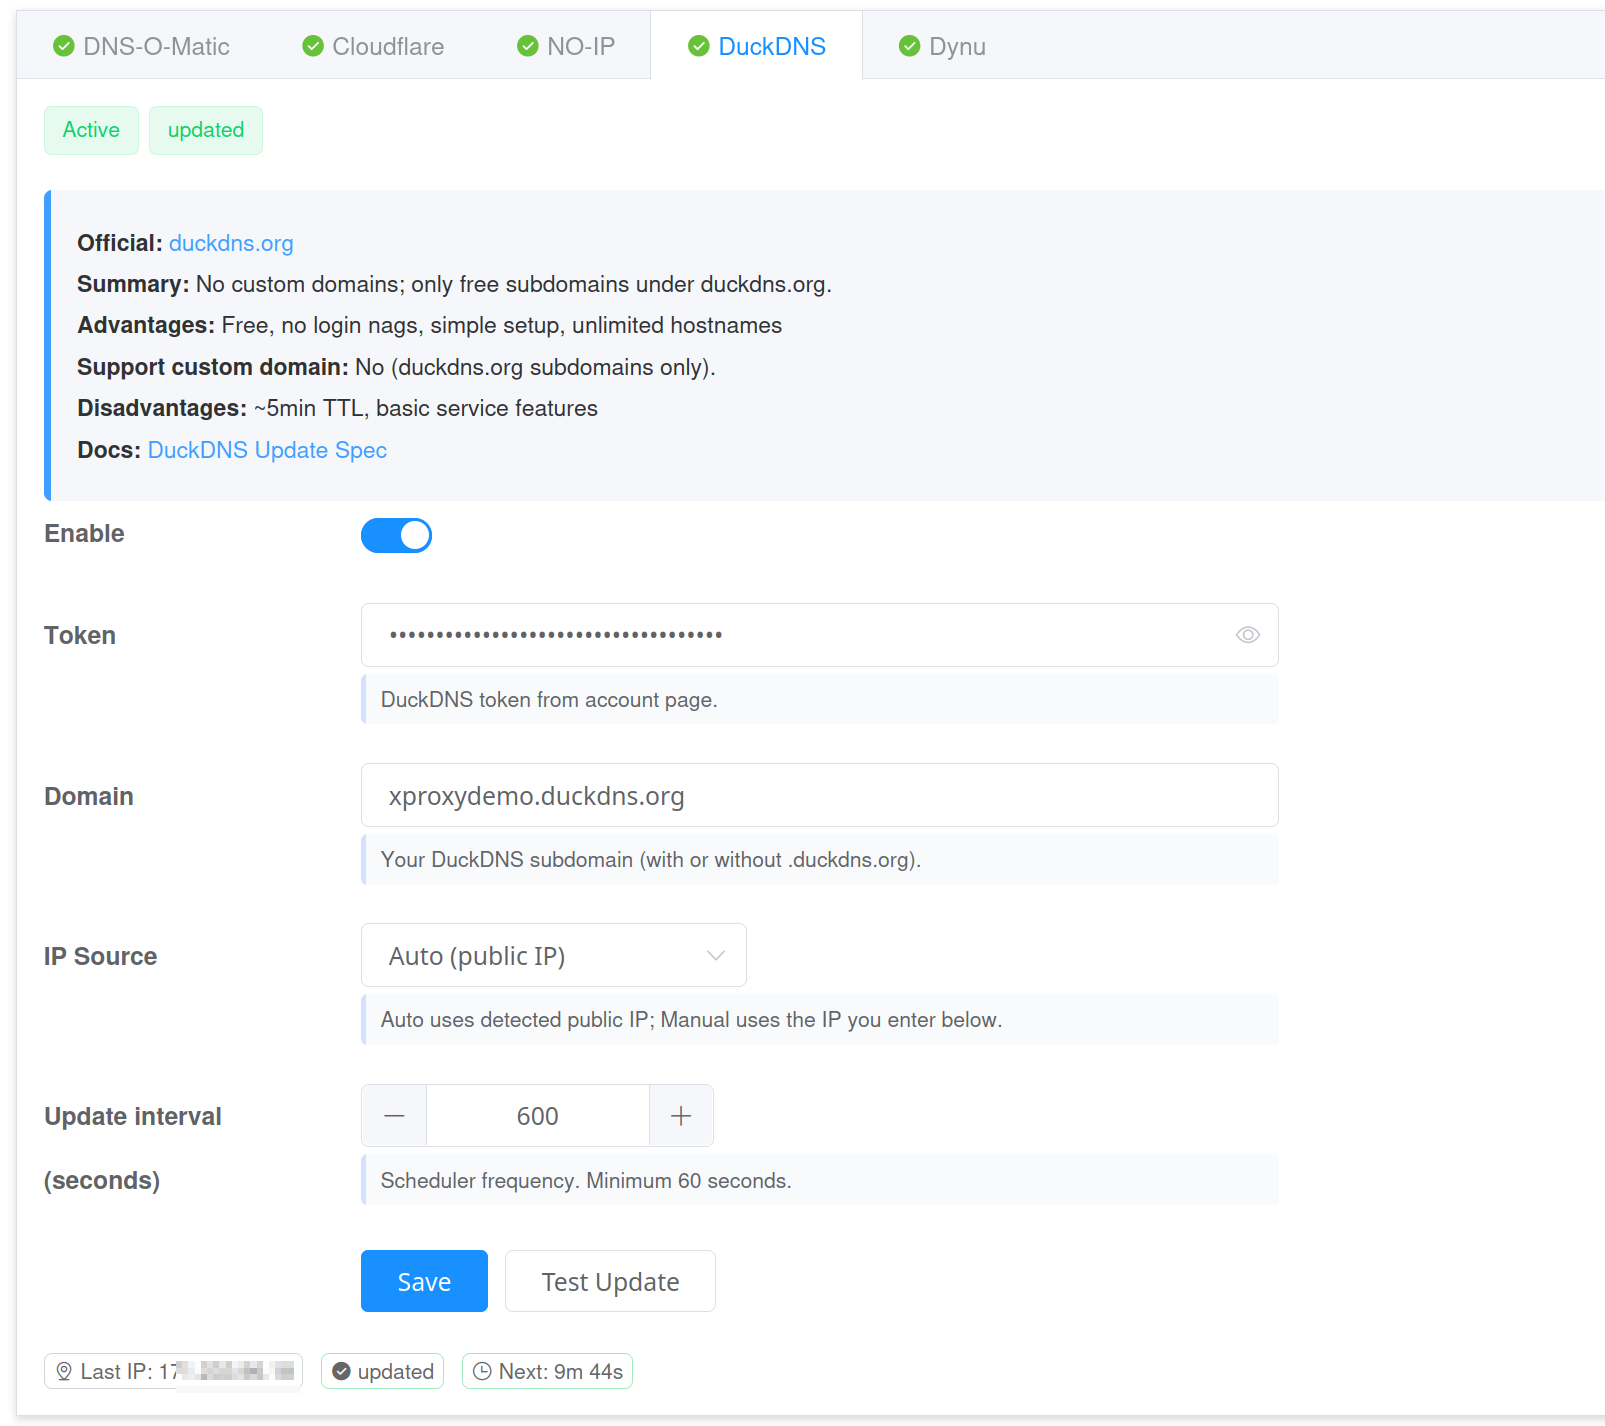
Provider 5 — DuckDNS
- Token — your DuckDNS token.
- Domain — your DuckDNS subdomain (e.g.
yourname.duckdns.org). - Note: DuckDNS only supports
.duckdns.orgsubdomains — no custom domains.
TTL and propagation
TTL (Time To Live) is how long DNS servers cache your record. A shorter TTL means the world learns your new IP faster when it changes.
- Recommended TTL: 60–120 seconds for proxy use.
- If using Cloudflare Proxied mode, TTL is managed automatically.
- Keep Cloudflare Proxied OFF for proxy endpoints — proxied mode routes traffic through Cloudflare, which breaks proxy protocols.
Status indicators
- Synchronized — provider accepted the update. DNS record matches your current IP.
- No change — IP is already correct; next update is scheduled.
- Warning — temporary issue (e.g. rate limit); system will retry automatically.
- Error — wrong credentials or record not found. Fix the values and test again.
Troubleshooting
- Authentication failed — check username, token, or password.
- Record not found — confirm the host exists in your provider dashboard.
- Still showing old IP — wait for TTL to expire, or lower TTL for faster updates next time.
- Service offline — make sure DDNS is enabled in XProxy and you clicked Save.
FAQ
Can I use more than one DDNS provider at the same time?
Yes. Enable multiple providers and XProxy will update them all.
How do I check that my domain points to the new IP?
nslookup your.domain.com
# or
dig +short your.domain.com
What TTL should I use?
Use 60–120 seconds for proxy use. This ensures fast global propagation when your IP changes.