VPS Forwarding — Use Proxy from Anywhere
VPS Forwarding lets you expose your XProxy proxies to the internet through a cloud server's public IP — even if your home router doesn't support port forwarding or your upload speed is limited.
Ways to expose XProxy remotely
- Router Port Forwarding — simplest, but requires a router that supports it and a fast upload connection.
- Tailscale VPN — easy mesh VPN, good for personal use.
- VPS Forwarding — most reliable and professional. This guide covers this method.
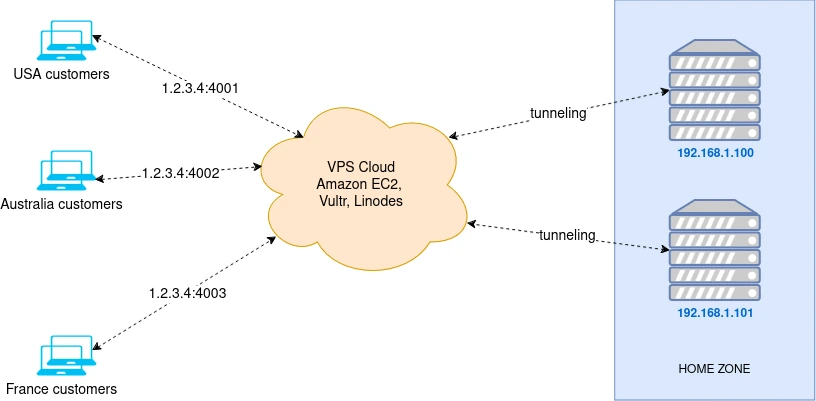
Why use VPS Forwarding?
A VPS acts as an intermediary: Customer → VPS public IP → XProxy server → mobile network.
- Your router doesn't support port forwarding.
- Your home upload speed is below 50 Mbps.
- You want to hide your home IP address.
- You need a static public IP without DDNS.
- You need full UDP support for SOCKS5 proxies (gaming, QUIC, HTTP/3).
Prerequisites
- A VPS running Ubuntu (Amazon EC2, Vultr, Linode, or OVH).
- Recommended: OVH VPS — unlimited bandwidth, 500 Mbps / 1 Gbps.
- Choose a VPS close to your physical location for lower latency.
Security settings before you start
In the XProxy dashboard, enable all of these before proceeding to protect your proxy endpoints and dashboard from unauthorized access:
Dashboard User Authentication
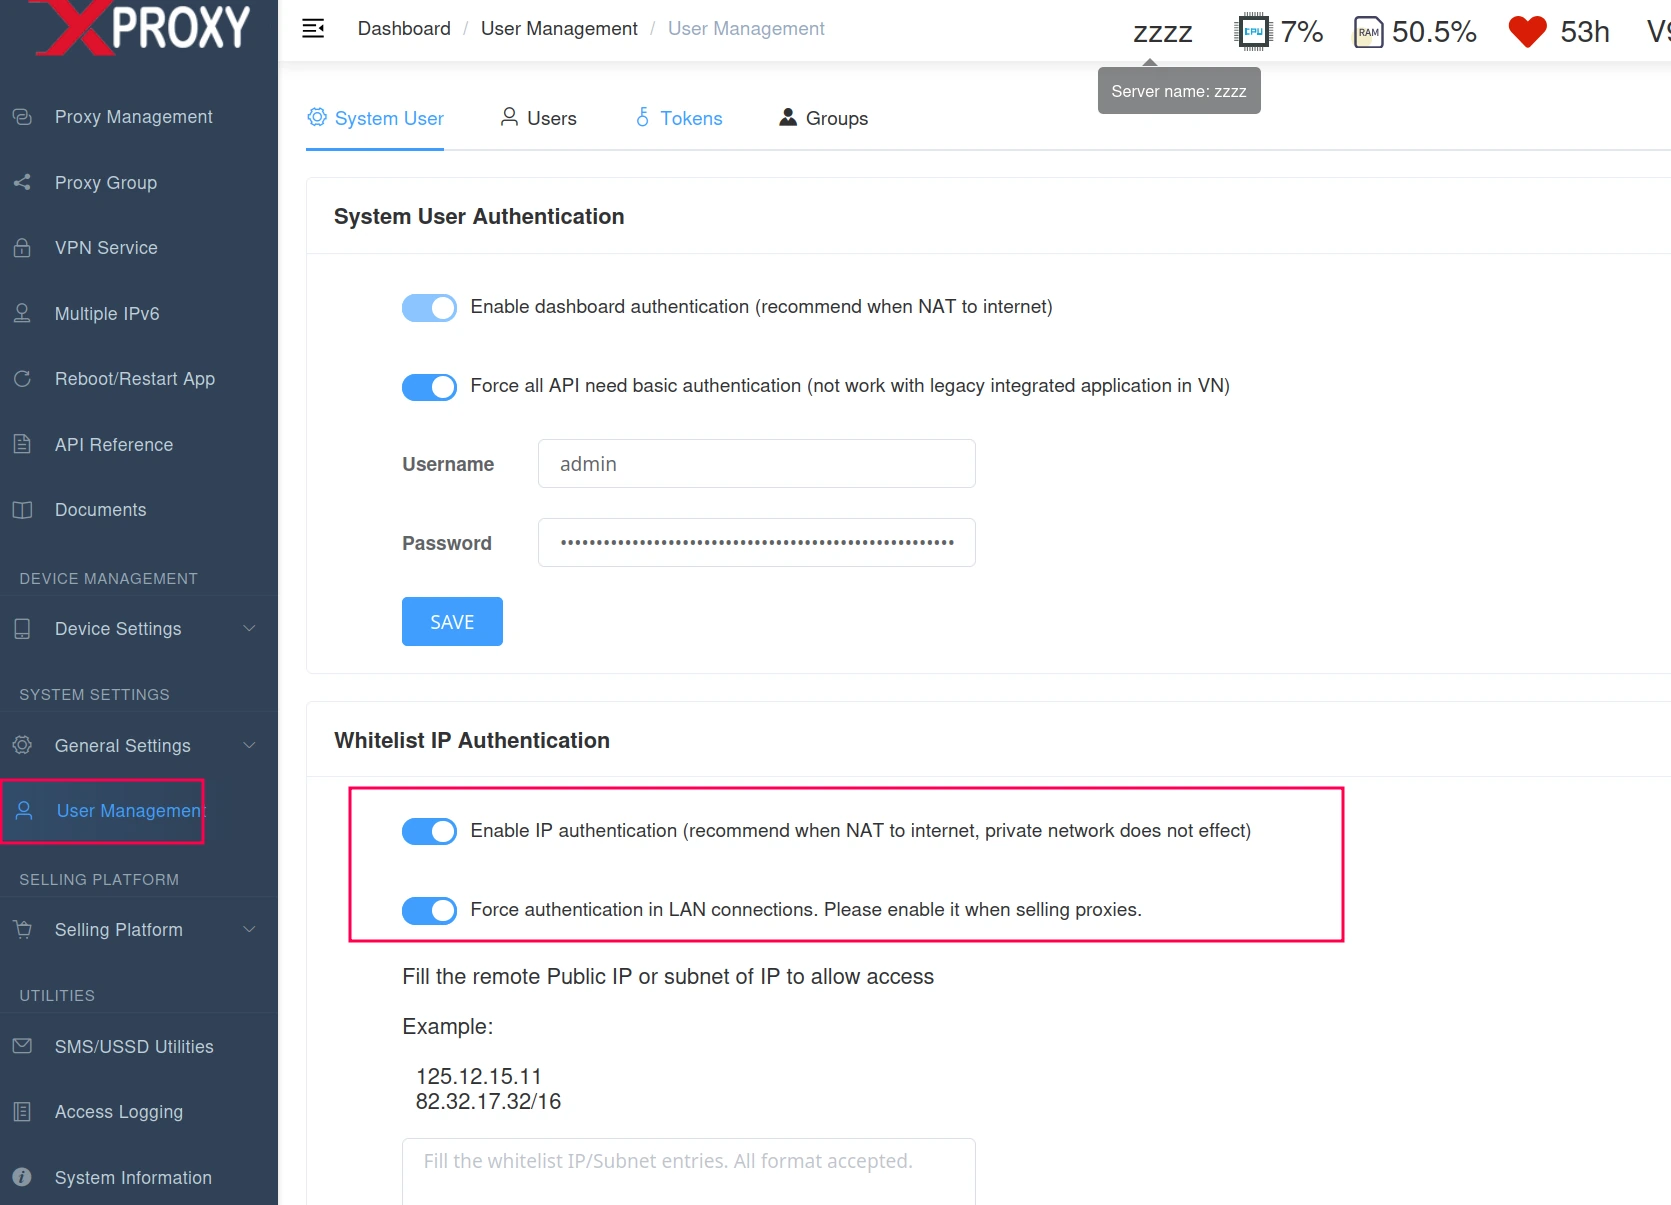
Enable User Authentication under General Settings in your dashboard - Enable dashboard authentication: Activates login protection for the management dashboard.
- Force authentication in LAN connections: Requires authentication even for devices on the same local network, preventing unauthorized internal access.
Proxy Authentication Settings

Enable proxy authentication, password auth, and LAN authentication - Enable proxy authentication: Requires username/password for all proxy connections.
- Force authentication in LAN connections: Ensures LAN users must authenticate, preventing unauthorized internal usage.
Step 1 — Prepare your VPS
SSH into your VPS as root and update the system:
sudo apt update && sudo apt upgrade -yStep 2 — Open firewall ports
Ensure ports 80 to 65550 are open. To disable the firewall temporarily:
systemctl disable ufw && systemctl stop ufwStep 3 — Connect XProxy to your VPS
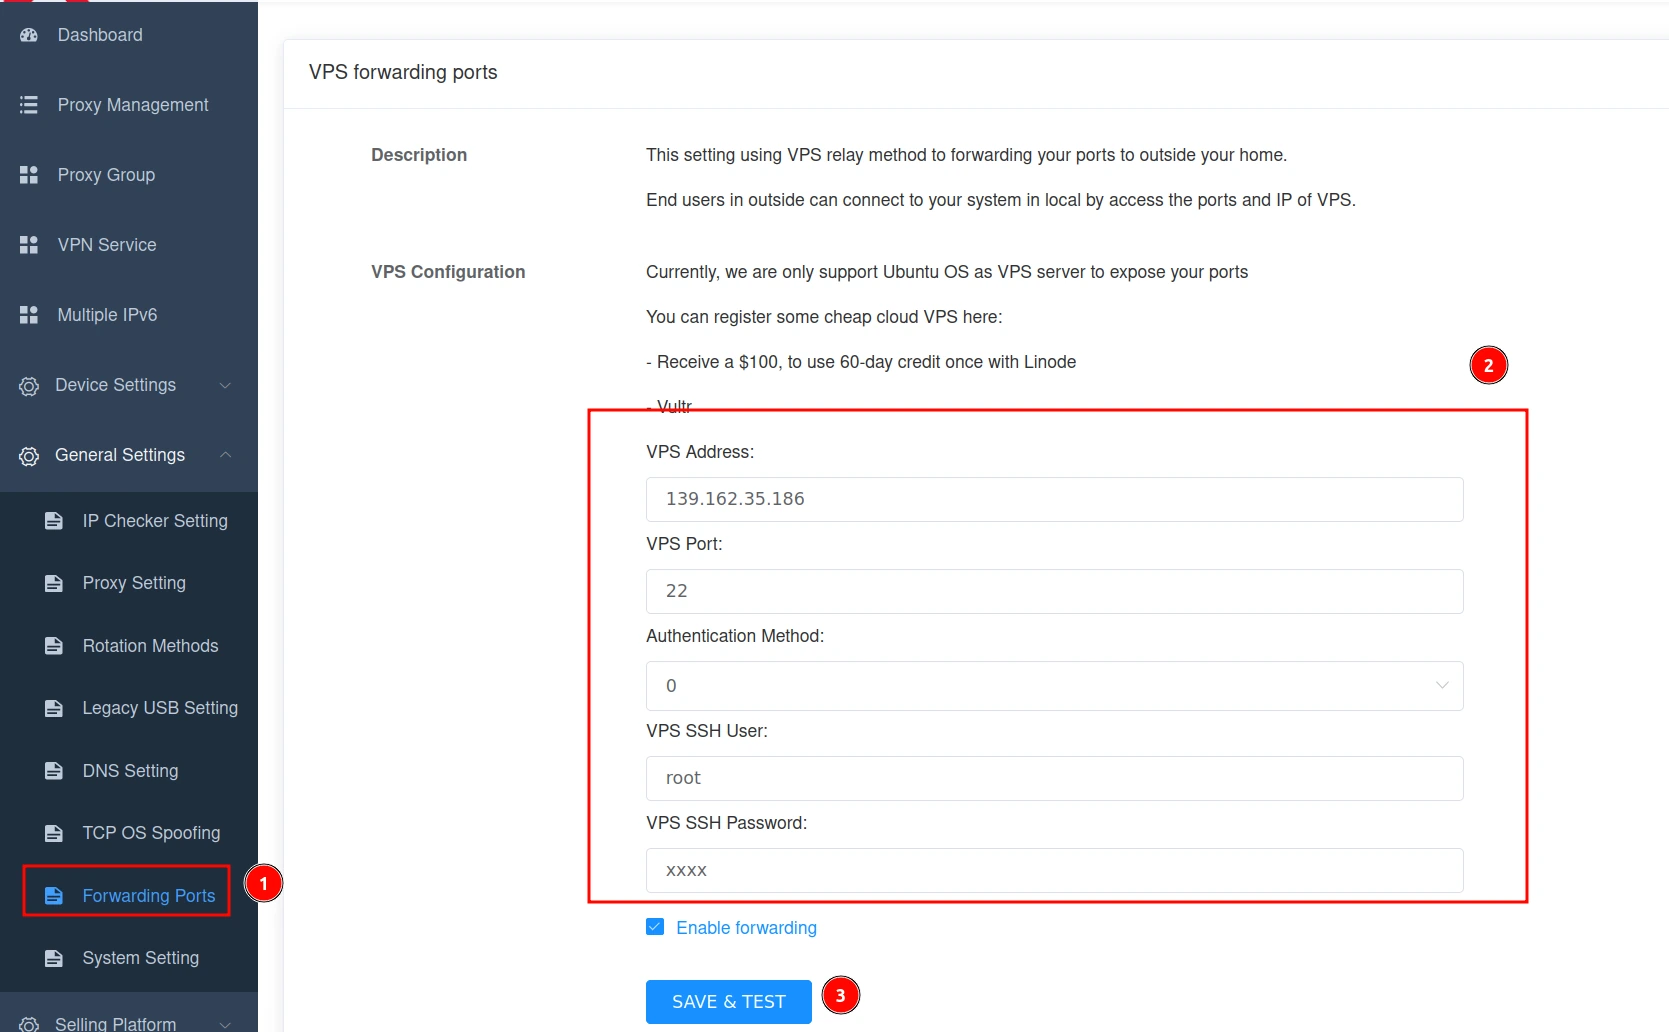
Open the XProxy dashboard → General Settings → Forwarding Ports. Enter your VPS IP, SSH port (22), username (root), and password. Click Save & Test.
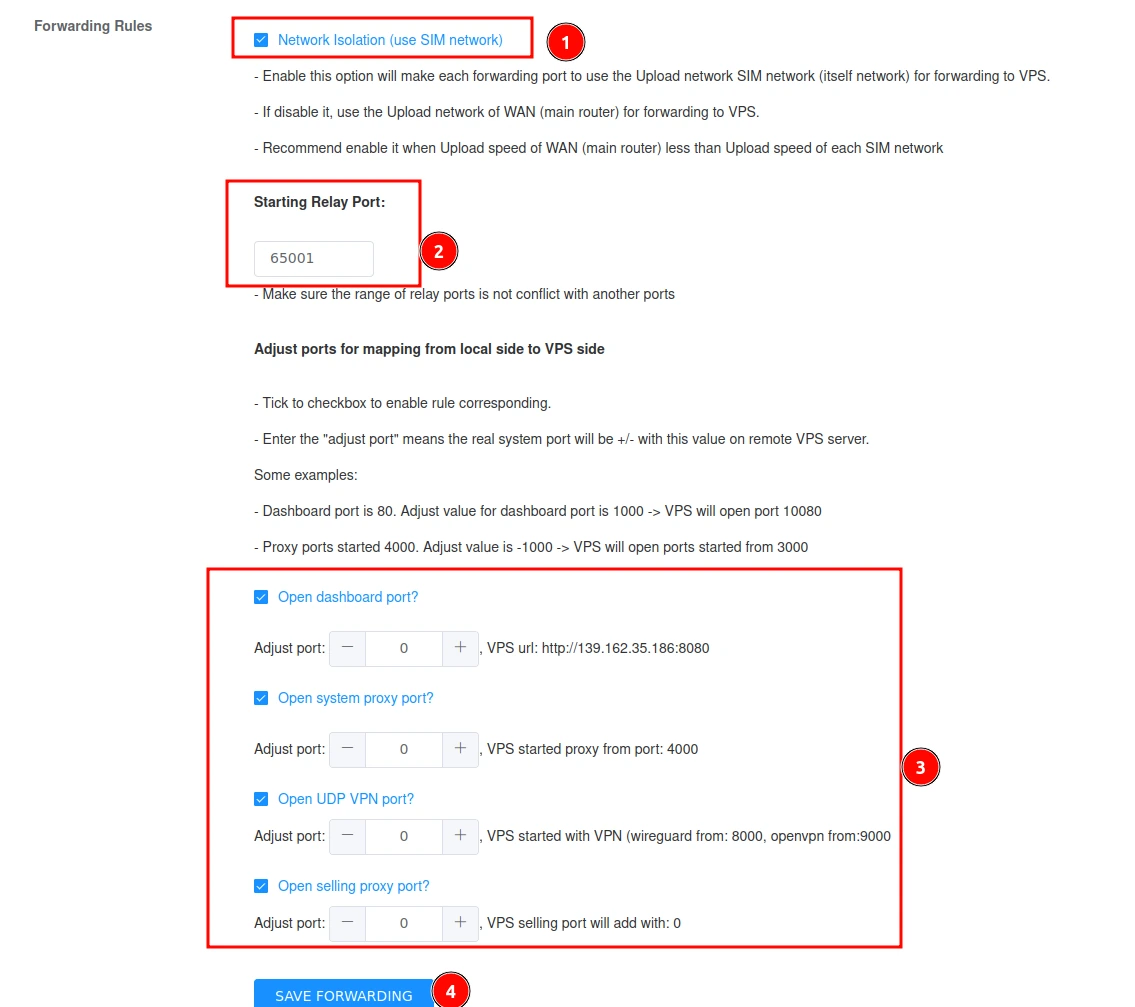
Step 4 — Configure forwarding rules
- Network Isolation (SIM Upload) — routes each SIM's traffic through its own mobile network. Enable when SIM upload speed is faster than your WAN.
- Enable UDP for SOCKS5 — required for gaming, VoIP, QUIC, HTTP/3. Each UDP SOCKS5 connection uses ~40 MB of RAM on the VPS.
- Starting Relay Port — base port for forwarding (default: auto). For multiple services on the same VPS, set a unique starting port (e.g. 65011) and increment by 10 per service.
Configure and manage ports for multiple forwarding services
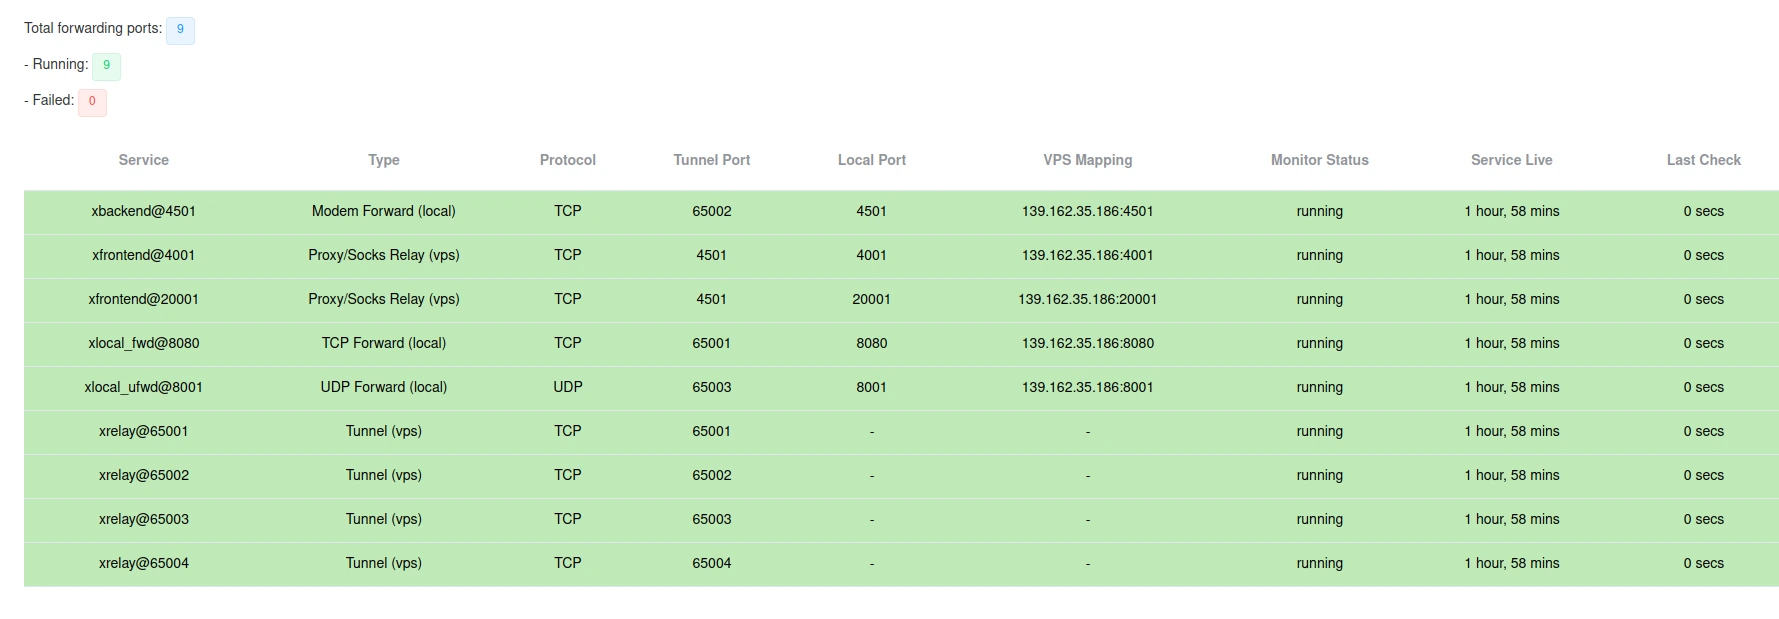
Monitoring & troubleshooting
All active forwarding ports will appear in green. If there's an issue, the port will be marked red, making it easy to identify and troubleshoot problems.
- If UDP traffic is heavy, upgrade your VPS RAM.
- Always choose a VPS close to your physical location for best performance.