Step 1:
Use firefox browser and install foxyproxy extension.
You can use any browser with proxy configuration support.
https://addons.mozilla.org/en-US/firefox/addon/foxyproxy-standard/
Step 2:
- Looking at the proxy in the Proxy column (Proxy Management page of XProxy panel).
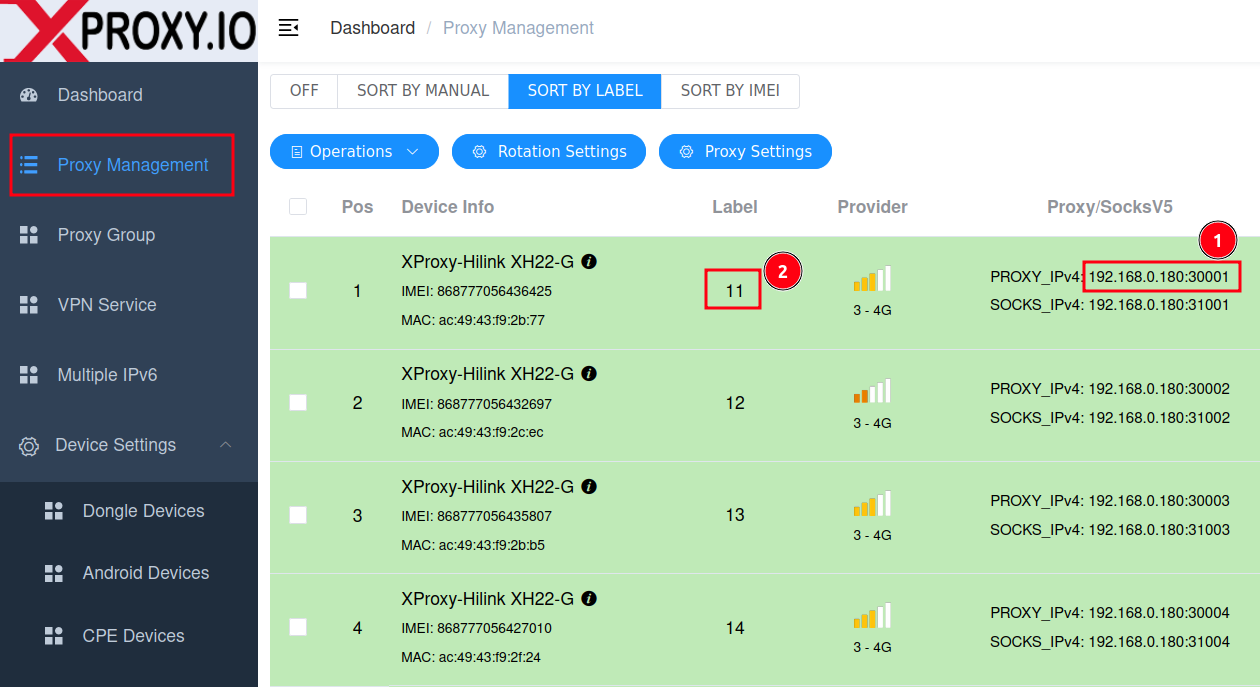
- Copy the proxy (1) (e.g: 192.168.0.180:30001 in example aboves)
- Open Foxyproxy extension in the top right of Firefox browser -> Click Options
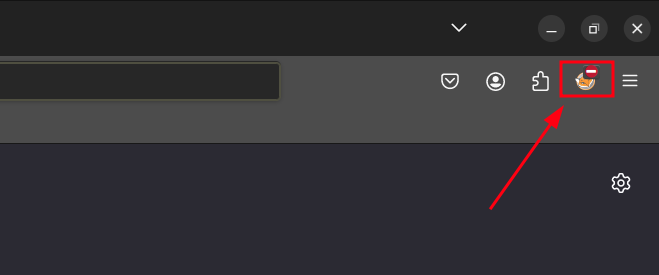
- Fill this proxy into Foxyproxy extension (noted, fill your info proxy copied before):

Step 3:
- Browse dongle panel:
Look at the screenshot of Step 2, you can see the Label (2) of this proxy (192.168.0.180:30001) is number 11
- Now you can access the url: http://192.168.<label>.1
In this example, this is http://192.168.11.1
Default login password for Xproxy dongles: admin/admin
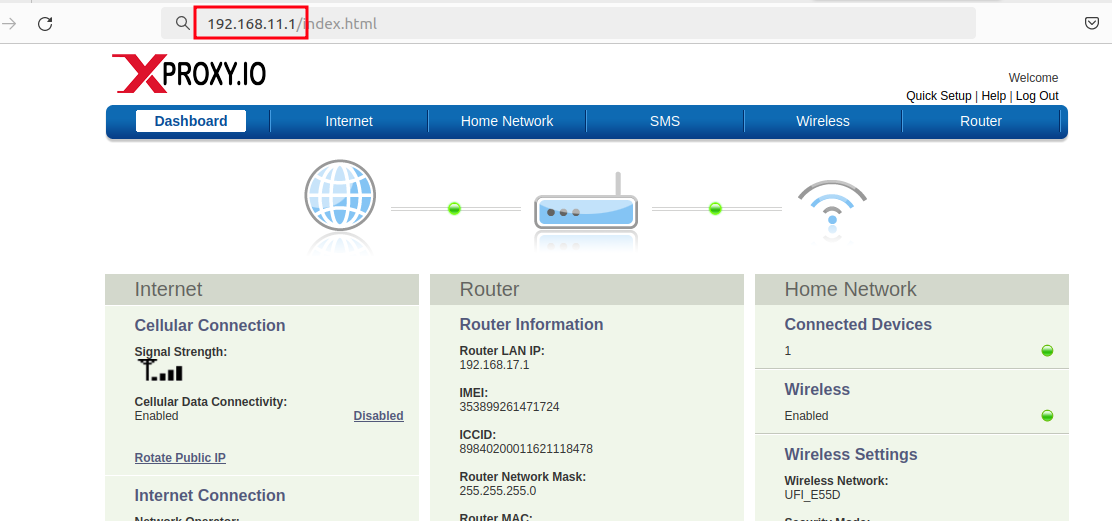
Similarly, for proxy 192.168.0.180:30002, the url to access throught this proxy is 192.168.12.1 (label 12)
Step 4: Configure APN (in case you want enable IPv6 or difference APN)
Go internet Menu -> Disable Auto Configure APN (1) -> Save (2)
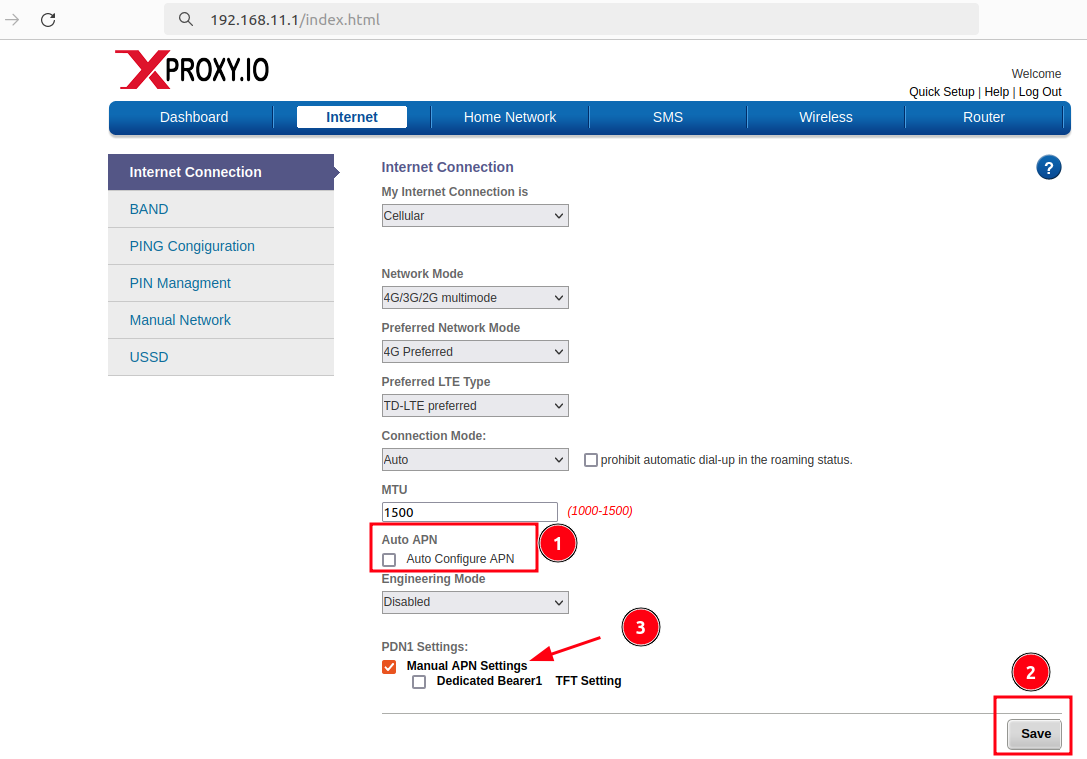
Click Manual APN Settings (3):
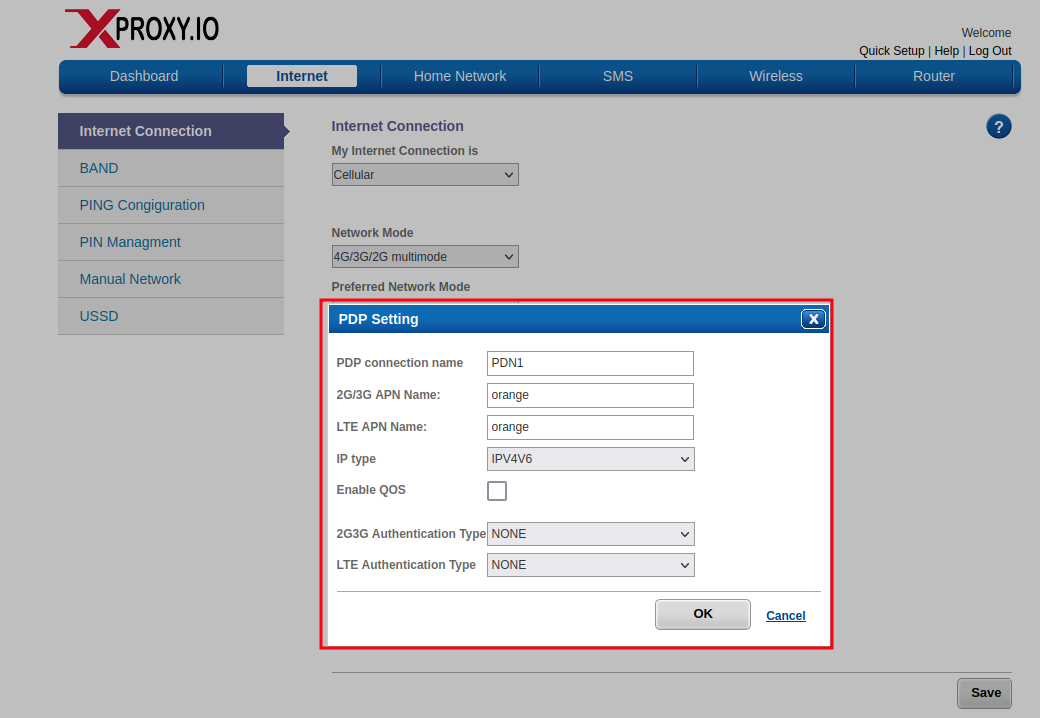
- Fill APN for both 2G/3G APN Name, LTE APN Name (all same APN)
- IP Type: Choice IPV4V6 if you want to use dual proxies stack.
- 2G3G Authentication Type / LTE Authentication Type: choice Authenticaion PAP/CHAP depend on operator required.
- Click OK -> Save (2)
Step 5: Disable PIN/PUK if your sim required
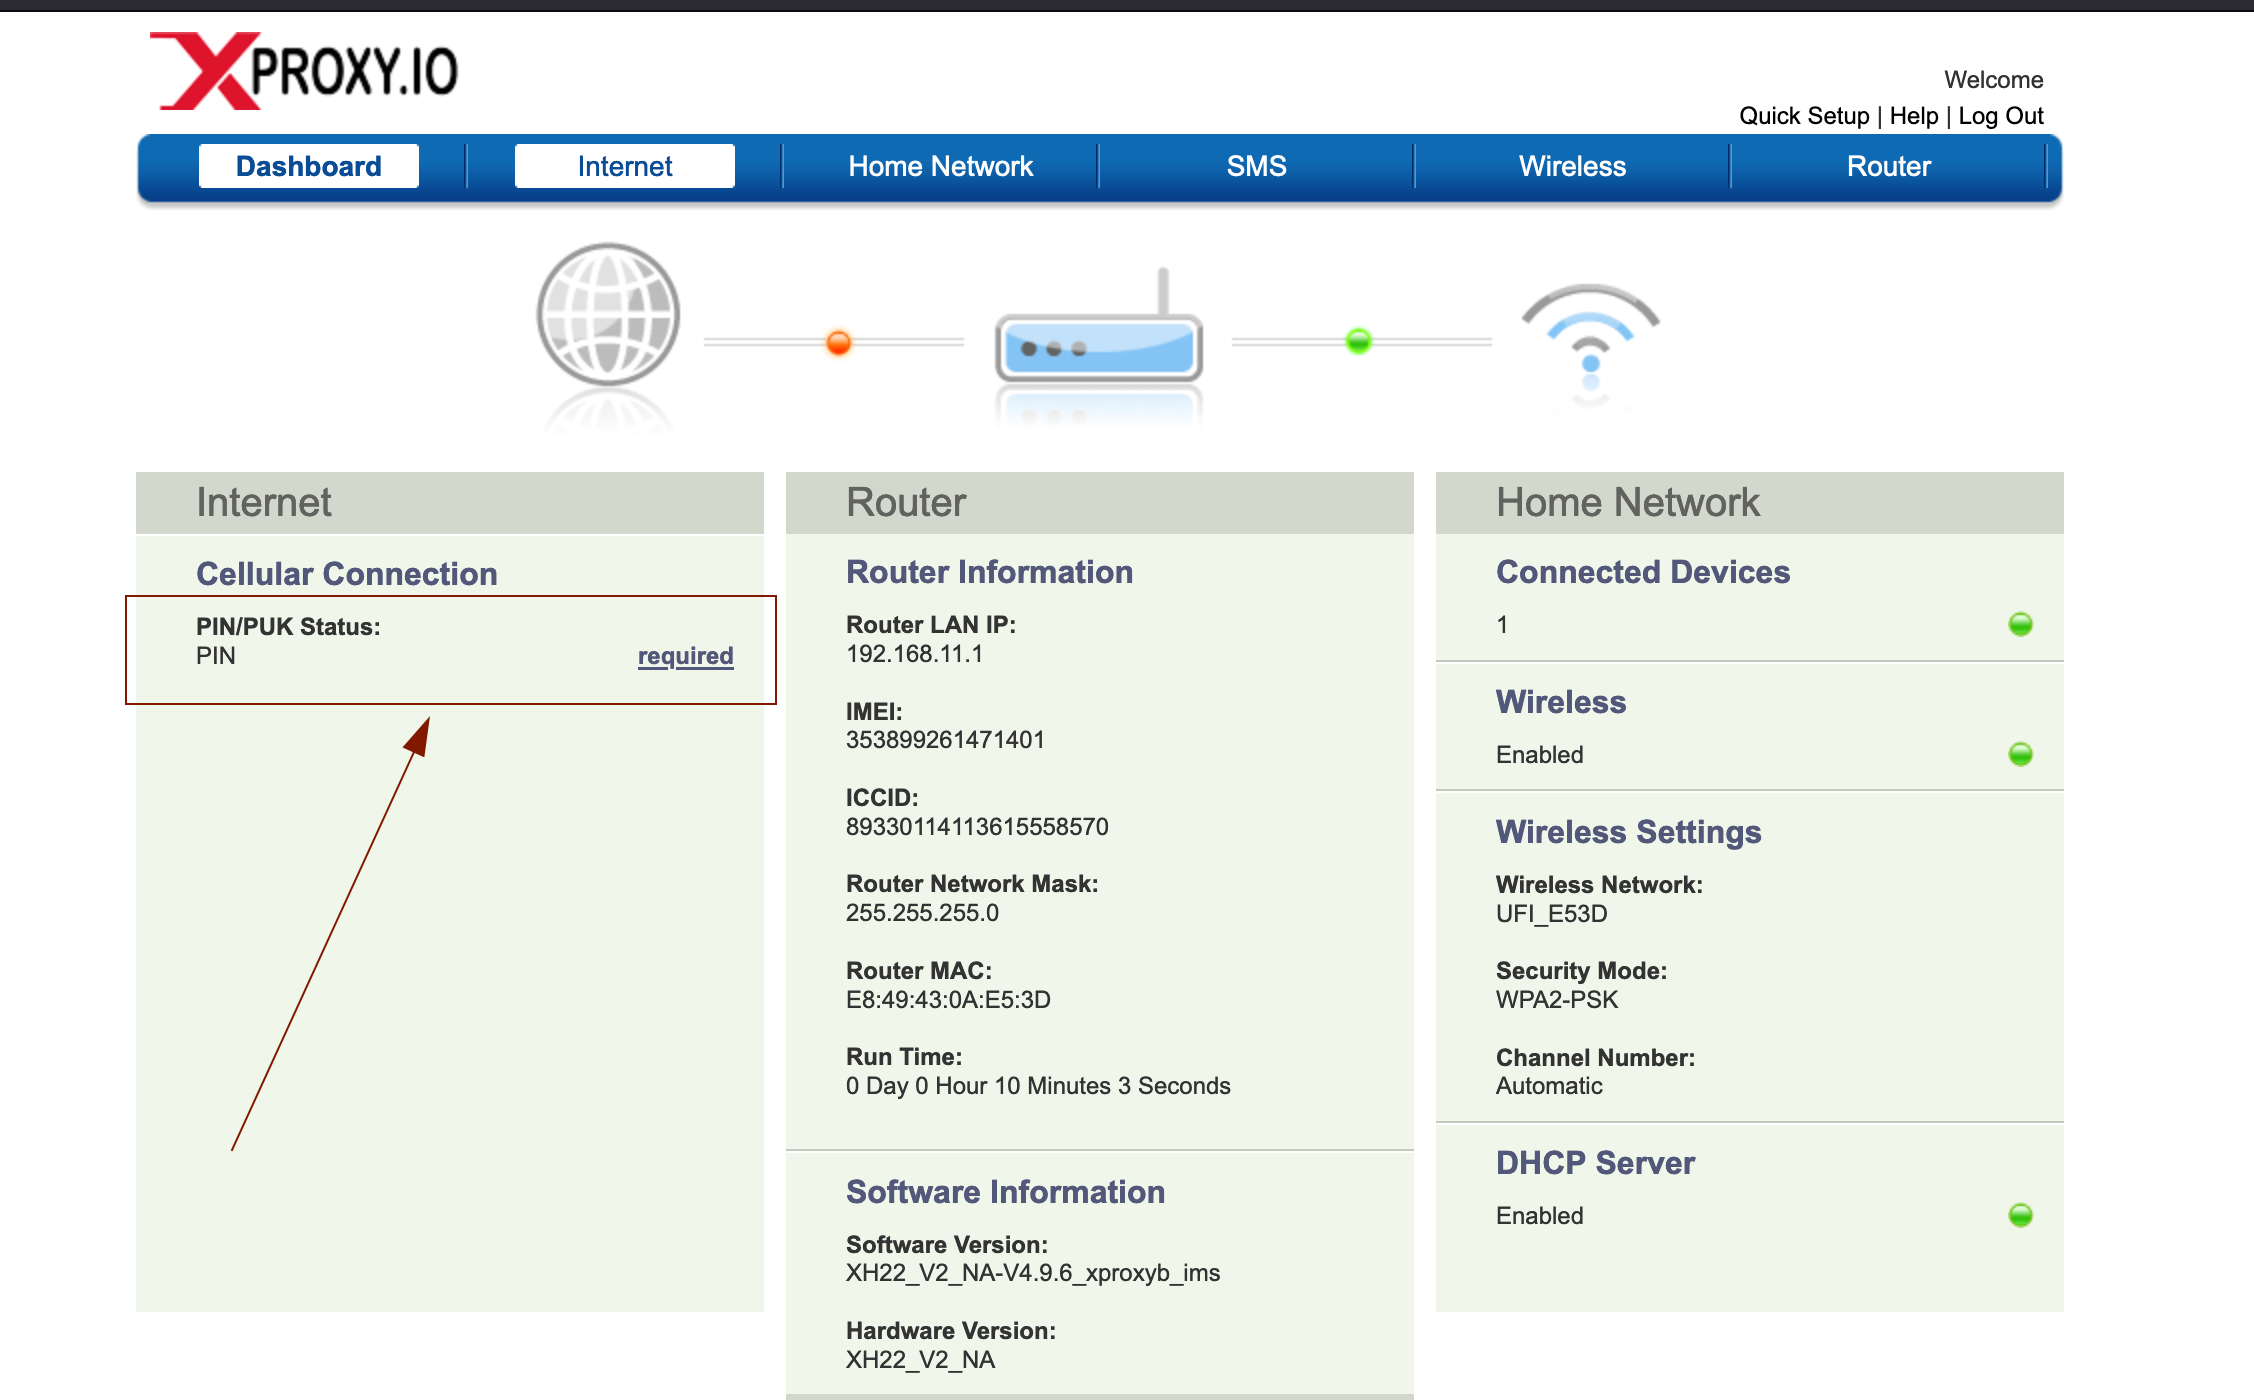
Click required -> Next page -> Enter your PIN and Remove it.