
How to Change / Rotate IP of Proxy
XProxy mobile proxies support dynamic exit IP changes. You can rotate your proxy's public IP address manually from the admin dashboard, automatically on a timer schedule, via a client portal GUI, or programmatically using raw HTTP API endpoints.
Part 1 — Admin Dashboard IP Rotation
As an XProxy administrator, you can manage and rotate modems directly from your main control panel.
1. Manual IP Rotation (Instant)
Change your proxy IP immediately with one click:
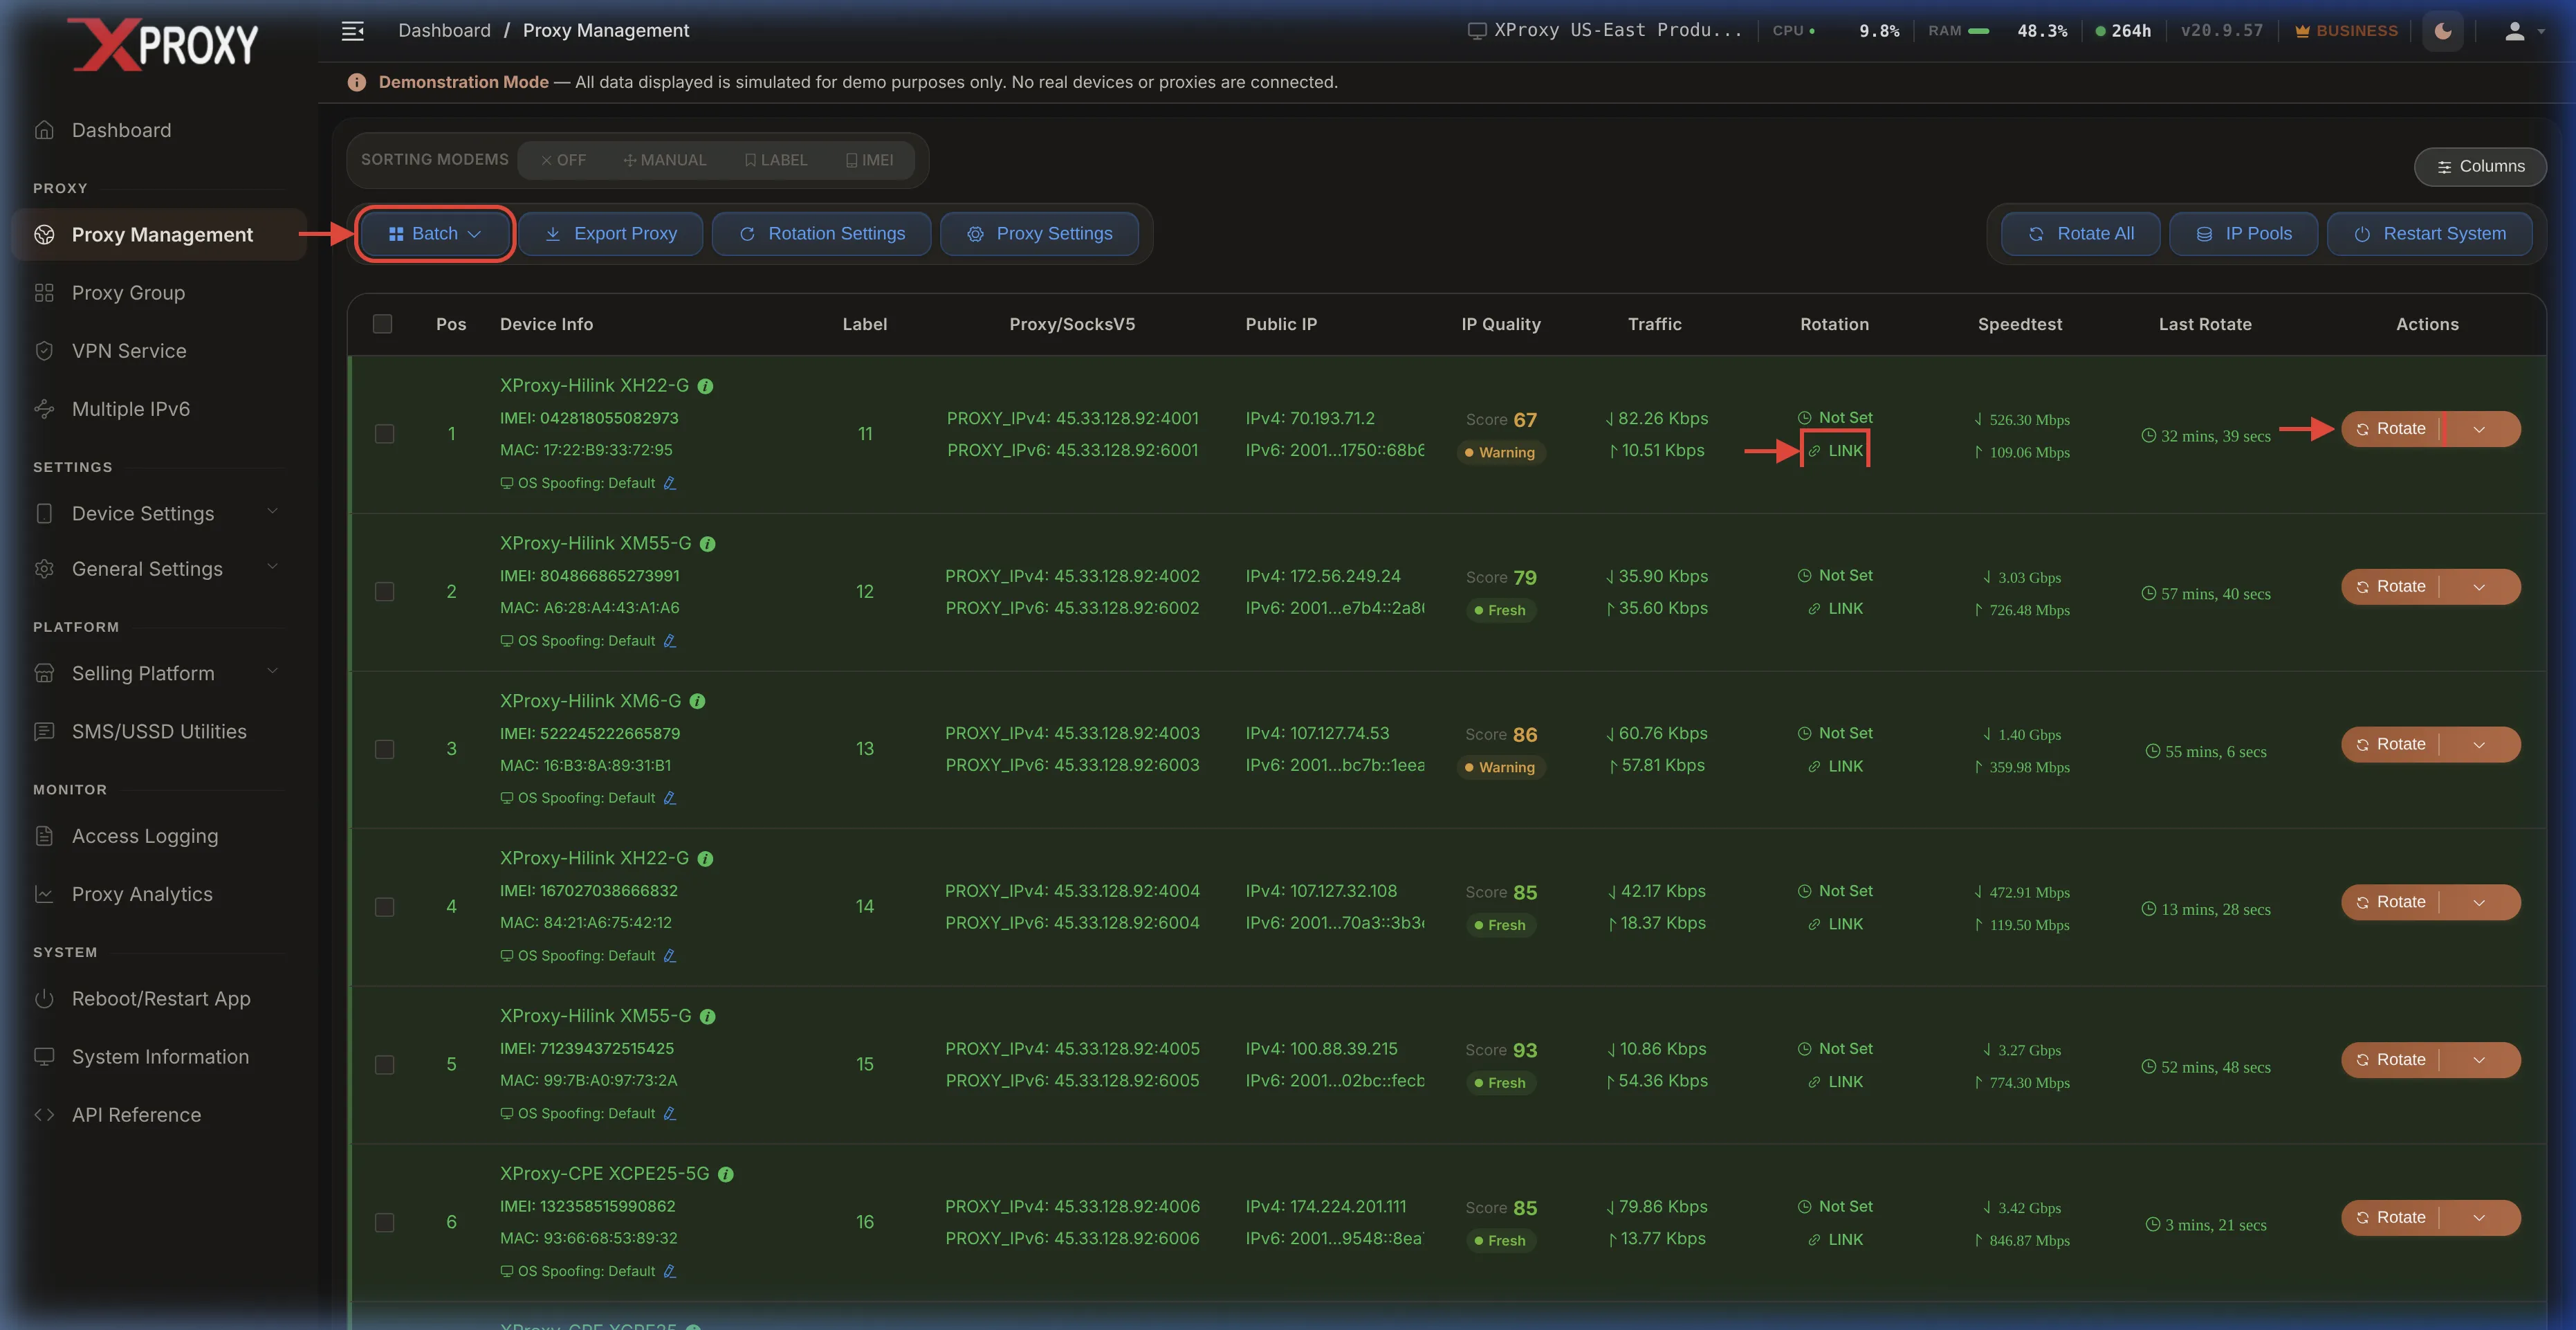
- Go to the Proxy Management page.
- Find your proxy in the table list.
- Click the orange Rotate button at the far right of the row.
2. Scheduled Auto-Rotation (Timer)
Set your proxies to rotate automatically at regular intervals (e.g. every 5 minutes):
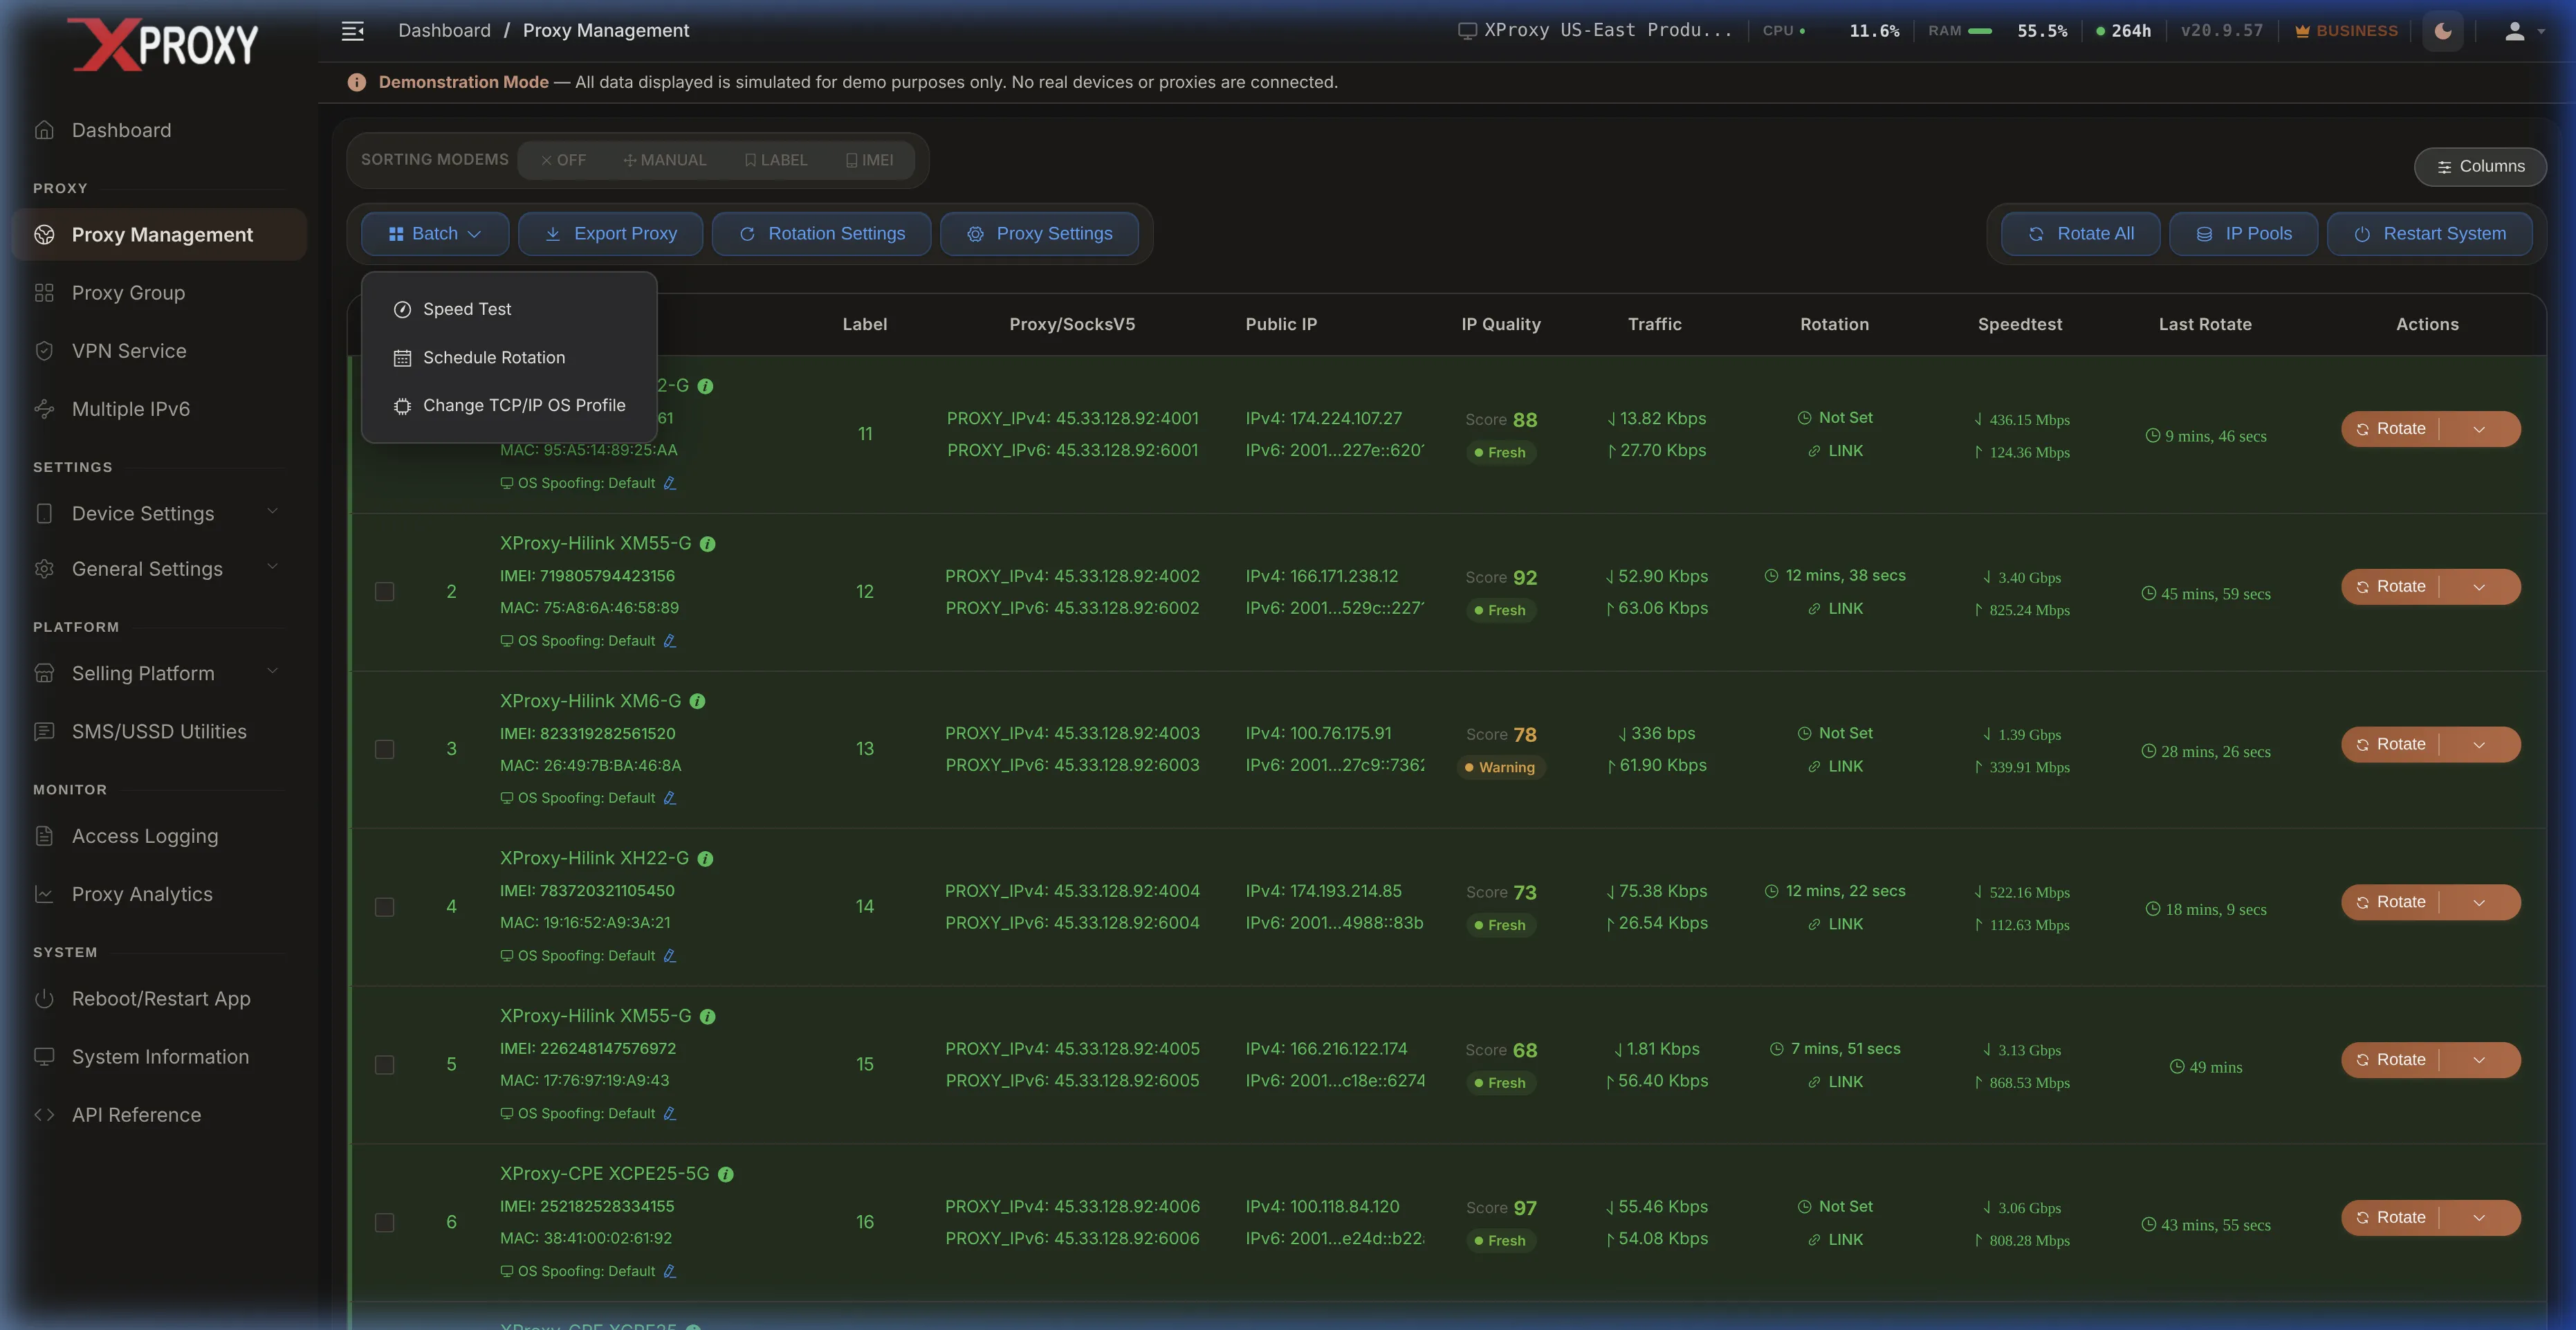
- Select one or more proxies by checking their checkboxes in the first column.
- Click the Batch dropdown button in the toolbar and select Schedule Rotation.
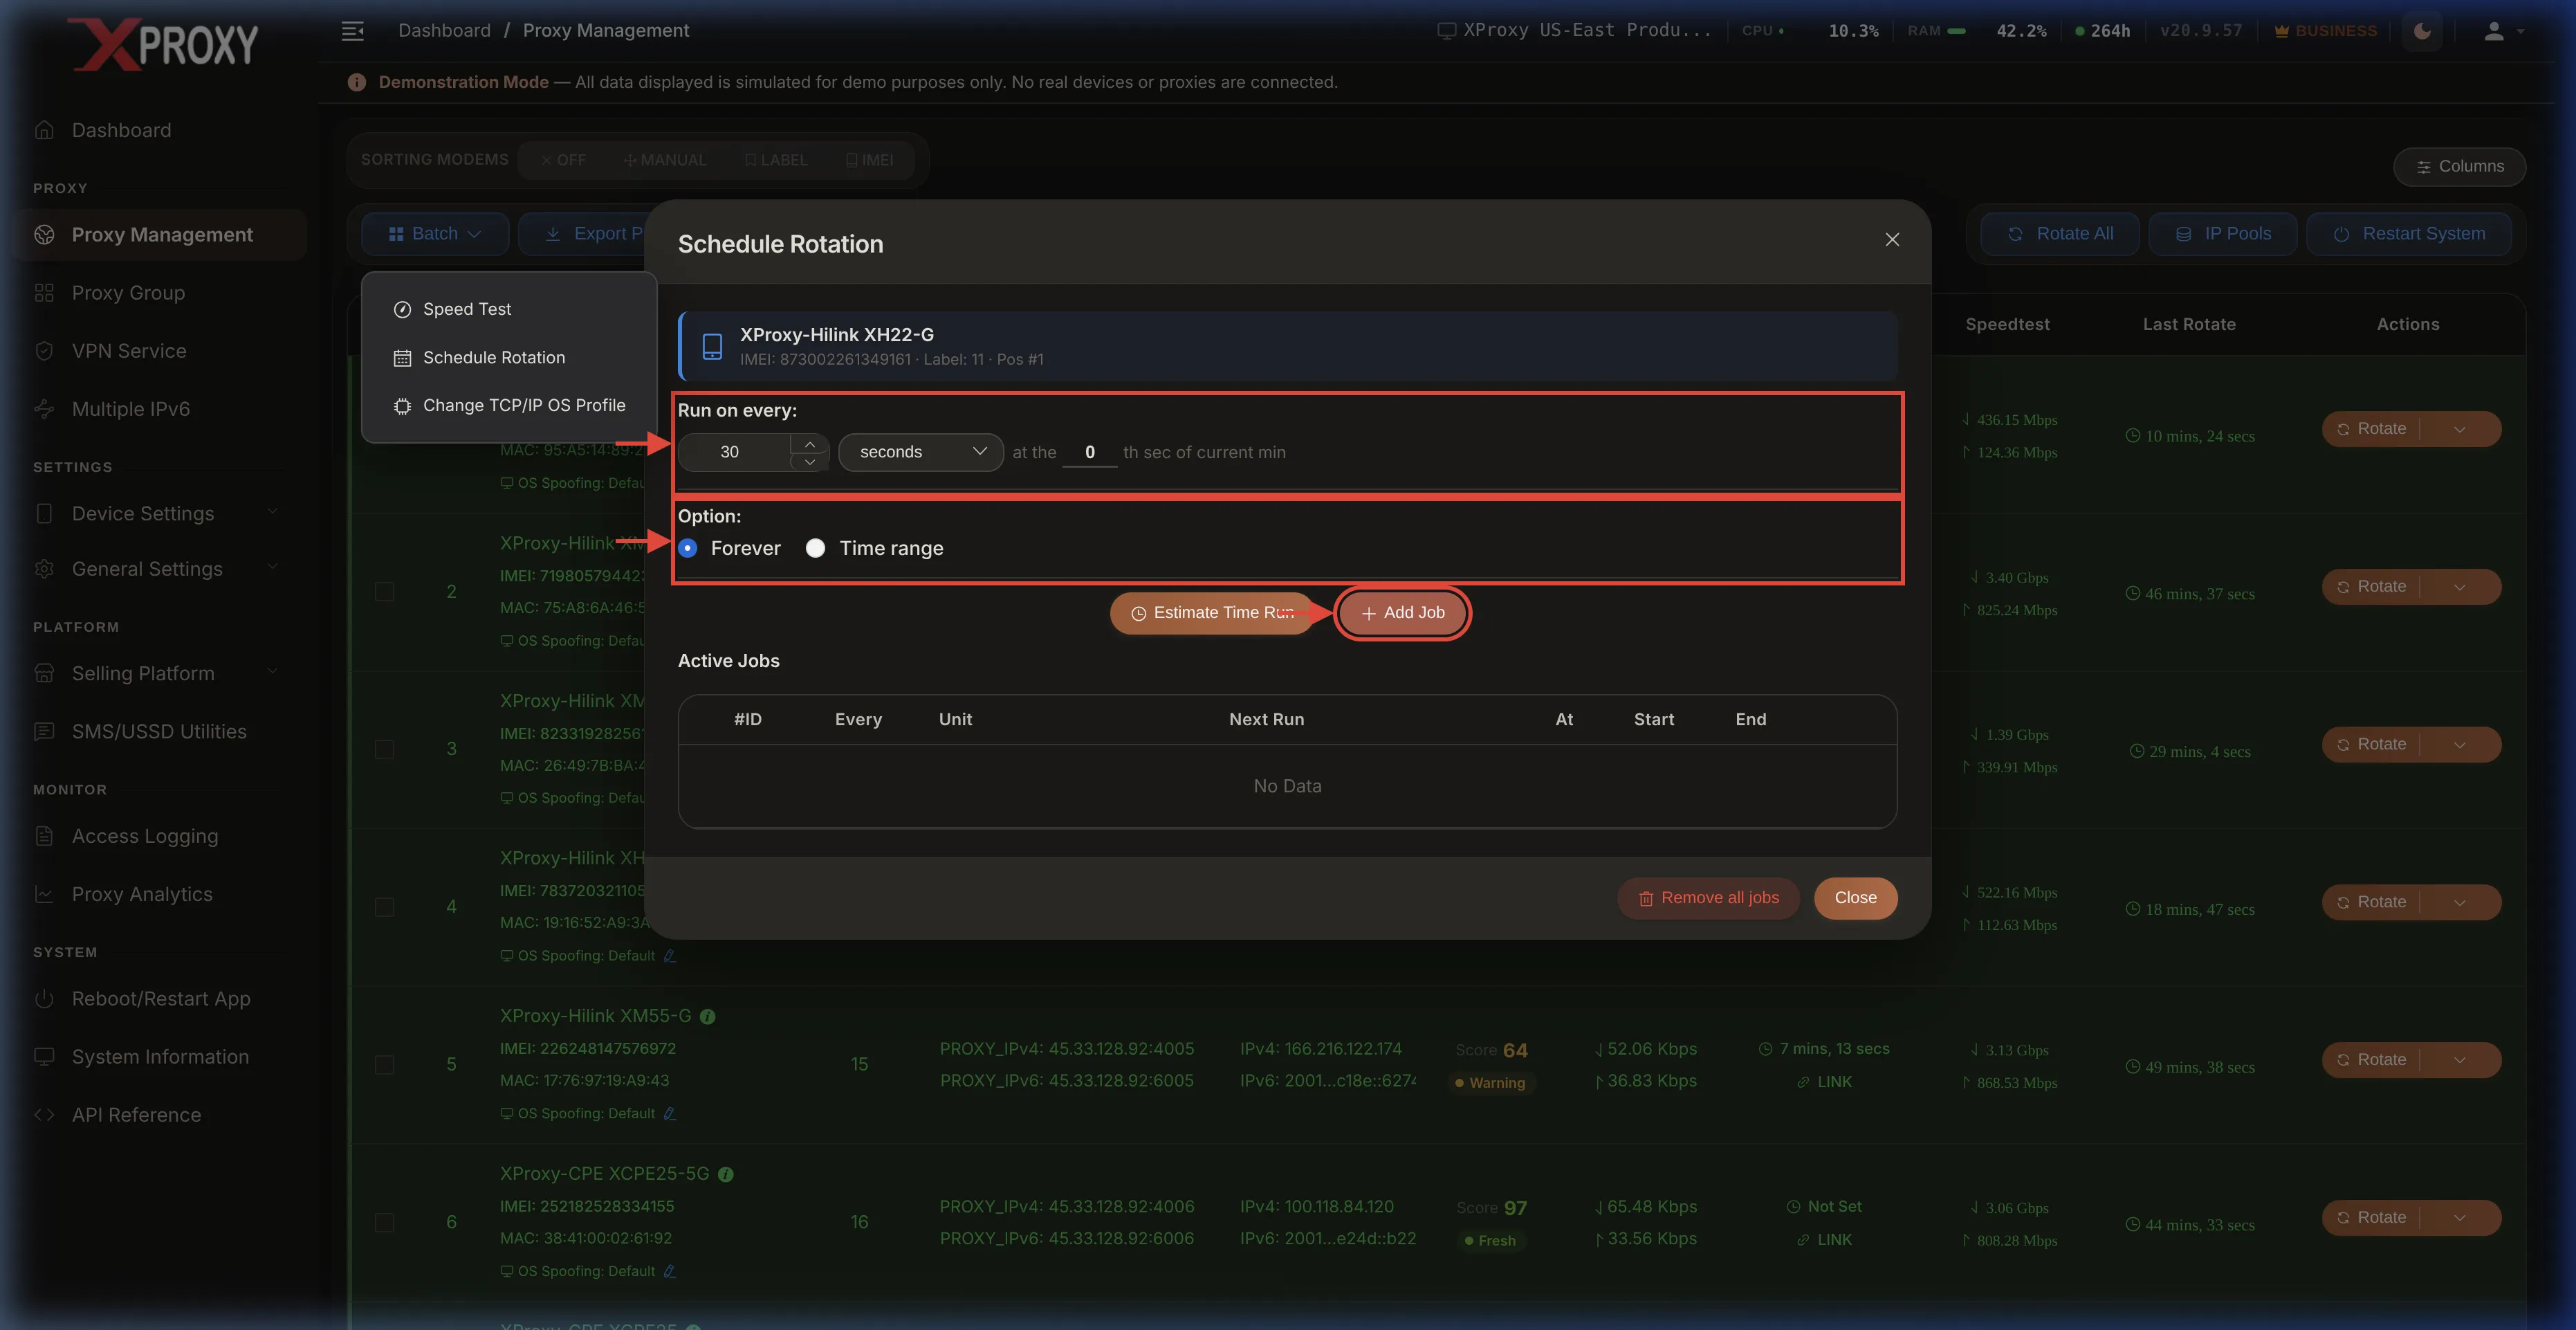
- In the Schedule Rotation modal:
- Enter your rotation interval (e.g.,
30 secondsor5 minutes) under Run on every. - Choose Forever to rotate 24/7.
- Click the orange + Add Job button to save and activate the schedule.
- Enter your rotation interval (e.g.,
3. Get the Rotation API Link
Copy a unique HTTP GET request link to trigger rotations programmatically:
- Go to the Rotation column in the proxy table.
- Click the LINK text located directly below the countdown timer.
- The rotation API link will be copied directly to your clipboard. You can paste this URL into your bot or script to trigger a new IP on demand.
4. Customizing the API Link Domain or IP
By default, the copied API link uses your local XProxy server IP. If you want the link to use your custom domain or public IP, configure the Display Host:
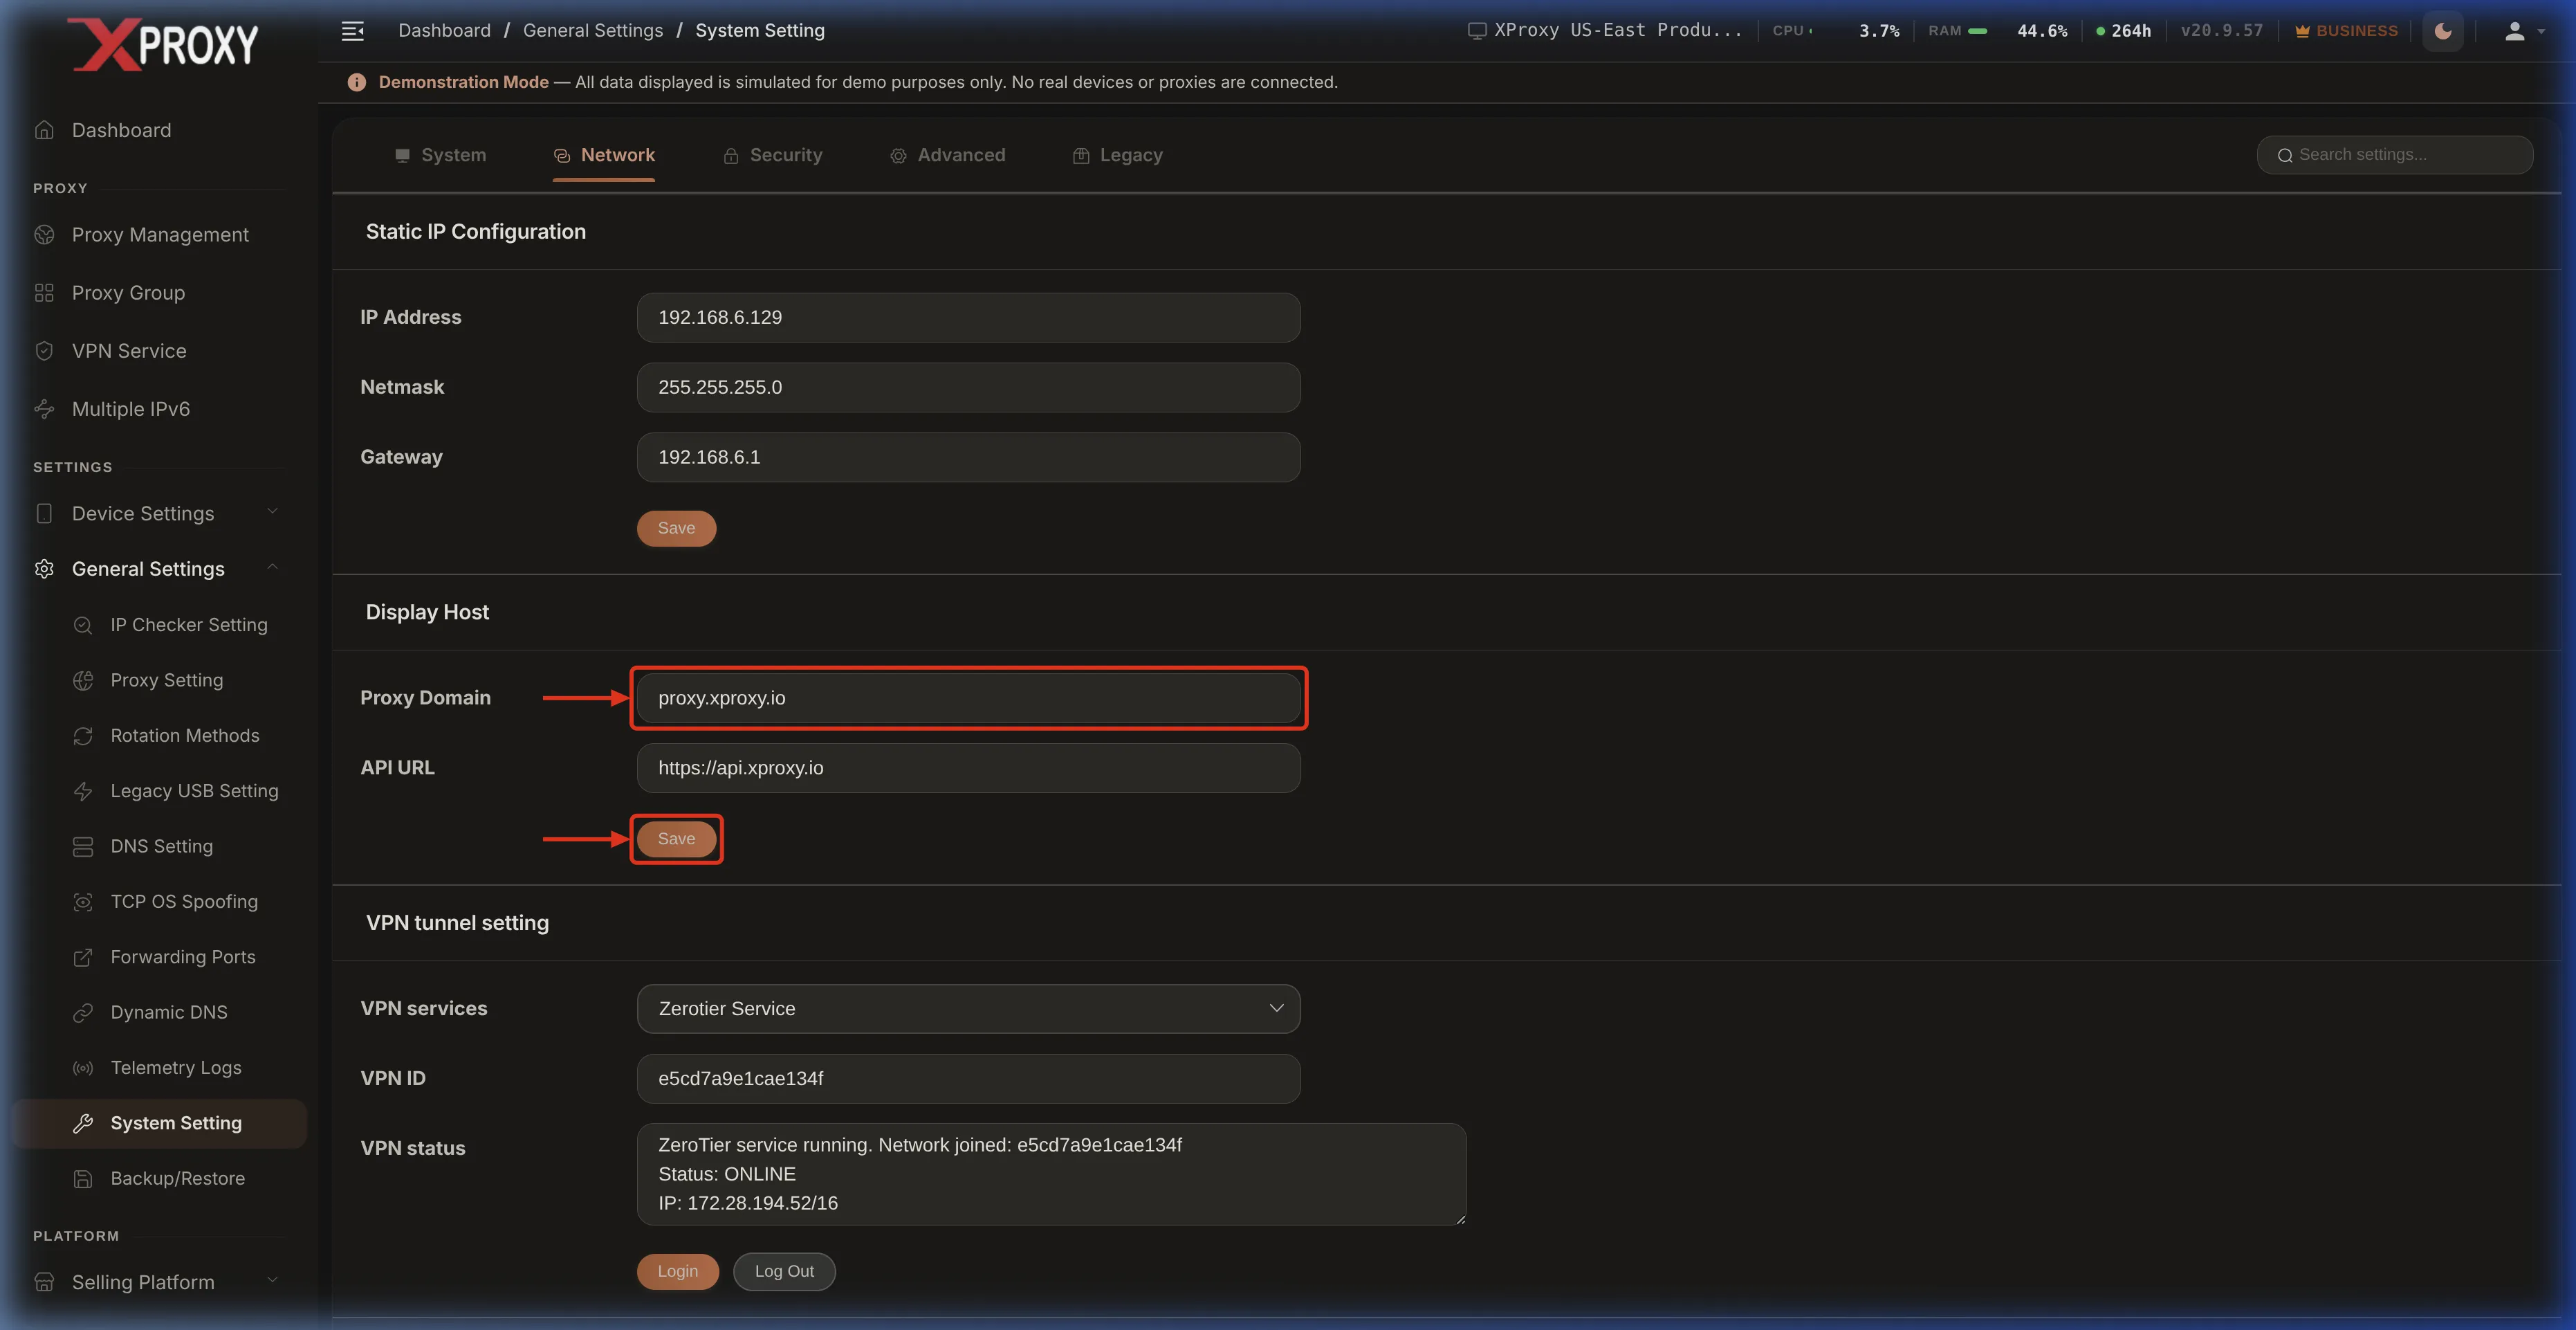
- Go to General Settings in the left sidebar, and select System Setting.
- Under the Network tab, locate the Display Host card.
- In the Proxy Domain input field, enter your custom domain (e.g.,
myproxy.duckdns.org) or your public IP address. - Click Save to apply the settings.
Part 2 — Client Portal IP Rotation (End-User)
If you purchase mobile proxies from an XProxy reseller, you can configure automatic IP rotation directly from your personal client dashboard without needing admin server access.
1. Accessing your Client Dashboard
Your proxy provider will send you a unique management URL containing your access token. Open this URL in any web browser to view your proxy details and control panel.
http://<proxy-provider-domain>/client/<your-unique-token>
# Or:
http://<proxy-provider-domain>/selling/info?token=<your-token>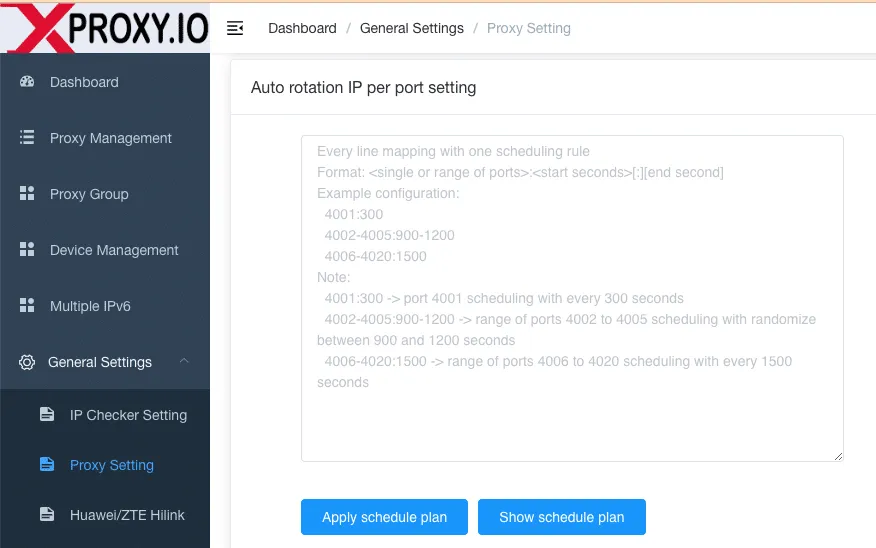
2. Configuring Auto-Rotation
- Locate the IP Rotation Control section on the page.
- Switch the Auto Rotation toggle to ON.
- In the Rotation Interval (seconds) field, input the delay time between rotations (e.g.
300for 5 minutes). - Click the Save Changes (or Update) button to save the configuration.
3. Manual Instant Rotation & API Links
- Manual Rotation: Click the large blue ROTATE IP NOW button to change the IP immediately (takes 5-10 seconds).
- API Integration: Copy the URL in the Rotation API Link text field and call it inside your scraping scripts or paste it into your anti-detect browser profile.
Part 3 — Developer IP Rotation API Reference
For developers, XProxy exposes raw HTTP endpoints to trigger manual rotations, query health status, or manage schedules programmatically.
http://192.168.1.100 or http://myproxy.duckdns.org). NextGen API (v1) — Manual Rotation
1. Rotate IP by Proxy Port
# Path parameters: {proxy} - The host:port string of the target proxy (e.g. localhost:4001)

# Example Request
curl --location 'http://192.168.1.100/api/v1/rotate_ip/proxy/localhost:4001'

# Response (200 OK)
{
    "status": true,
    "msg": "command_sent"
}
2. Rotate IP by Device Position
# Path parameters: {position} - The 1-based integer position index of the modem (e.g. 1)

# Example Request
curl --location 'http://192.168.1.100/api/v1/rotate_ip/position/1'

# Response (200 OK)
{
    "status": true,
    "msg": "command_sent"
}
NextGen API (v2) — Rotation Schedules
1. Add a Rotation Schedule Job
# Headers: Content-Type: application/json
# Example Request
curl --location 'http://192.168.1.100/v2/schedule/rotation_add_job' \
--header 'Content-Type: application/json' \
--data '{
    "run_per_day": "forever",
    "positions": [1],
    "interval": 5,
    "unit": "minutes",
    "specific_time": "00:00",
    "start_time": null,
    "end_time": null
}'

# Response (200 OK)
{
    "status": true,
    "msg": "Schedule rotation added successfully!"
}
2. Retrieve Scheduled Rotation Jobs
# Headers: Content-Type: application/json
# Example Request
curl --location 'http://192.168.1.100/v2/schedule/rotation_jobs' \
--header 'Content-Type: application/json' \
--data '{
    "positions": [1],
    "page": 1,
    "limit": 5
}'

# Response (200 OK)
{
    "status": true,
    "data": {
        "data": [
            {
                "id": 3,
                "position": 1,
                "interval": 5,
                "unit": "minutes",
                "enabled": 1,
                "next_run": 1741690800
            }
        ],
        "total": 1
    }
}
Legacy API — Compatibility Endpoints
1. Check Proxy Status
# Example Request
curl 'http://192.168.1.100/status?proxy=192.168.1.100:4000'

# Response
status = True
msg = MODEM_READY
Possible status message values returned in msg:
| Message Code | Description / State |
|---|---|
MODEM_READY | The modem/proxy is connected and ready to route traffic. |
MODEM_RESETTING | The modem is currently resetting its cellular connection (rotating IP). |
MODEM_NOT_FOUND | No active modem is bound to the requested proxy port. |
MODEM_DISCONNECTED | The modem is physically disconnected or turned off. |
COLLISION_IP | Multiple modems share the same public IP address (IP renewal failed). |
2. Renew / Rotate Proxy IP
# Example Request
curl 'http://192.168.1.100/reset?proxy=192.168.1.100:4000'

# Response
status = True
msg = command_sent