Installing Mobile Phones & 5G Proxies (NextGen)
Set up Android phones as rotating 4G/5G mobile proxies using the XProxy NextGen app. This guide covers all three connection modes and walks you through setup step by step.
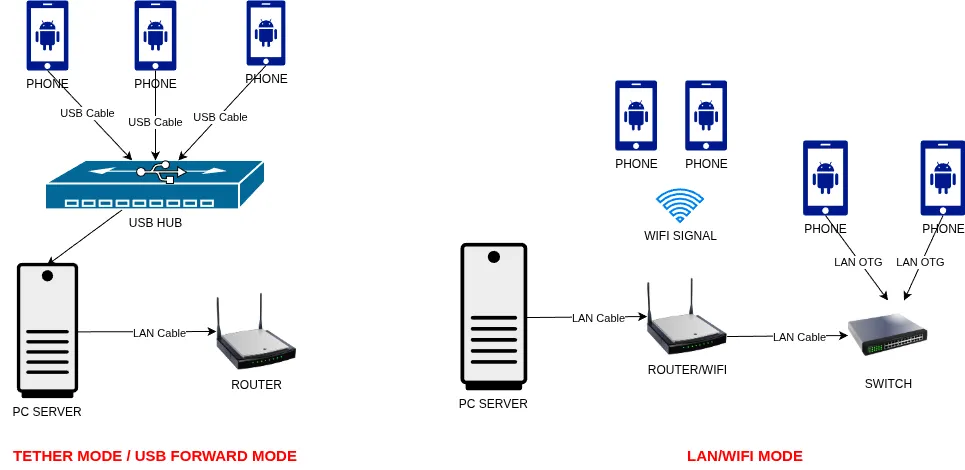
Connection modes
XProxy NextGen supports three ways to connect your phones. Start with USB Forwarding — it's the easiest. Switch to LAN/WiFi later if you're running many phones.
| Mode | How it works | Best for |
|---|---|---|
| USB Forwarding (default) | Phone stays connected via USB cable. XProxy uses USB Debugging (ADB) to control the app and run the proxy. | All new customers. Small to medium setups. |
| LAN/WiFi | Phone connects to your router over WiFi or Ethernet. USB only needed for first setup. | Large setups with many phones. Users with good routers or access points. |
| USB Tether | Phone shares mobile data to the server via USB tethering. ADB still required for control. | Unstable WiFi environments. |
What you need
- Android phone running Android 8.1 (Oreo) or newer — root access not required.
- USB cable — required for USB Forwarding and USB Tether; only needed for first setup in LAN/WiFi mode.
- USB hub — recommended if you have more phones than USB ports on your server.
- XProxy server: 4+ CPU cores, 16 GB RAM minimum, stable network (1 Gbps recommended).
- For LAN/WiFi mode: a stable router or WiFi access point that can handle all phone traffic.
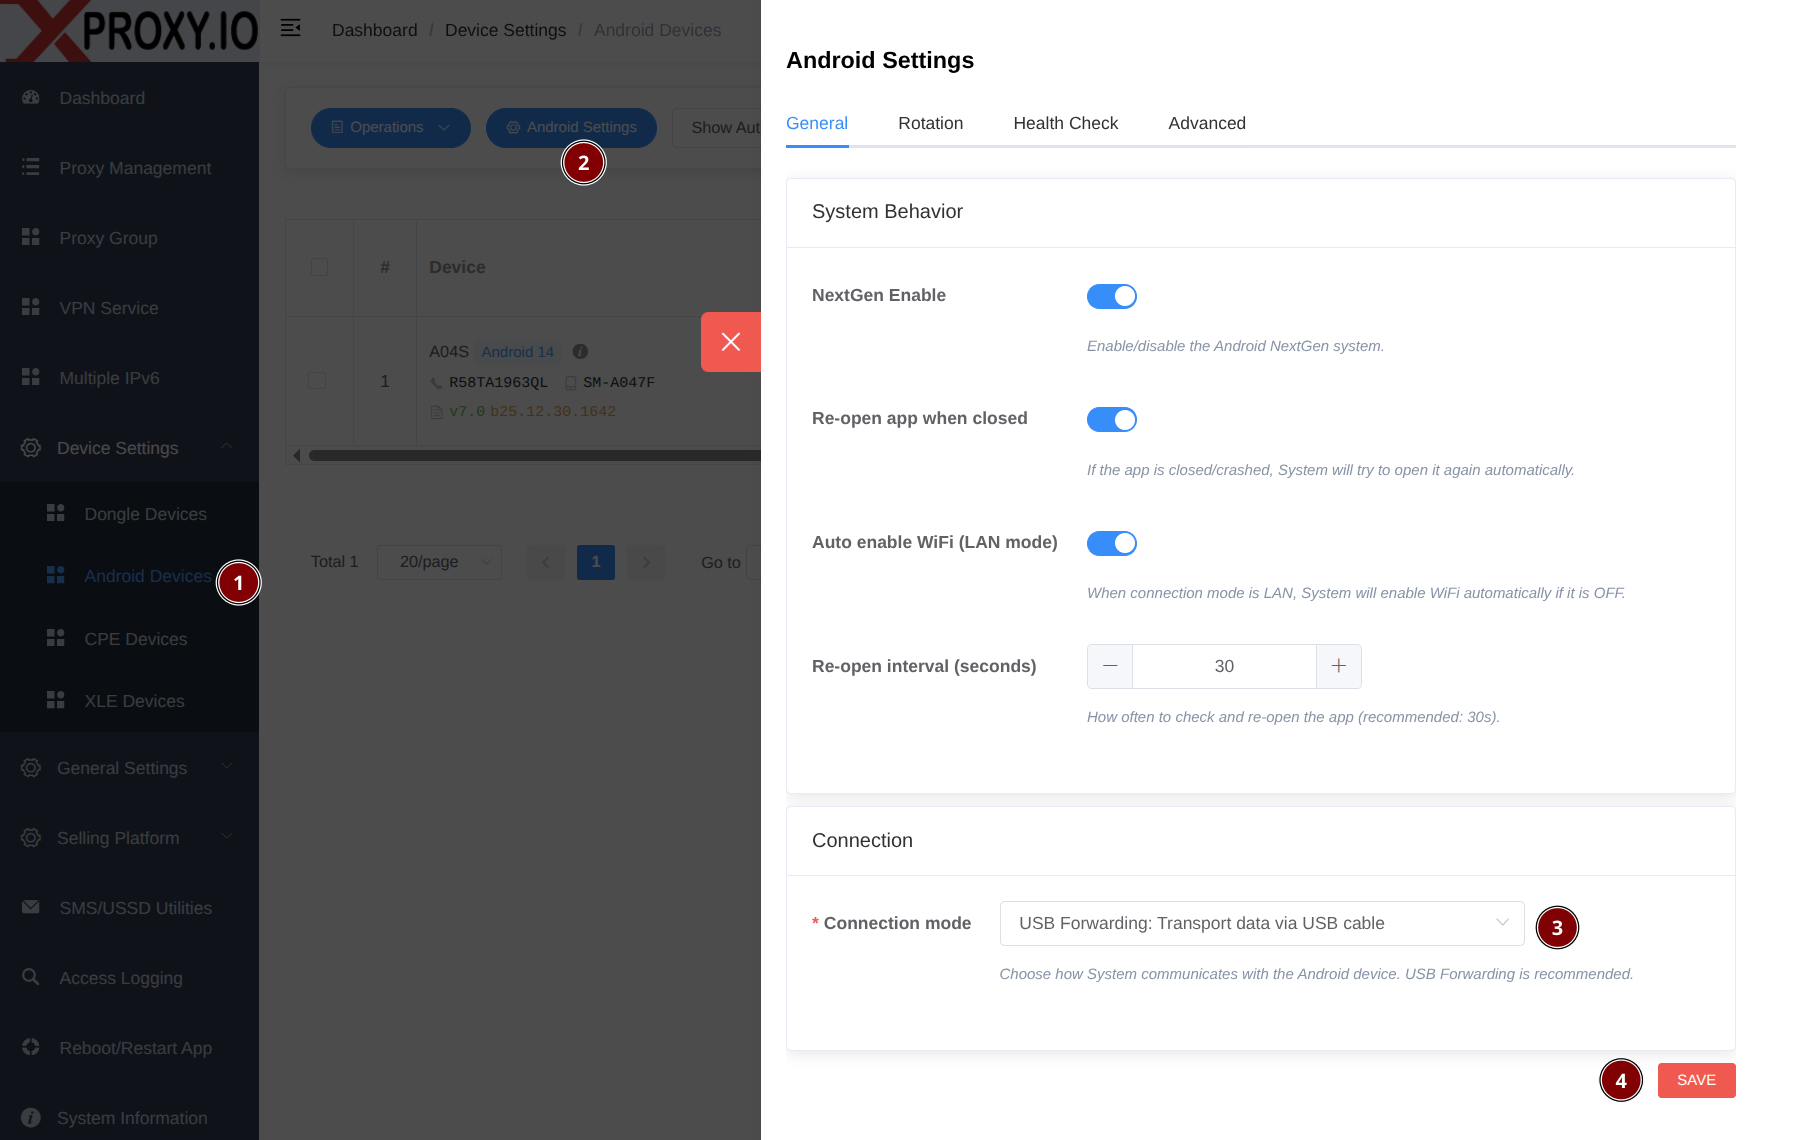
Step 1 — Enable Android NextGen in XProxy panel
In the XProxy panel, go to Settings and enable Android NextGen. Then restart the XProxy panel/server from Device Settings → Android Devices → Android Settings Button.
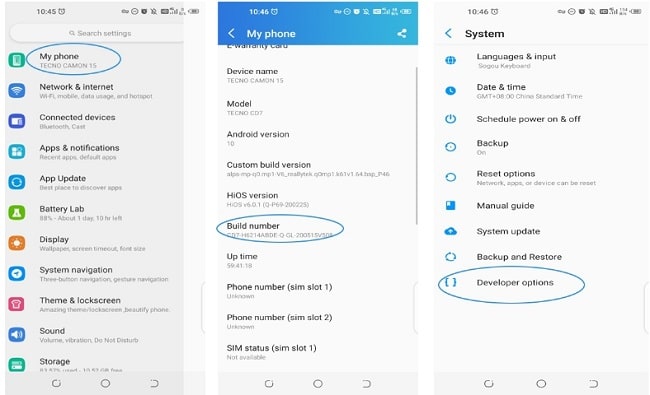
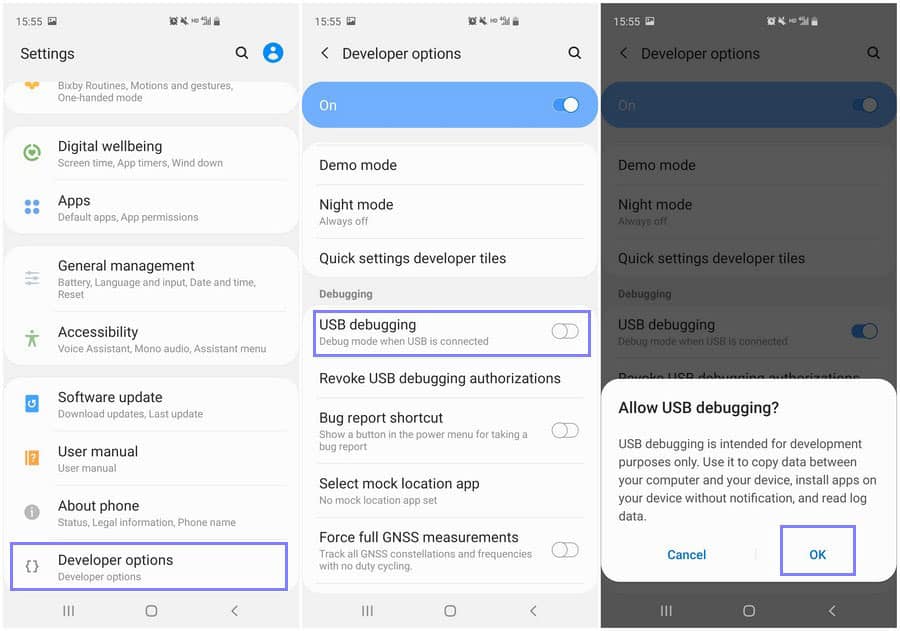
Step 2 — Enable Developer Options and USB Debugging
Required for USB Forwarding and USB Tether modes. Also recommended for first setup in LAN/WiFi mode.
- Go to Settings → About phone → tap Build number 7 times to unlock Developer Options.
- Go to Developer options and enable USB debugging.
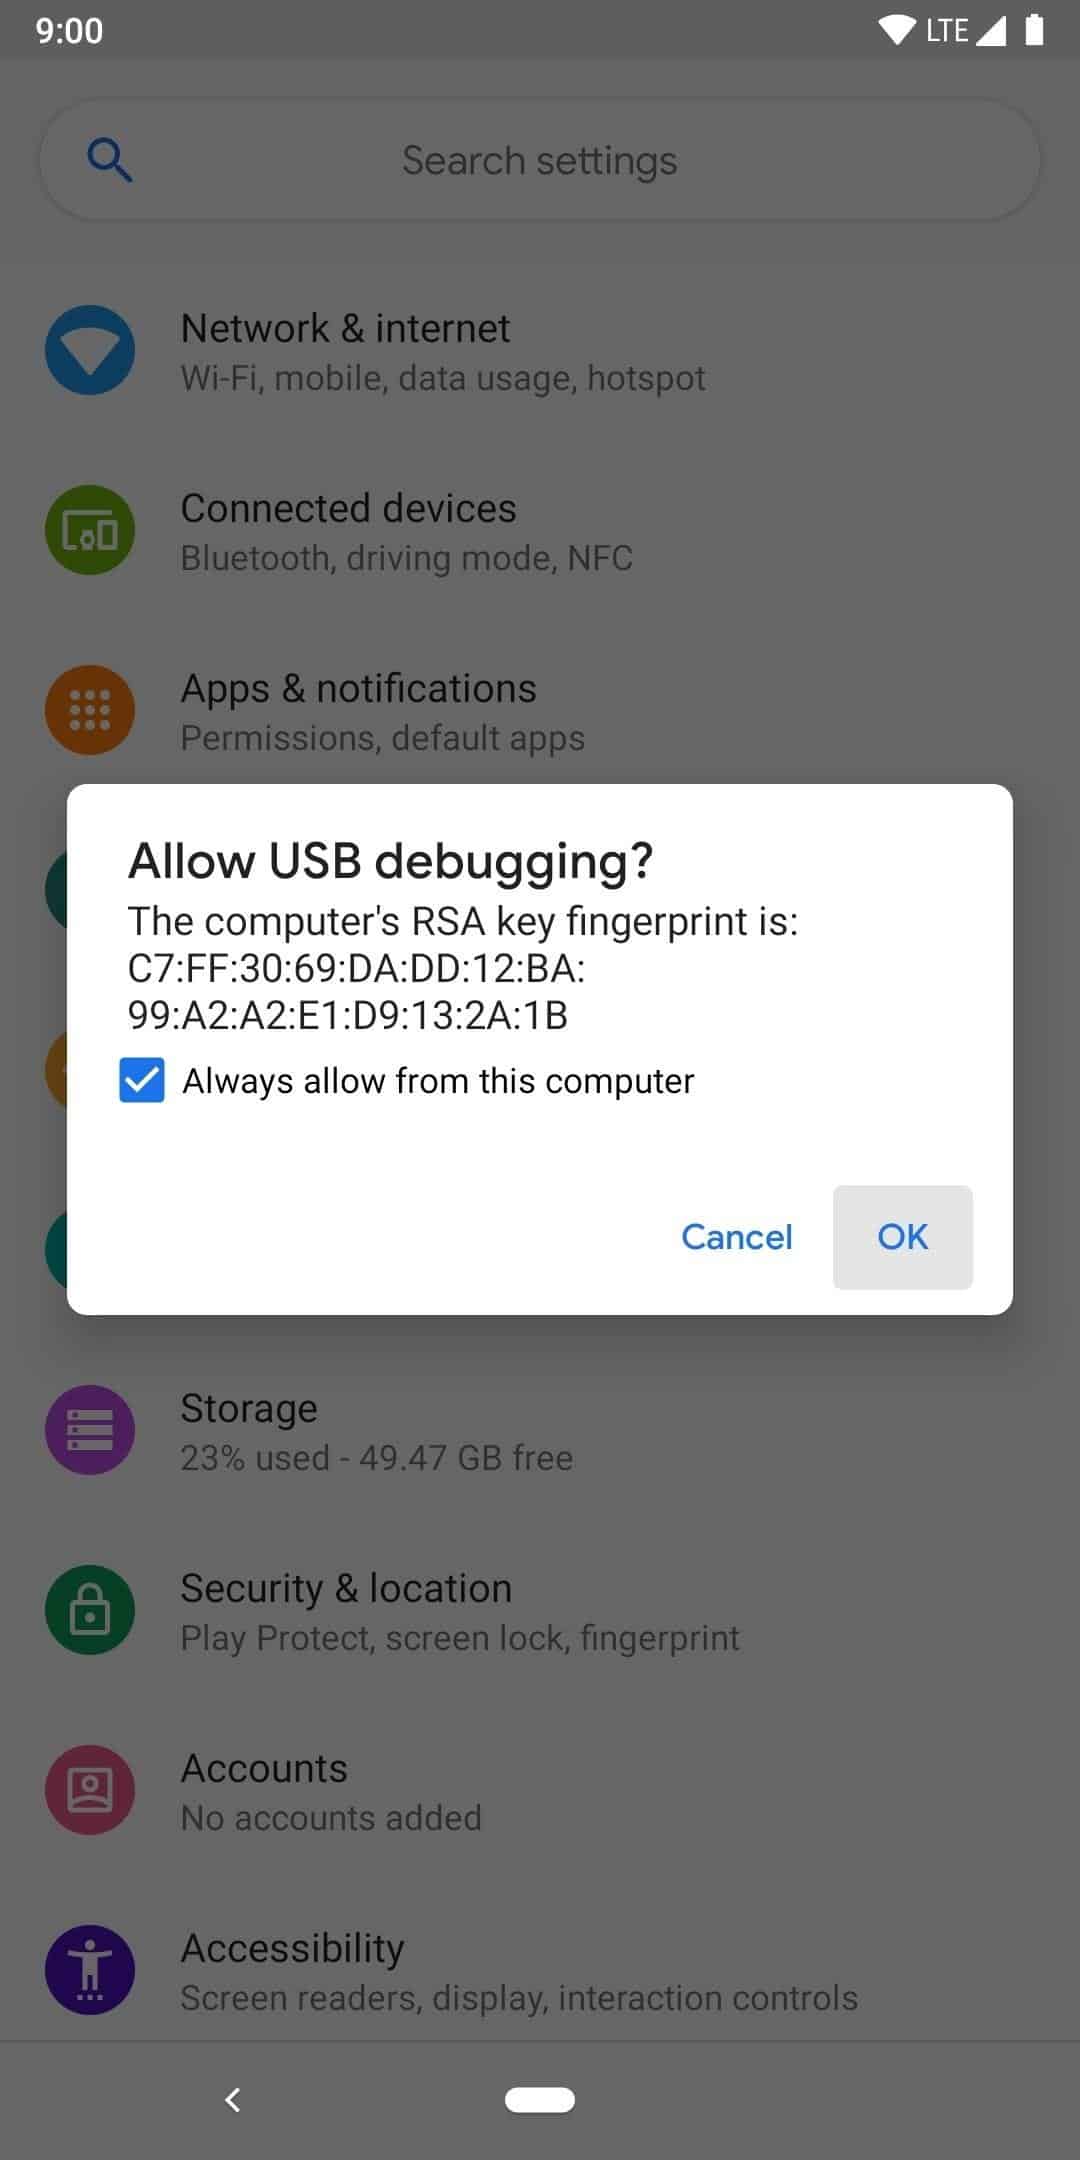
Step 3 — Connect the phone to the XProxy server
Plug the Android phone into the XProxy server via USB. When prompted on the phone, tap Always allow to authorize USB debugging.
The XProxy app installs automatically on the phone. You will see it in your app list.
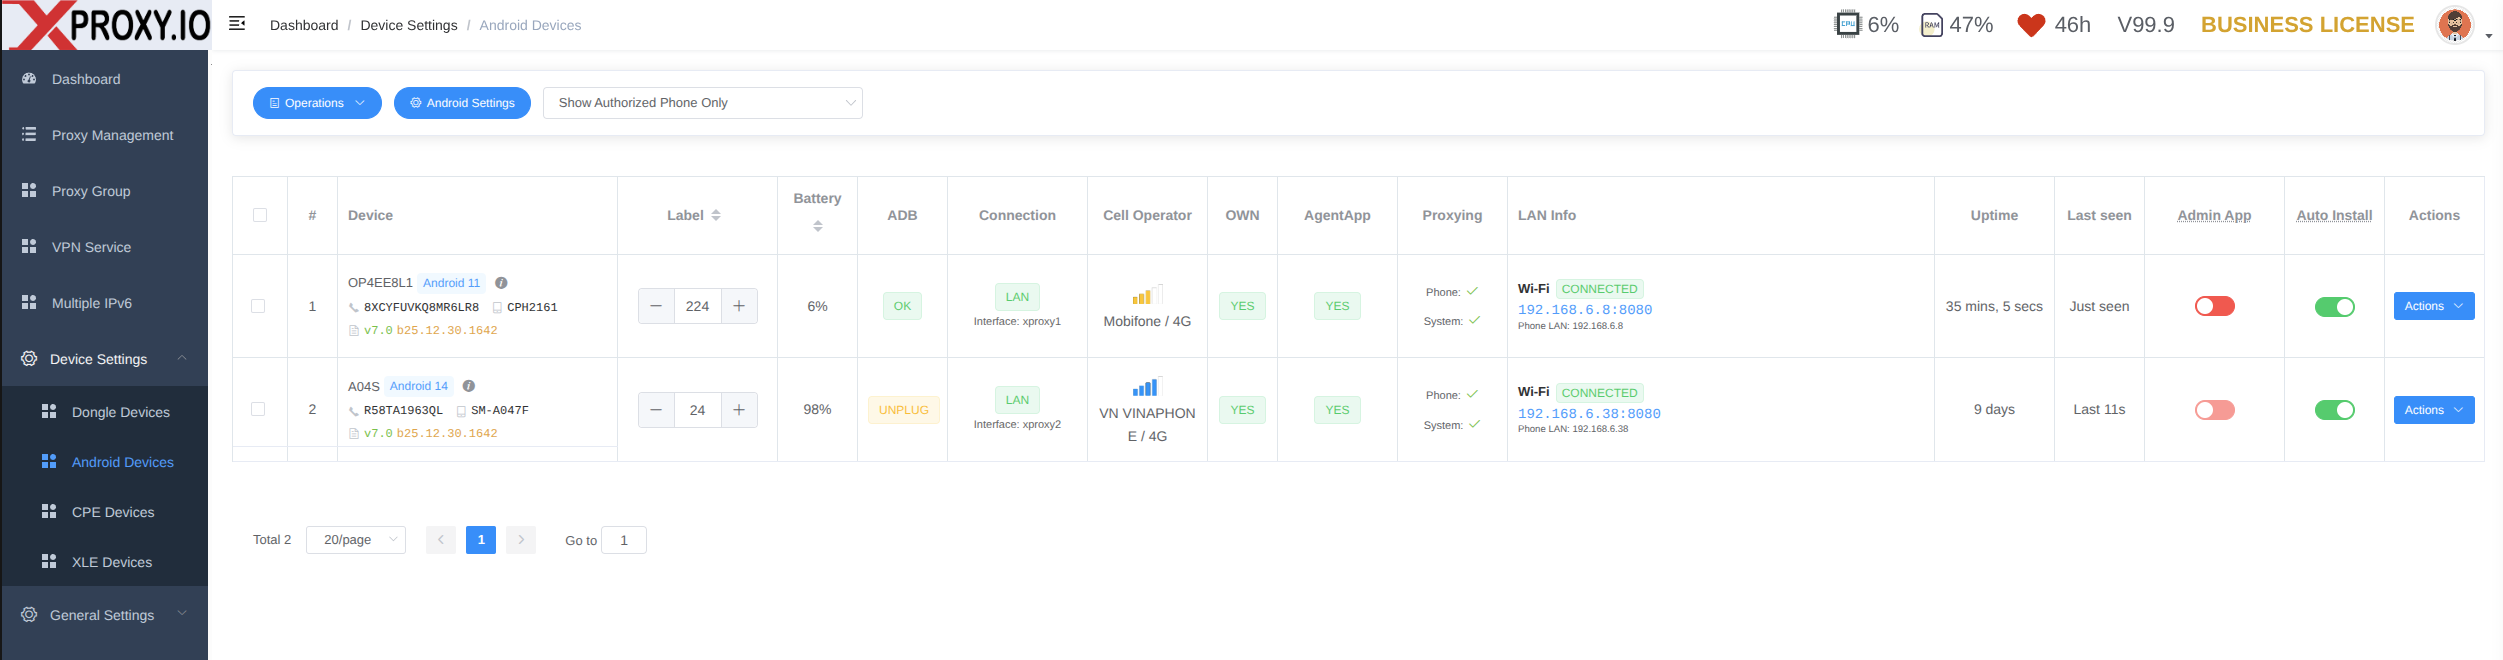
Step 4 — Verify in the XProxy panel
Open Android Devices in the XProxy panel. Your phone should appear within 30 seconds. Check these indicators:
- ADB: connected (for USB modes)
- AgentApp: running/OK
- Proxying: active
- Connection: shows the current mode set on the phone
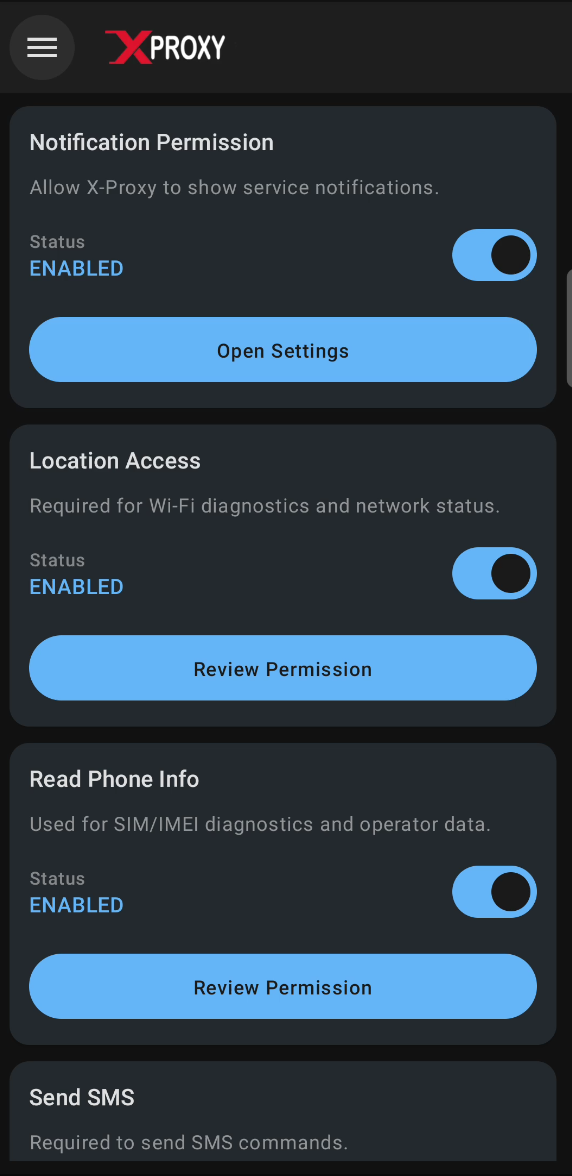
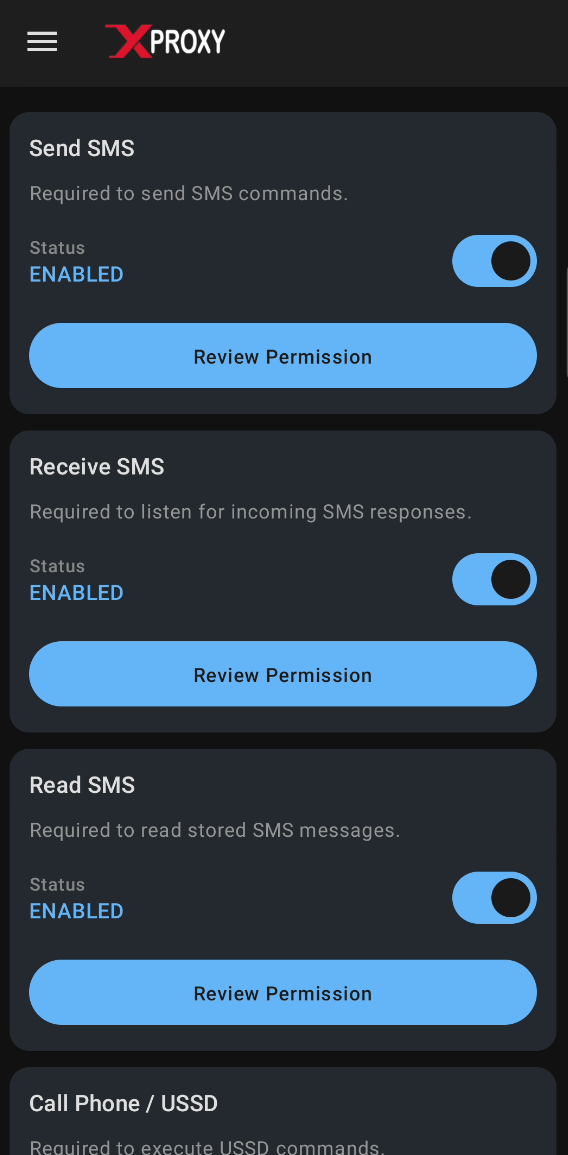
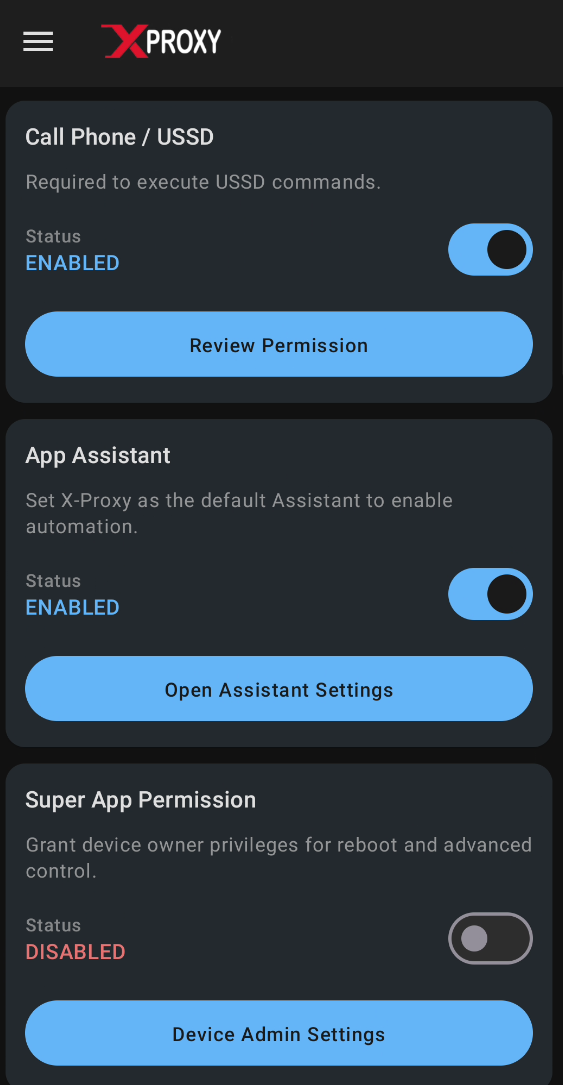
App permissions
The XProxy Android app may request these permissions — grant all of them for full functionality:
- Phone — reads mobile network info (carrier, signal strength).
- Location — required by Android for WiFi scanning and connection.
- SMS / Call / USSD — used for SMS and USSD utilities in the XProxy panel.
- Device Admin (optional) — enables advanced features like remote reboot when not connected via USB.
IPv6 (optional)
If your SIM and carrier support IPv6, XProxy creates IPv6 proxy ports automatically. If you don't see IPv6 ports:
- Check your mobile data APN settings — some carriers require IPv6 to be enabled manually.
- Turn off WiFi on the phone completely (test on cellular only).
- Open https://ipv6-test.com on the phone to confirm IPv6 is working.
Battery tips
Phones running 24/7 may develop battery issues (swelling, fast drain) after 6–12 months.
- Replace batteries periodically to avoid damage.
- Some Samsung models can run without a battery using a direct power source (advanced DIY setup).
Troubleshooting
Phone doesn't appear in the panel
- Open the XProxy Android app at least once on the phone.
- For USB modes: enable USB Debugging and tap Always allow when prompted.
- Try unplugging and reconnecting the USB cable.
LAN/WiFi mode is unstable
- Use a stronger WiFi router or access point, or switch to Ethernet (LAN-OTG cable).
- Avoid crowded WiFi channels.
- Move phones closer to the access point.
Changed connection mode but nothing happens
- Restart the XProxy panel/server — mode changes apply only after restart.
- Verify the mode on the phone matches the server setting.
- If issues persist, reinstall the XProxy app on the phone.