Are you tired of low success rates and being constantly blocked while web scraping? Mobile proxies can be the solution you're looking for. In this comprehensive guide, we'll walk you through the step-by-step process of building your very own mobile proxy using Raspberry Pi.
Mobile proxies have proven to be highly effective for web scraping, and by following this guide, you'll gain the ability to generate thousands of IP addresses daily, significantly improving your scraping success rate.
Please note that this guide is specifically tailored for a small-scale, home-based mobile proxy setup. While it provides valuable insights and instructions, it does not delve into the advanced intricacies of running large-scale mobile proxies, recovering from modem failures, implementing rotating proxies by API, scheduling by time,... If you require access to a reliable production-grade mobile proxy pool for web scraping, we recommend considering our product.
Let's get started on the path to web scraping success with your very own Raspberry Pi-based mobile proxy.
The Importance of Mobile Proxies in Web Scraping
Proxy quality plays a crucial role in determining the success rate of web scraping endeavors. When it comes to proxies, there are three primary types to consider:
- Datacenter Proxies: These proxies offer a vast pool of inexpensive IP addresses associated with datacenters and cloud server providers. However, they are frequently blacklisted and generally unsuitable for web scraping purposes.
- Residential Proxies: These proxies provide IP addresses from an Internet Service Provider (ISP) pool, which are shared among multiple users. While they offer some level of anonymity, they may not always meet the requirements of web scraping projects.
- Mobile Proxies: Mobile proxies are considered the top-tier proxies for web scraping. They operate using ephemeral IP addresses that are frequently rotated among mobile network users as they move between Base Transceiver Stations (BTS). While mobile proxies tend to be more expensive, the investment can be worthwhile. In this guide, we will demonstrate how to build your own mobile proxy pool, enabling you to change IP addresses on demand and generate thousands of new IP addresses daily.
By following this guide, you'll gain valuable insights into constructing your own mobile proxy pool, allowing for increased success and efficiency in web scraping endeavors.
Essential Hardware for Building Your Proxy
To get started, let's discuss the necessary hardware and tools you'll need for this project:
- Raspberry Pi: This will serve as the host for your proxy service, providing the necessary computing power.
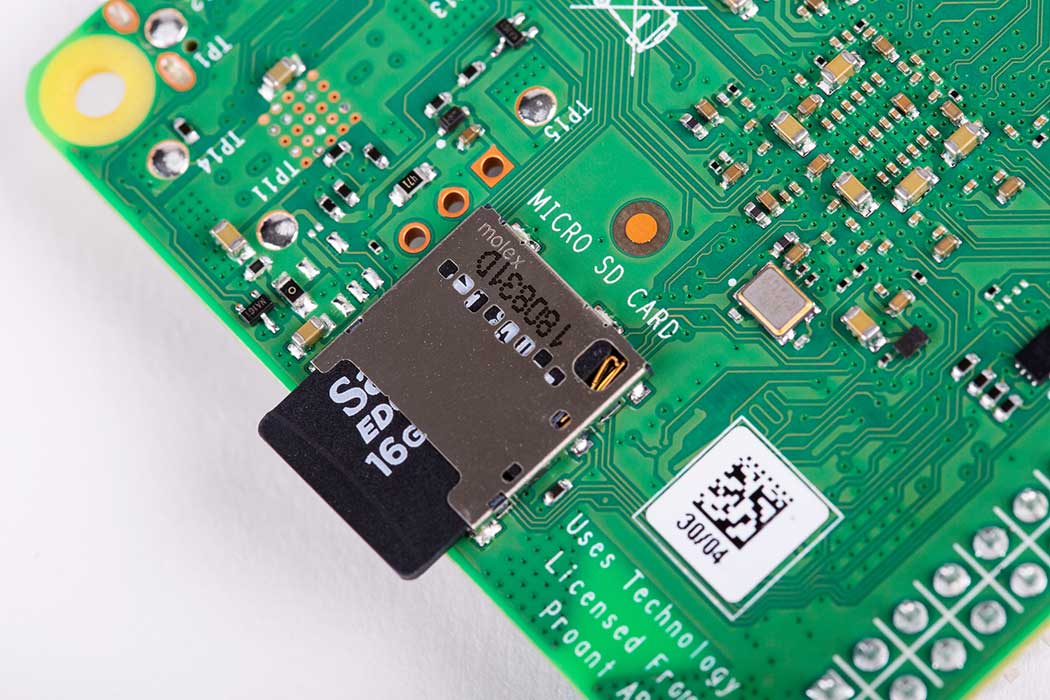
- nanoSD Memory Card: You'll require this card to install the Raspberry Pi OS. Additionally, an SD card adapter is necessary for the installation process.
- Computer with SD Card Slot: You'll need a computer with an SD card slot to install the Raspberry Pi OS onto the nanoSD card. Additionally, a USB-A port is required to initialize the 4G USB modem.
- Ethernet Cable: Connecting the Raspberry Pi to your local network is essential, and an Ethernet cable will facilitate this connection.
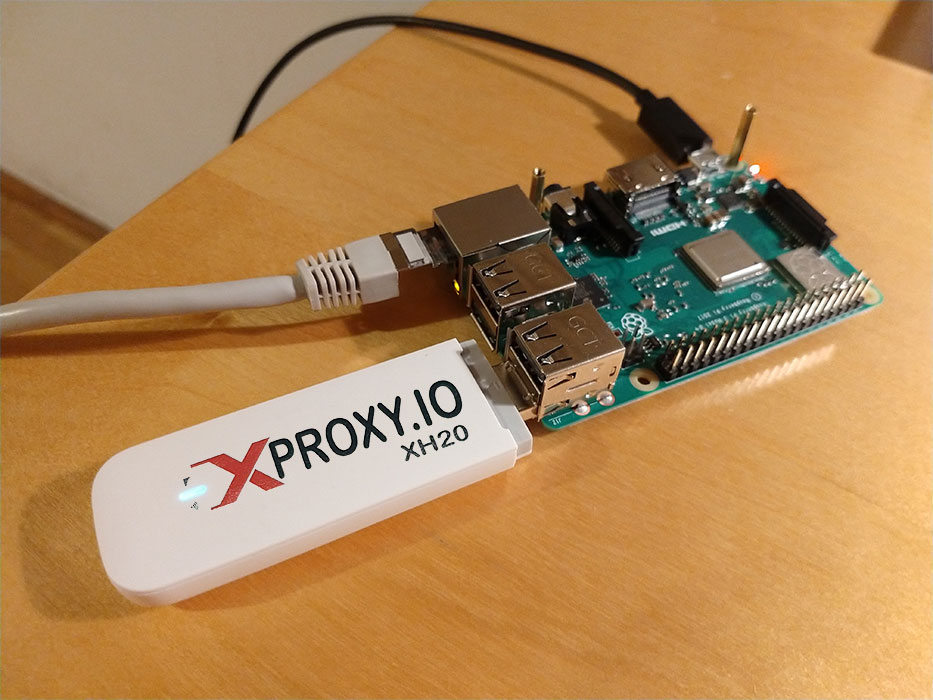
- 4G USB Modem with SIM Card: This component is crucial for establishing the internet connection required for your proxy setup.
- Optional: USB Hub (if connecting more than 2 dongles): If you plan to connect more than two dongles to your setup, a USB hub can be used to expand the number of connections available.
By gathering these hardware components, you'll be well-equipped to proceed with building your own mobile proxy.
Setting Up the Raspberry Pi
To begin, let's walk through the process of setting up your Raspberry Pi. Follow these steps:
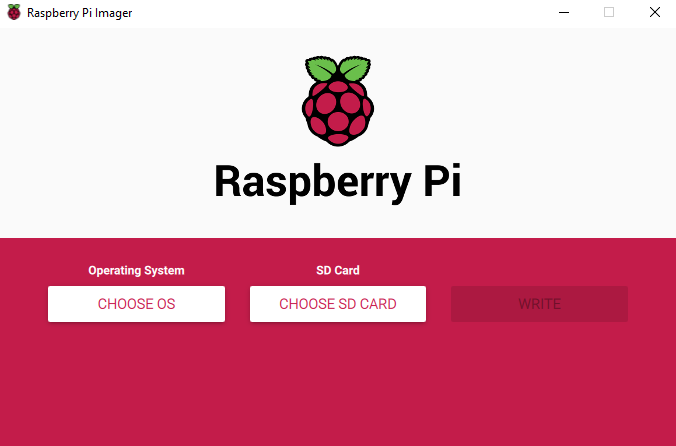
- Install Raspberry Pi Imager on your computer and insert the SD card into your computer's card reader.
- Open Raspberry Pi Imager and select Raspberry Pi OS (32-bit) as the operating system. Choose the SD card as the storage location.
- In the advanced options window (gear icon), ensure that SSH with password authentication is enabled. Set up a username and password for your account.
- Click on "Write" to begin installing the Raspberry Pi OS onto the selected storage. Once the process is complete, eject the SD card from your computer.
- Insert the SD card into the Raspberry Pi and connect the Ethernet and power cables. Wait for the Raspberry Pi to start up.
- To find the Raspberry Pi's address on your local network, you can check your router's admin panel or use network scanning tools. For example, the address may be 192.168.0.10.
- Verify that you can establish an SSH connection to the Raspberry Pi from your computer using the account credentials you set up during the installation step. Use the command: ssh [email protected].
By following these steps, you will have successfully set up your Raspberry Pi for the next stages of the mobile proxy configuration.
4G USB Modem Configuration
To configure your 4G USB modem for use in your mobile proxy setup, follow these steps:

- Select a USB modem that is compatible with your region. We recommend Huawei modems with the HiLink interface, such as the 4G Dongle E3372. These modems work well with an open source API called huawei-lte-api, which allows for dynamic IP address changes.
- Insert a SIM card with an active Internet plan into the modem, and plug the modem into your computer. Wait for the modem to initialize and establish a network connection.
- Open the HiLink interface in your web browser. You can typically access it by entering the modem's IP address in the browser's address bar. Upon accessing the interface, you may be prompted to accept the Terms of Service, choose an update schedule, and provide the PIN code for your SIM card.
- After completing the setup process, navigate to the DHCP section in the Advanced settings of the HiLink interface. Set the modem IP to a unique value to distinguish it from other connected modems. Note that if you are building a proxy with only one modem, you can skip this step.
- Connect the modem to the Raspberry Pi. Once it's connected and initialized, use the ifconfig command to verify that a network interface corresponding to the modem's IP address, set during the configuration process, is visible in the output.
By following these steps, you'll successfully configure your 4G USB modem for integration with your Raspberry Pi-based mobile proxy setup.
Setting Up the Proxy Server
To install and configure the 3proxy server for your mobile proxy setup, follow these steps:
1. Proxy Installation
Begin by logging into the Raspberry Pi and downloading the 3proxy Debian package using the following command:
wget https://github.com/3proxy/3proxy/releases/download/0.9.4/3proxy-0.9.4.arm.deb
Note: If you're using a different device or operating system, ensure you select the appropriate binaries/package from the release assets.
2. Install Package
Install the downloaded package using the following command:
sudo dpkg -i 3proxy-0.9.4.arm.deb
Once the installation is complete, create an admin user:
sudo echo admin:`mycrypt $RANDOM ` | sudo tee --append /usr/local/3proxy/conf/passwd > /dev/null
3. Filesystem Setup
Set up the necessary folders and files with appropriate permissions for the proxy user by executing the following commands:
sudo mkdir -p /usr/local/3proxy/conf
    sudo touch /usr/local/3proxy/conf/3proxy.cfg
    sudo chmod 660 /usr/local/3proxy/conf/3proxy.cfg
    sudo mkdir -p /usr/local/3proxy/logs
4. Routing
To configure routing for your modems, append route table entries in the /etc/iproute2/rt_tables file. Each modem should have a corresponding {i} gateway{i} line, where {i} represents the modem number. For example, if you have 2 modems, the entries would be:
1 gateway1
    2 gateway2
Ensure you append the route tables at the end of the file as local entries and avoid modifying reserved values.
5. IP Routing Rules
Configure IP routing rules for each modem by executing the following commands, replacing the placeholder values with the actual information obtained from the ifconfig command:
sudo ip route replace {{ network }} dev {{ name }} src {{ ip }} table gateway{{ index }}
    sudo ip route replace default via {{ gateway }} dev {{ i.name }} table gateway{{ index }}
    sudo ip rule add from {{ ip }}/32 table gateway{{ index }}
    sudo ip rule add to {{ ip }}/32 table gateway{{ index }}
For example, if the modem has an IP address of 192.168.8.101, the commands would be:
sudo ip route replace 192.168.8.0/24 dev eth1 src 192.168.8.101 table gateway1
    sudo ip route replace default via 192.168.8.1 dev eth1 table gateway1
    sudo ip rule add from 192.168.8.101/32 table gateway1
    sudo ip rule add to 192.168.8.101/32 table gateway1
6. 3proxy Configuration
Create the configuration file for 3proxy by editing the /usr/local/3proxy/conf/3proxy.cfg file and adding the following content:
#! /usr/local/bin/3proxy
    daemon

    config /usr/local/3proxy/conf/3proxy.cfg

    # logging
    log /usr/local/3proxy/logs/3proxy-%y%m%d.log D
    rotate 60

    # users passwd file
    users $/usr/local/3proxy/conf/passwd


    auth iponly strong

    # allow proxy access for local network
    allow * 192.168.0.0/24

    # assign weights (probabilities) to modem by their IP address
    parent 1000 extip 192.168.8.101 0

    # run proxy on port 2000
    proxy -a -p2000

    flush

    # allow admin panel access to the admin user on port 8080
    allow admin
    admin -p8080
For more information on 3proxy configuration options, refer to the package documentation.7. Testing
To test the configuration, start the proxy service with the following command:
sudo 3proxy /usr/local/3proxy/conf/3proxy.cfg
Verify that the proxy is working correctly by making a request to https://eth0.me using curl to check your external IP address:
curl --proxy 192.168.0.10:2000 https://eth0.me
Make multiple requests and, if you have multiple modems connected, you should observe different IP addresses based on the probabilities set in the 3proxy configuration file.
To stop the proxy, you can kill the 3proxy process using the following command:
sudo kill -9 `pidof 3proxy`
By following these steps, you will have successfully installed and configured the 3proxy server for your mobile proxy setup, allowing you to use it for web scraping and other relevant purposes.
Changing IP Address
One of the remarkable advantages of using a mobile proxy is the ability to change the IP address on demand, which is a superpower in the world of web scraping. The simplest and quickest method to achieve this is by adjusting the network settings, a process that typically takes just a few seconds to assign a new IP address.
If you're utilizing a modem with a HiLink interface, you can leverage the huawei-lte-api Python package to interact with it. Begin by installing the package using the command: `python -m pip install huawei-lte-api`. Next, create a `main.py` file with the following code:
python
    import time
    from huawei_lte_api.Client import Client
    from huawei_lte_api.Connection import Connection
    from huawei_lte_api.enums.net import LTEBandEnum, NetworkBandEnum, NetworkModeEnum

    def main(gateway: str, timeout: float = 5.0):
        print(f"Connecting to {gateway}")
        with Connection(url=f"http://{gateway}/", timeout=timeout) as connection:
            lte_client = Client(connection)
            print("Resetting network...")
            net_mode_response = lte_client.net.net_mode()
            net_mode = net_mode_response.get("NetworkMode", NetworkModeEnum.MODE_4G_3G_AUTO.value)
            new_net_mode = (
                NetworkModeEnum.MODE_4G_ONLY
                if not net_mode == NetworkModeEnum.MODE_4G_ONLY.value
                else NetworkModeEnum.MODE_4G_3G_AUTO
            )
            time.sleep(0.1)
            lte_client.net.set_net_mode(
                lteband=LTEBandEnum.ALL,
                networkband=NetworkBandEnum.ALL,
                networkmode=new_net_mode,
            )
            time.sleep(3.0)
            print("Done")

    if __name__ == "__main__":
        import argparse

        parser = argparse.ArgumentParser(description="Reset IP address of a 4G modem with HiLink interface")
        parser.add_argument("--gateway", type=str, required=True, help="modem gateway address")
        parser.add_argument(
            "--timeout",
            type=float,
            required=False,
            default=5.0,
            help="modem connection timeout in seconds (default=5.0)",
        )
        args = parser.parse_args()
        main(gateway=args.gateway, timeout=args.timeout)
The code explained:
The IP change process occurs within the `main` function. It begins by establishing a connection to the modem using the `Client` from the `huawei_lte_api` package:
python
    with Connection(url=f"http://{gateway}/", timeout=timeout) as connection:
        lte_client = Client(connection)
Next, it retrieves the current network mode and determines the new mode based on that information:
python
    net_mode_response = lte_client.net.net_mode()
    net_mode = net_mode_response.get("NetworkMode", NetworkModeEnum.MODE_4G_3G_AUTO.value)
    new_net_mode = (
        NetworkModeEnum.MODE_4G_ONLY
        if not net_mode == NetworkModeEnum.MODE_4G_ONLY.value
        else NetworkModeEnum.MODE_4G_3G_AUTO
    )
After setting the new network mode, a brief delay is introduced to allow the modem to be ready for new connections:
python
    lte_client.net.set_net_mode(
        lteband=LTEBandEnum.ALL,
        networkband=NetworkBandEnum.ALL,
        networkmode=new_net_mode,
    )
    time.sleep(3.0)
To change the IP address for a modem with the IP 192.168.8.101, simply execute the following command:
python main.py
Web Scraping Use Case and Limitations
Congratulations on establishing your web scraping infrastructure with a mobile proxy that allows you to change IP addresses on demand whenever you encounter blocking. Here's how your web scraping workflow can be implemented: scrape the desired website until you encounter a block, then change the IP address and resume scraping.
However, it's important to be aware of certain limitations. When using a Raspberry Pi, you're restricted to approximately a dozen modems if you have a USB hub with its own power supply. Attempting to connect more modems may lead to various software and hardware complications.
It's essential to note that while mobile proxies are valuable for web scraping, they may not be sufficient for scraping websites with advanced bot detection systems. To overcome such challenges, additional tools like headless browsers, JavaScript rendering capabilities, and other solutions are often required. These comprehensive approaches enable you to carry out web scraping tasks effectively, allowing you to sleep peacefully while your scraping job runs smoothly.
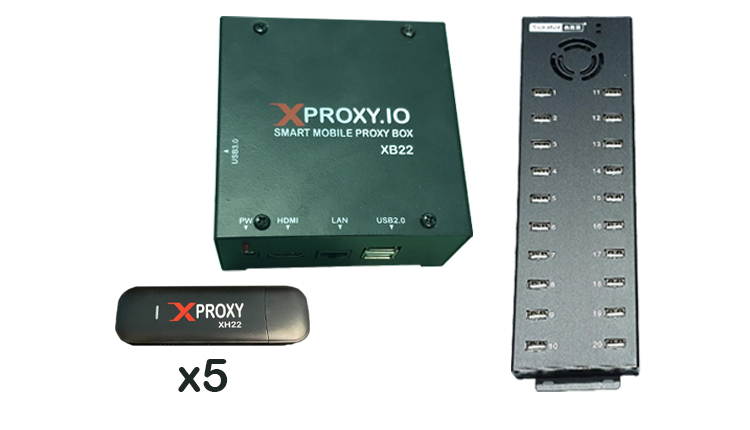
XProxy Kit
To simplify the challenges associated with large-scale web scraping and use api such rotation by link to integrate into automation tools, just plug and play without any knowledge base about technology, consider XProxy Kit. All-in-one, just Plug and Play. XProxy Kit includes full hardware and pre-installed free license lifetime. You only need to prepare SIM cards to go to the Moon, all for an affordable price of $399.
All features of XProxy listed here.
If you have not time to researching and implemeting, we are offering FREE Mobile Proxy license software for 5 dongles. You can Getting Started free mobile setup here. It will out of offering soon, hurry up and starting today!
If you found this information helpful, we invite you to stay connected with us on our Telegram Channel for more updates and valuable content.